Category: Developers

  • ArcGIS and Power BI

    ArcGIS and Power BI

    By Jake Hanson – GIS Advisor

    Accessing ArcGIS feature layer attribute data in Power BI using a Custom Data Connector

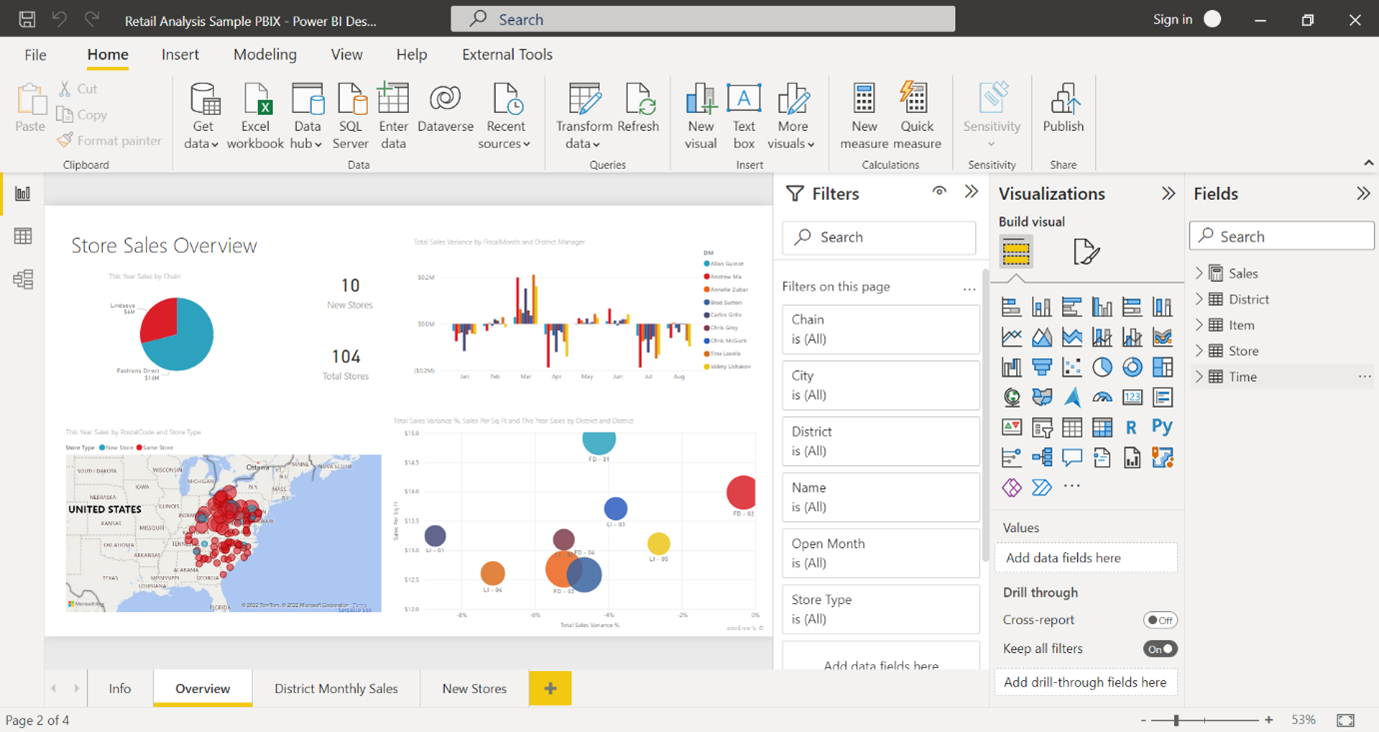
    Many organisations use ArcGIS for geospatial analytics, visualisation, and data capture, alongside Power BI Desktop, which creates interactive reports and dashboards from a variety of data sources. However, ensuring that users across both platforms work with consistent data and provide uniform reporting to stakeholders can be a significant challenge.

    This post describes how you can compile and configure a Power BI Custom Data Connector to simplify the process of using up-to-date ArcGIS data in your Power BI reports.

    What is a Custom Data Connector?

    Power BI comes with many data connectors out-of-the-box, for example, allowing you to connect to an Excel Spreadsheet, Parquet, or a SQL Server table. 

    However, Microsoft also allows you to build your own data connector if your data is in a format that is not natively supported. As there is no native connector for ArcGIS, this post will show you how you can build your own that handles authenticating with ArcGIS, querying a feature layer, paging through the results and loading them into a report.

    When should I use the custom data connector rather than other workflows?

    There are several other documented workflows for bringing your ArcGIS data into Power BI, and each has its own advantages and disadvantages, briefly outlined in the table below:

    Workflow

    Great for

    Limitations

    Using ArcGIS Maps for Power BI to visualise your ArcGIS data within Power BI Desktop

    • Quickly bringing in an ArcGIS map into your Power BI report
    • Doesn’t support analysis of attribute data in Power BI.

    Automating data export to CSV using Power Automate or in bulk with FME or Python

    • Larger ArcGIS datasets
    • Scheduling exports out-of-hours
    • Sharing data with non-ArcGIS users
    • Requires data to be downloaded to a staging area for use

    Directly querying a feature layer using a Web Connection within Power BI Desktop

    • Quickly loading in a small amount of data into Power BI.
    • Only supports small datasets (usually <2000 features).
    • Difficult to refresh the data to get the latest updates

    Using a Power BI Custom Data Connector

    • Seamless – handles authentication, data wrangling for you
    • Refresh data at the click of a button
    • Great for development and testing
    • Users needing to refresh or add new data will need access to ArcGIS accounts
    • Regular requests for tens of thousands of features will have a performance impact on the server.
    • You need to allow non-certified connectors in Power BI Desktop to use custom connectors.

    How would I build a custom data connector?

    Fortunately, most of the work has already been done for you. This GitHub repository contains the basic code for the connector. There’s a little bit of work needed to configure and compile the connector for the ArcGIS Online organisation or ArcGIS Enterprise instance which contains the feature layer(s) you want to access. The steps for this are outlined below.

    How do I configure and compile the connector?

    1. The first step is to install Visual Studio Code, a free text editor and Integrated Development Environment (IDE) with powerful built-in tools, including tools to compile Power BI Data Connectors.

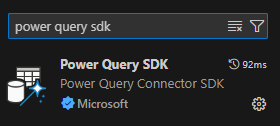
    2. Follow this guide to install the Power Query SDK Extension for Visual Studio Code.

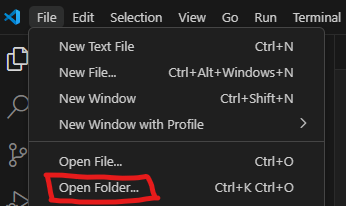
    3. Download this GitHub repository by clicking on the green “Code” button and “Download as zip”. Unzip the compressed folder, then open the folder in Visual Studio Code.

    4. The next step is to register an App in ArcGIS Online or Portal (wherever the data is that you want to access). This will create a Client ID and Secret that will be used to allow the Data Connector to authenticate with ArcGIS. 

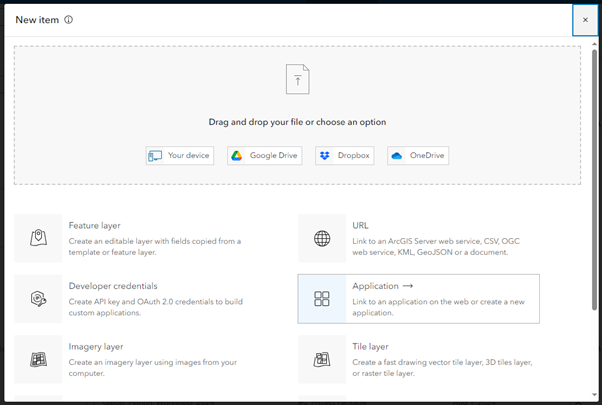
    a. Go to My Content > New Item > Application 

    b. Create an application of type “Other application” 

    c. Name it Power BI Desktop.

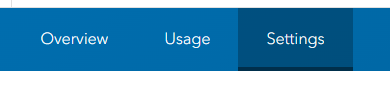
    5. In the page that opens, click Settings

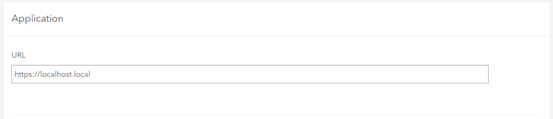
    6. In the URL box add https://localhost.local

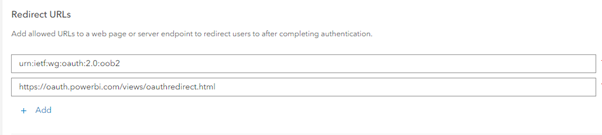
    7. Scroll down and add https://oauth.powerbi.com/views/oauthredirect.html to the Redirect URI box. 

    Click Add, then Save to complete the app registration process.

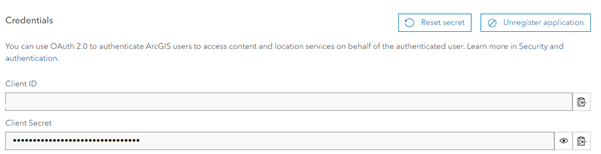
    8. Scroll to the Credentials section and copy the Client ID. In Visual Studio Code, paste it (overwriting the existing text) into the client_id.config file.

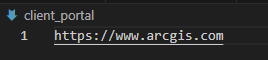
    9. Update the client_portal.config file in the cloned repository to your ArcGIS Online or Portal URL.

    10. In the connector_name.config file, update the file to reflect the name of the environment (e.g. ArcGIS Online Feature Layer or Eagle Enterprise PROD Feature Layer) so that users know which Portal’s feature layers they can connect to using this connector.

    11. Now we have finished configuring the connector, we can compile it into a Power BI Connector. Press F1 and type “Build Task”. Select the Tasks: Run Build Task option.

    12. Select “Build project using MakePQX”. This will build the Connector and store it as a .mez file in the unzipped folder’s ‘…/bin/AnyCPU/Debug’ folder.

    I’ve compiled the connector, how do I install it?

    1. Create the folder C:\Users\<user>\Documents\Power BI Desktop\Custom Connectors if it doesn’t already exist.

    2. Copy the .mez file from <unzipped folder>/bin/AnyCPU/Debug into the new ‘Custom Connectors’ folder.

    NOTE: While it is possible for multiple users to use the same .mez file (i.e. an administrator could create and share a .mez file and associated Portal item with all organisation members), the client ID and secret are easily accessible in plain text in the .mez file, meaning there is a possible risk that a knowledgeable user could re-use these credentials to impersonate your application.

    How do I use the connector once it is installed?

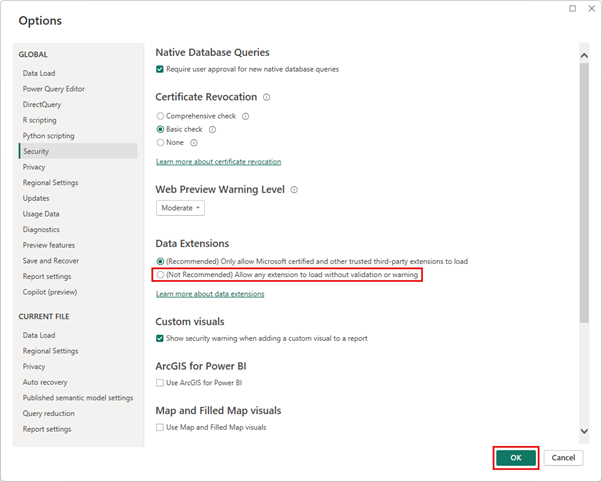
    1. In Power BI, under Options and Settings > Options > Security, enable non-certified connectors. Microsoft certifies a limited subset of custom connectors, but as we are building this one on-the-fly, the connector you create will not be certified. 

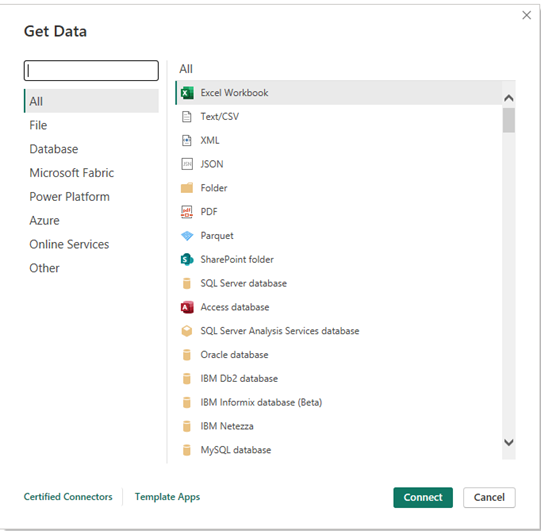
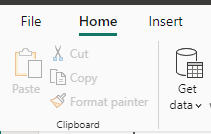
    2.  Now you’re ready to use the connector to add ArcGIS data into Power BI. Under the Home tab in your report, click Get data, click ‘More…’ at the bottom of the menu, and Search for “ArcGIS”. Your connector should appear in the list. Click it then click “Connect”

    NOTE: If you don’t see the Custom Connector in the list, it may be because the version of Power BI being used has been downloaded from the Microsoft Store. It is recommended that Power BI be downloaded directly from the official Power BI Website: https://www.microsoft.com/en-nz/power-platform/products/power-bi/desktop

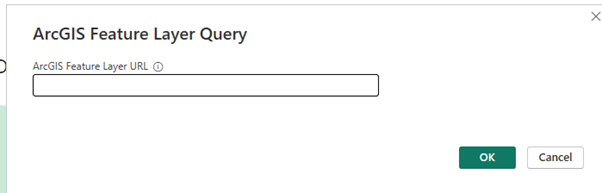
    3.  Enter the URL for the Feature Layer you want to add to your Power BI model, ideally suffixed with a compliant query (filter) as described in the Query documentation.


    NOTE: It is highly recommended to use a query to remove any records you don’t need to use in your report to reduce the load on the ArcGIS server. Example: Only the features with an OBJECTID less than 1000 will be returned. https://services.arcgis.com/hMYNkrKaydBeWRXE/ArcGIS/rest/services/Addresses_geocoded/FeatureServer/0/query?f=json&outFields=”*”&where=OBJECTID<1000&returnGeometry=false

    NOTE: If you provide a feature layer URL without a query, which will look like this: https://services.arcgis.com/hMYNkrKaydBeWRXE/ArcGIS/rest/services/Addresses_geocoded/FeatureServer/0/query?f=json&outFields=””*””&where=1=1&returnGeometry=false
     
    NOTE: If you provide a feature layer URL without a query, which will look like this:
    https://services.arcgis.com/hMYNkrKaydBeWRXE/ArcGIS/rest/services/Addresses_geocoded/FeatureServer/0
    The default query below will be used, to request all the features: query ?f=json&outFields=””*””&where=1=1&returnGeometry=false 

    NOTE: The geometry is never returned by the connector.

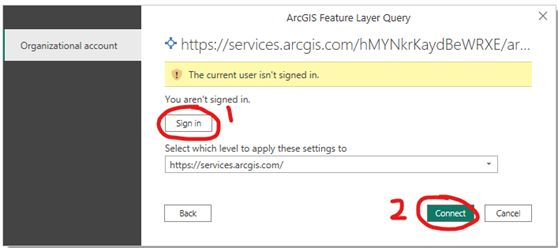
    4.  Click OK, then click Sign in. This will prompt you to sign in with your ArcGIS credentials. Once signed in, click Connect to load your data into your Power BI report.

    Now you should see your ArcGIS data in Power BI!

    When you hit the Refresh Data button, the connector should handle the authentication and pull in the latest data from ArcGIS! If you are signed out, the dialog above will display. Simply click “Sign in” again to reconnect to ArcGIS. 

  • Automate Web Map and Map Service Testing with Postman

    Automate Web Map and Map Service Testing with Postman

    Ensuring consistency across environments.

    One of the challenges when creating custom software in a multi-environment setup is ensuring that the environments are all in sync with each other. As an example, when working with ArcGIS Enterprise and ensuring that a web map is the same in the development environment as it is in the test, pre-production and production environments.

    This becomes more evident when you have an application that relies on specific layers being in a map, popups being configured in a particular way, certain fields or all the correct fields being in a service.

    We faced this challenge recently when working on a project based on Esri’s Experience Builder. We had four environments, and we needed to ensure that as new layers were added to a map, popups configured, and services changed, that everything was the same across each environment before we could release the app in to that environment.

    To achieve this, we used Postman to run a series of tests in a build pipeline to make sure that everything was configured as we expected.

    I had used Postman previously for simple tasks such as interrogating an API and viewing the resulting data, however, you can take it further and add in tests for a request, group your requests together and run them in a CI/CD pipeline.

    Prerequisites

    • ​Postman installed
    • An ArcGIS Enterprise environment

    Create an Environment

    An environment is a way within Postman to create a series of variables that can be applied to a collection of requests.

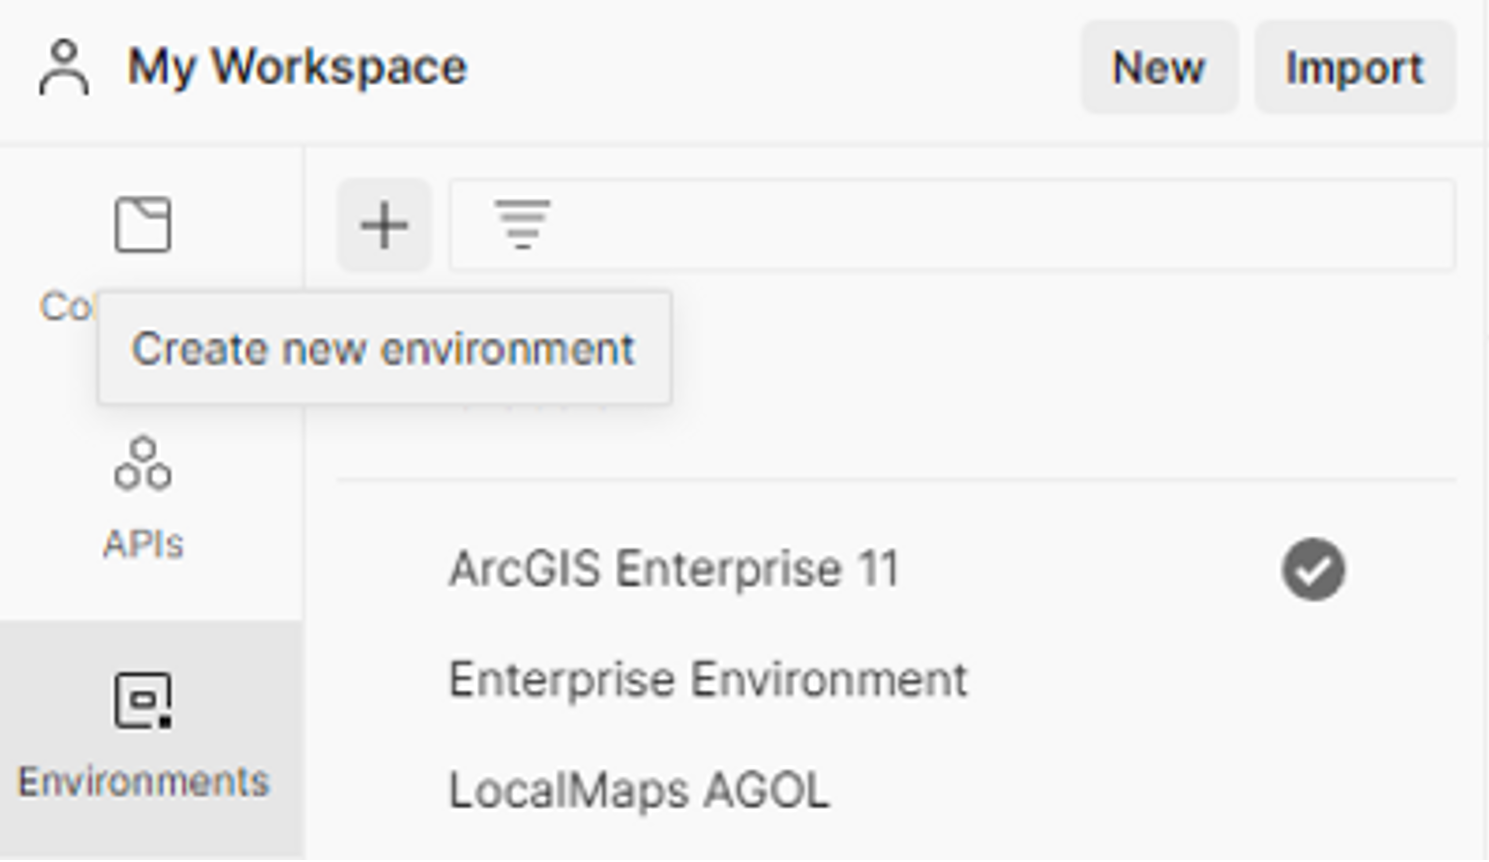
    1. To create a new environment, open Postman and in the left sidebar, select Environments and then click the + button to create a new environment.

    2. Give your new environment a meaningful name, and then we can start adding variables.

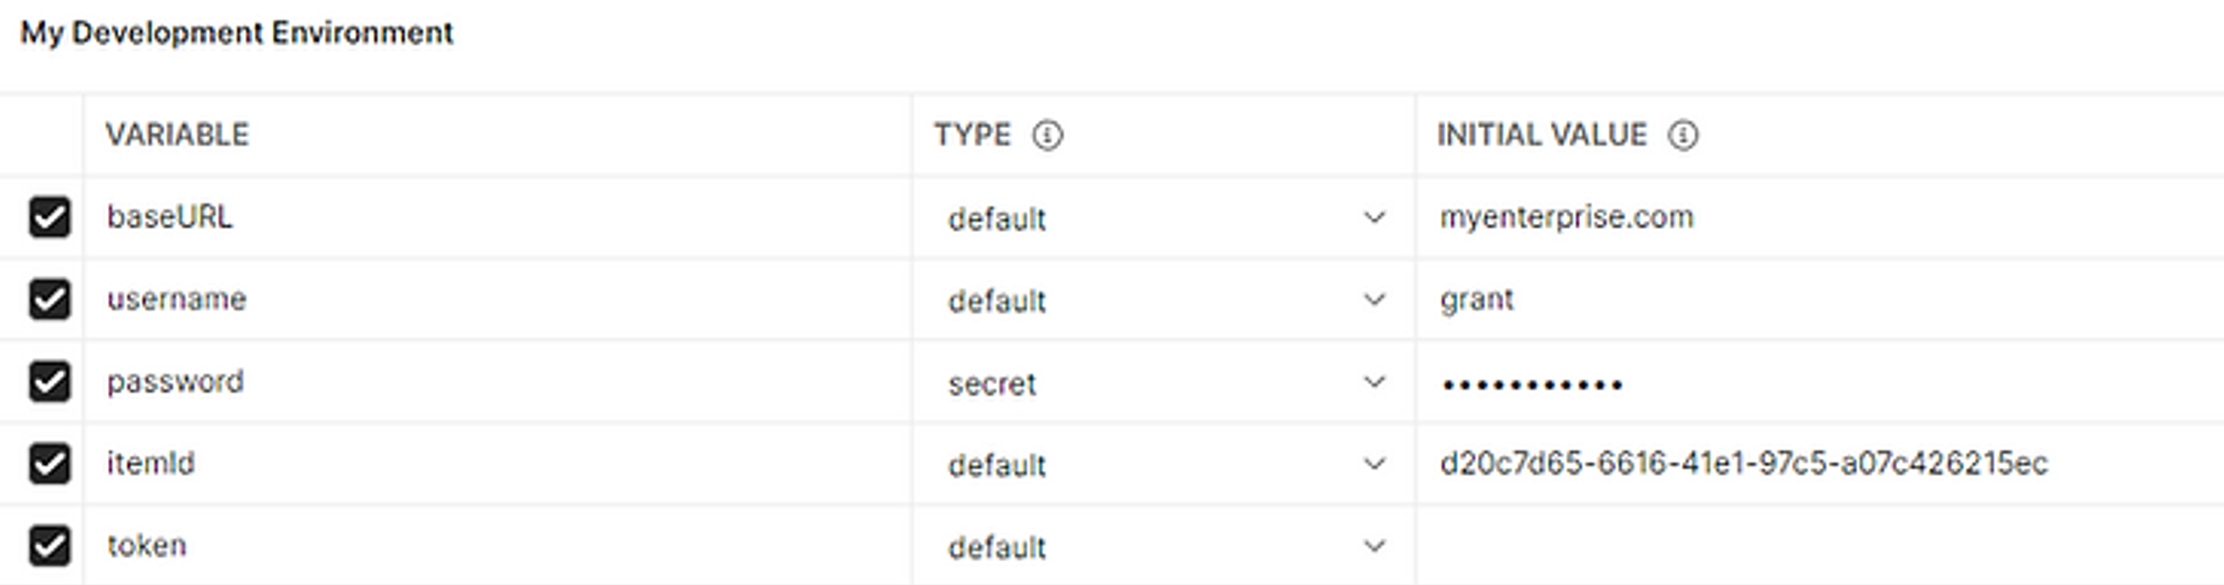
    3. Add in five new variables:

    • baseURL – the base URL to your Enterprise environment (without the web adaptor).
    • username – The username to connect to enterprise with.
    • password – The password for the user.
    • itemId – The itemId of your web map
    • token – Leave this blank, we will assign a value to it.

    Getting a token

    Now that we have an environment, we can start creating our requests. We group these together in a collection.

    1. Within Postman, in the sidebar, select Collections and then use the plus button to add a new collection.

    2. Give your collection a meaningful name

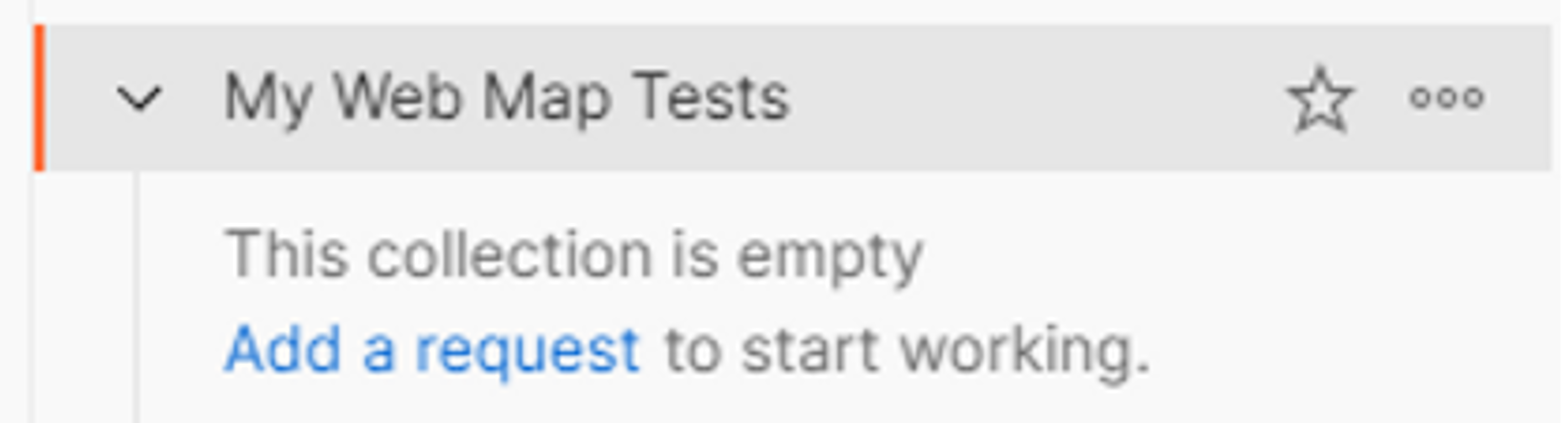
    3. The first thing we need to do in order to access ArcGIS Enterprise, is get a token that we can use in all our requests. Find the collection in the list of collections and select Add a request.

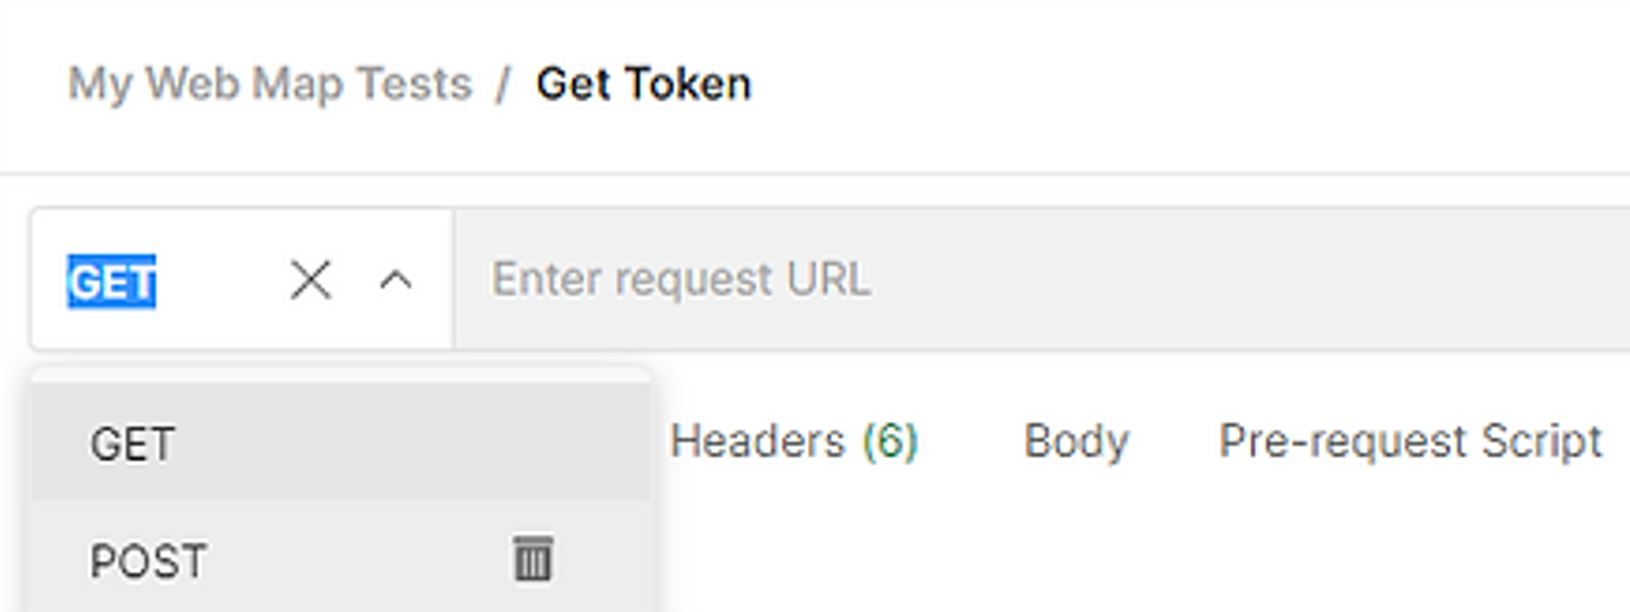
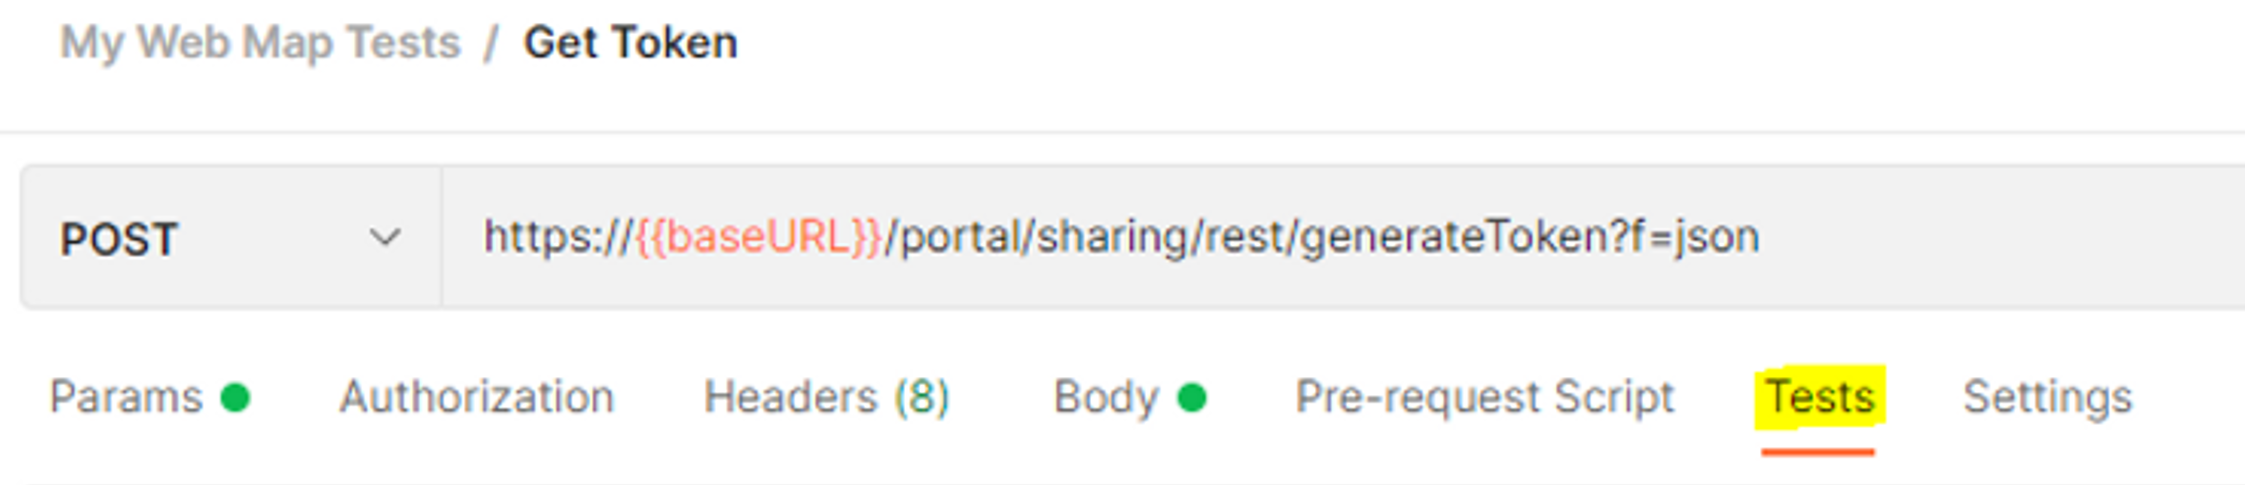
    5. Name the new request Get Token and set it as a POST request.

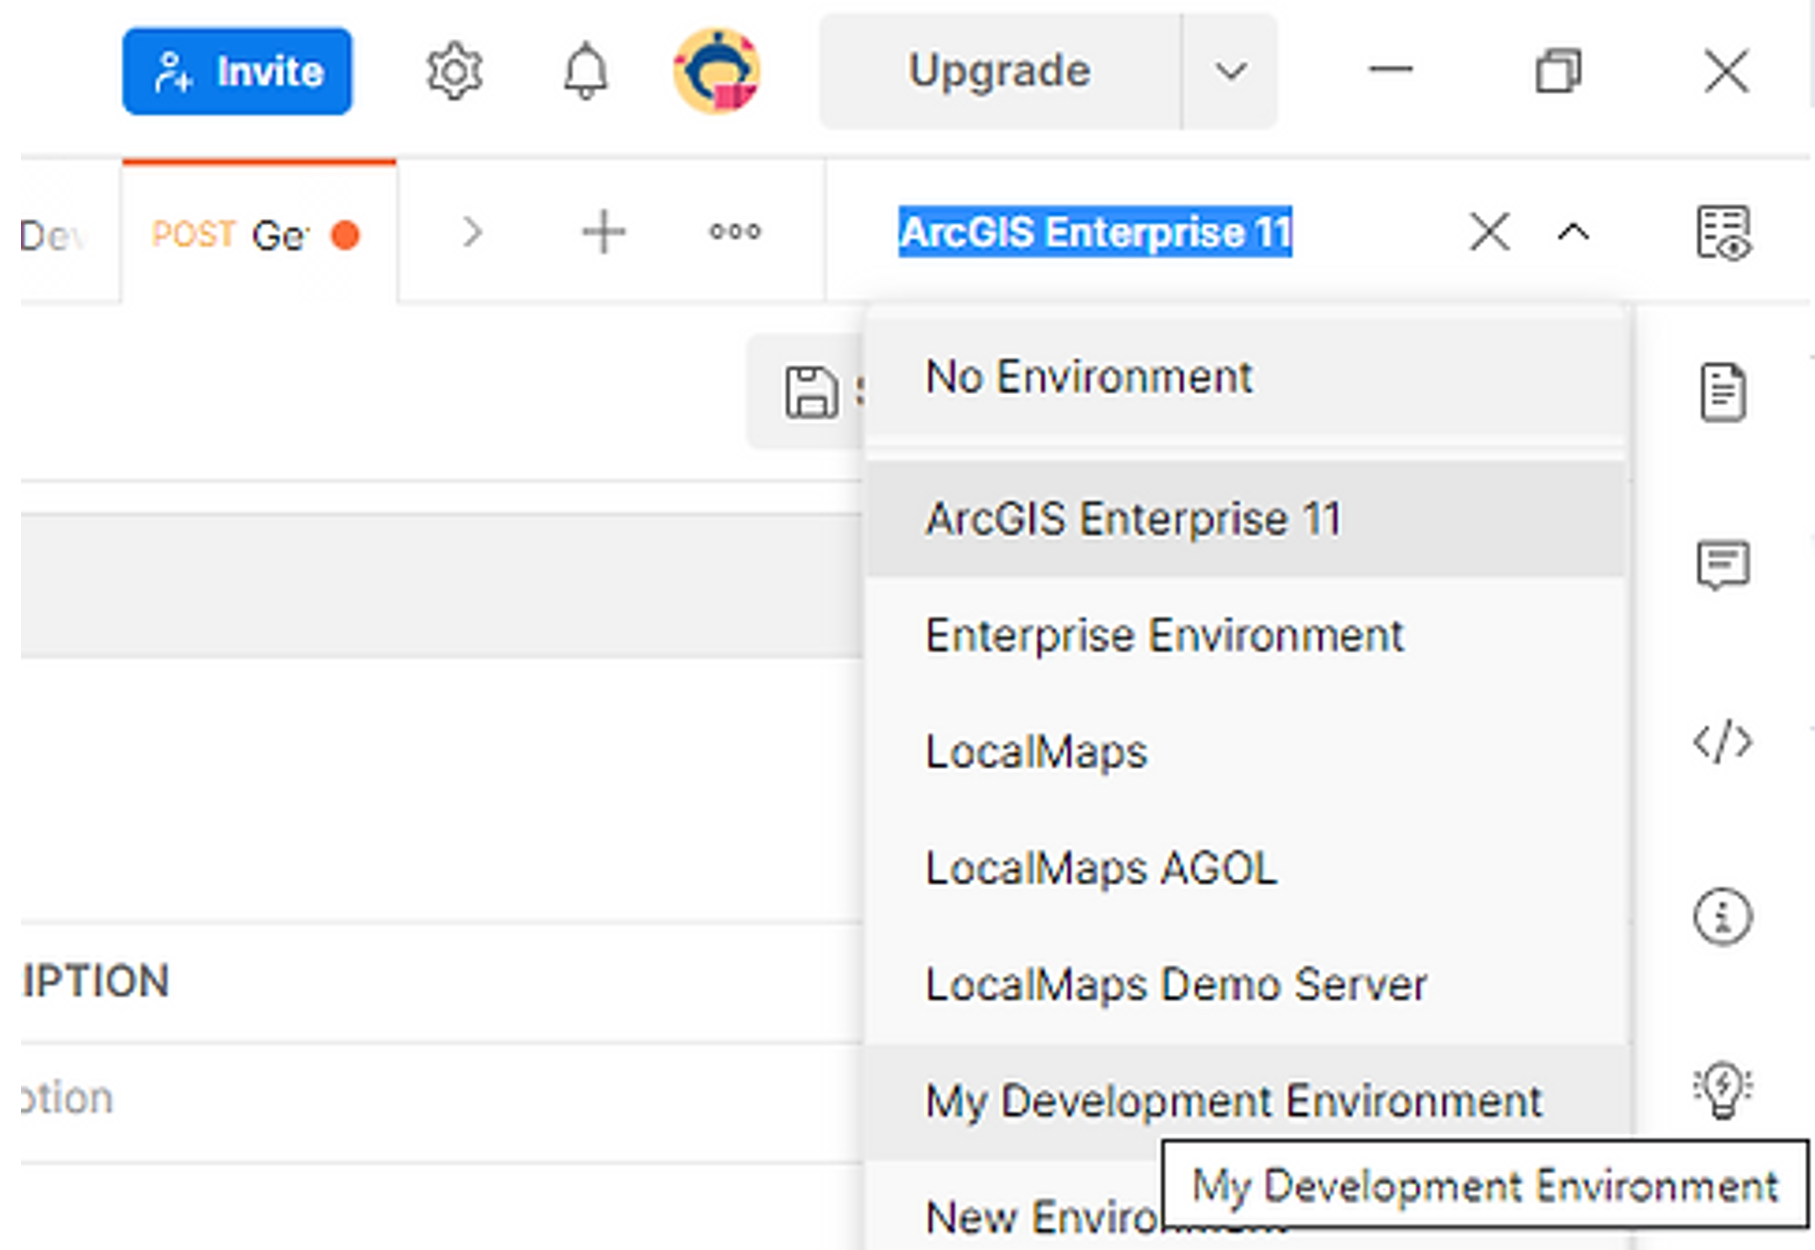
    6. Set the environment to the one we created earlier; the drop down is in the top right corner of Postman.

    7. Enter the following for the URL of the request.

    https://{{baseURL}}/portal/sharing/rest/generateToken?f=json

        The curly brackets indicate that we are substituting in our baseURL from the environment.

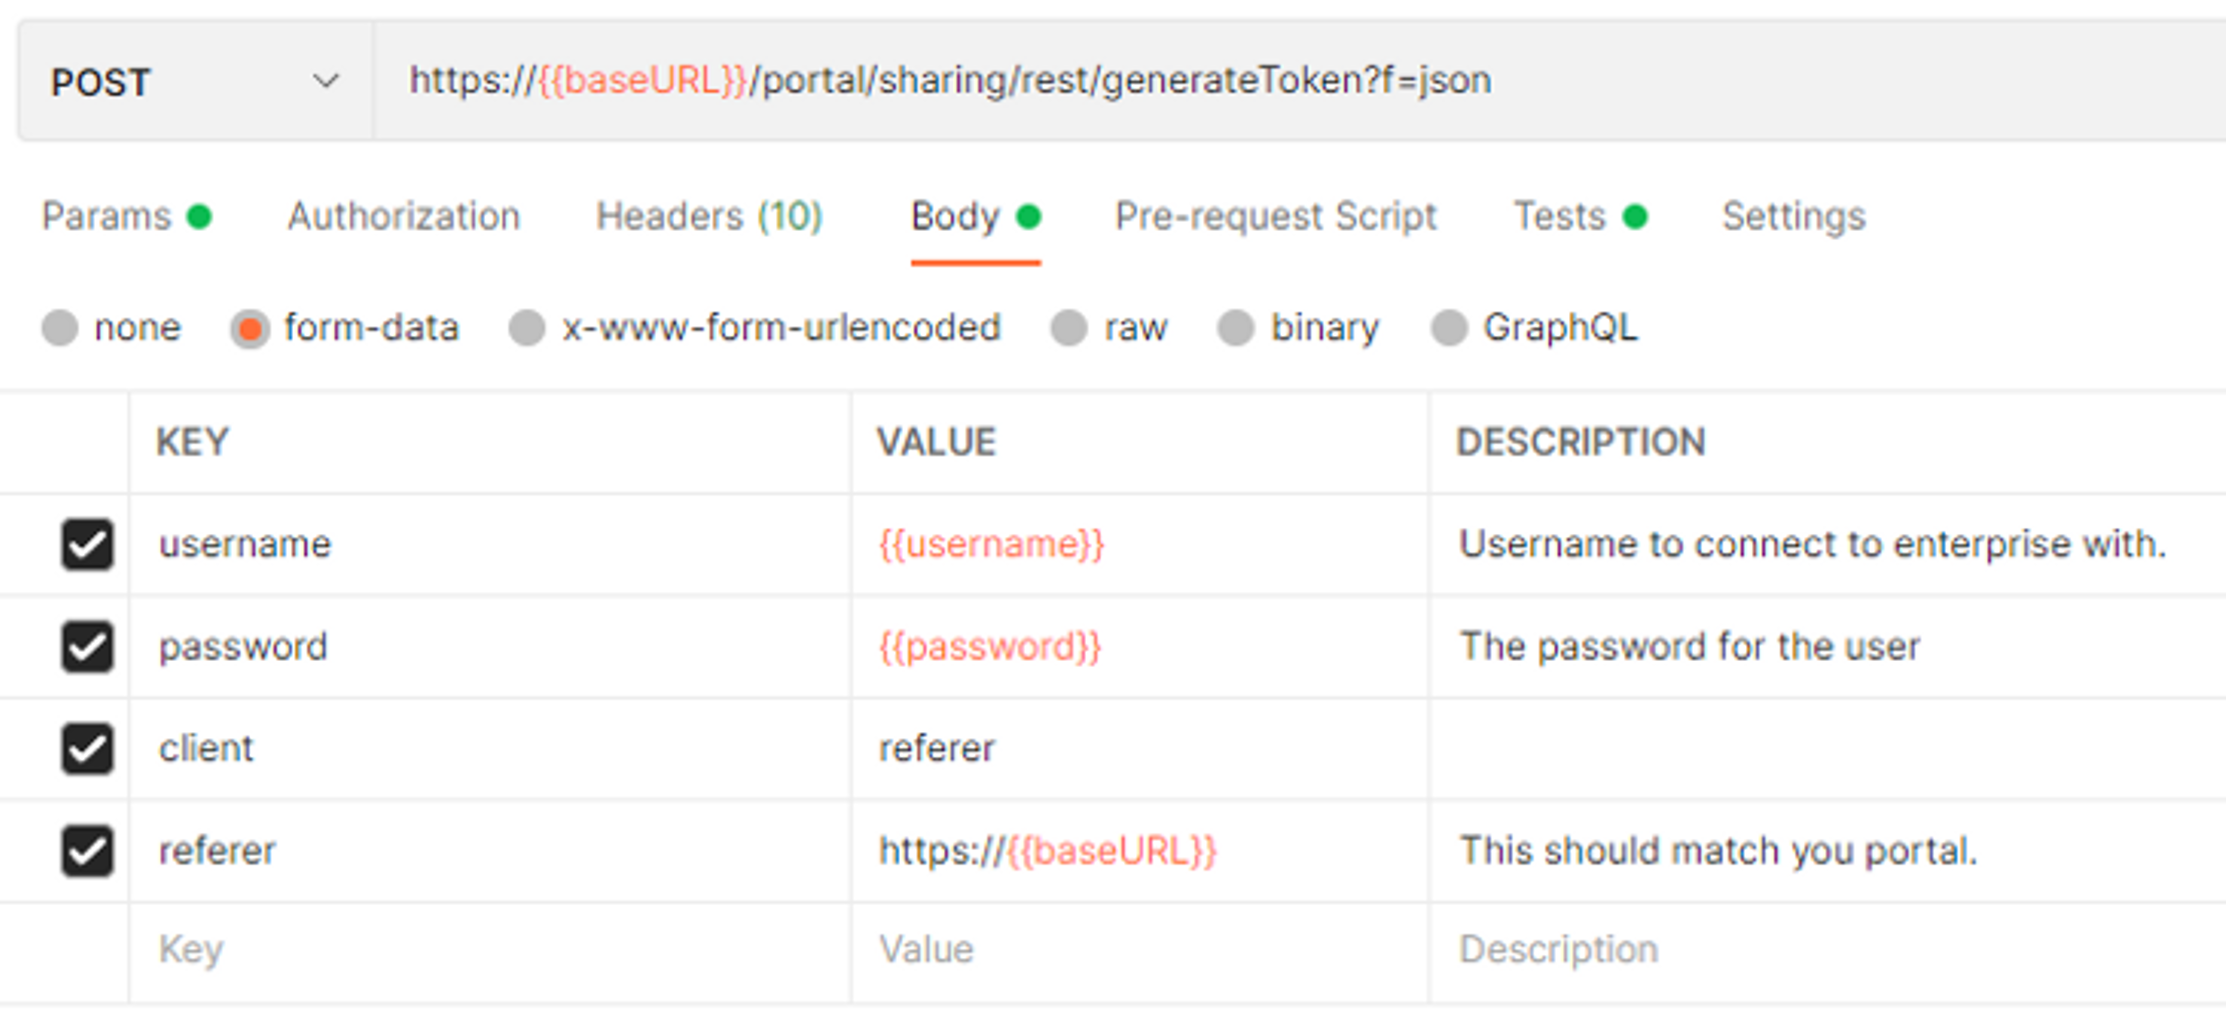
    8. Next select the body tab, ensure that form-data is selected and enter the following.

    Again, we are pulling values from our environment to make the request.

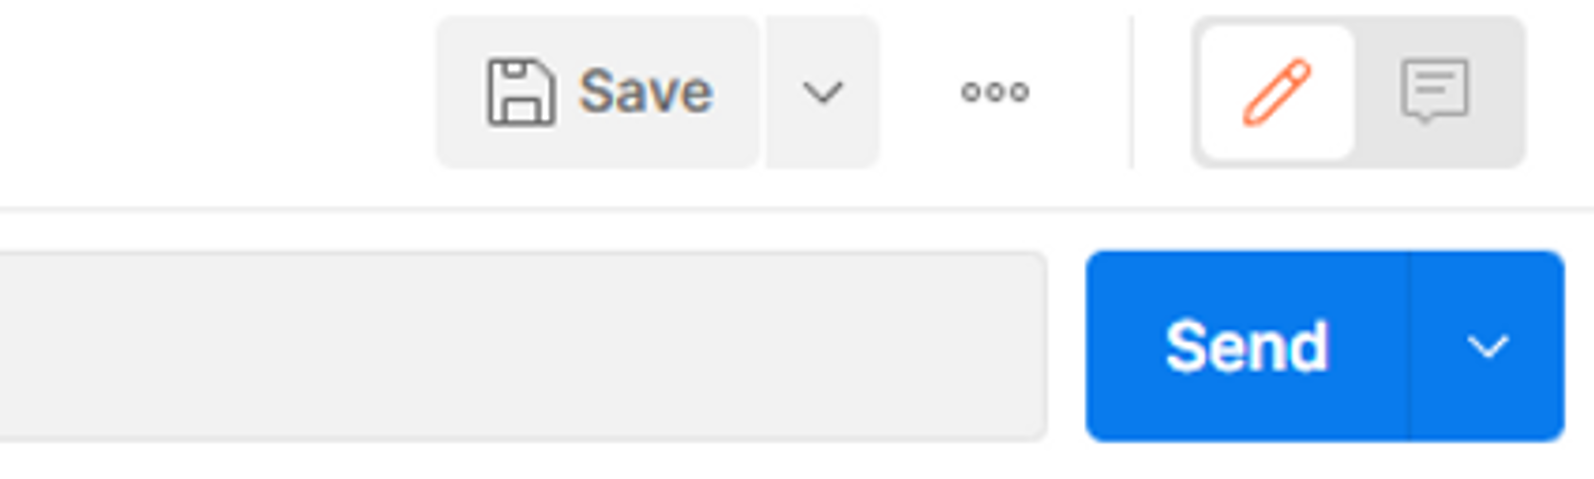
    9. Save the request and hit the Send button to see if everything is working as expected.

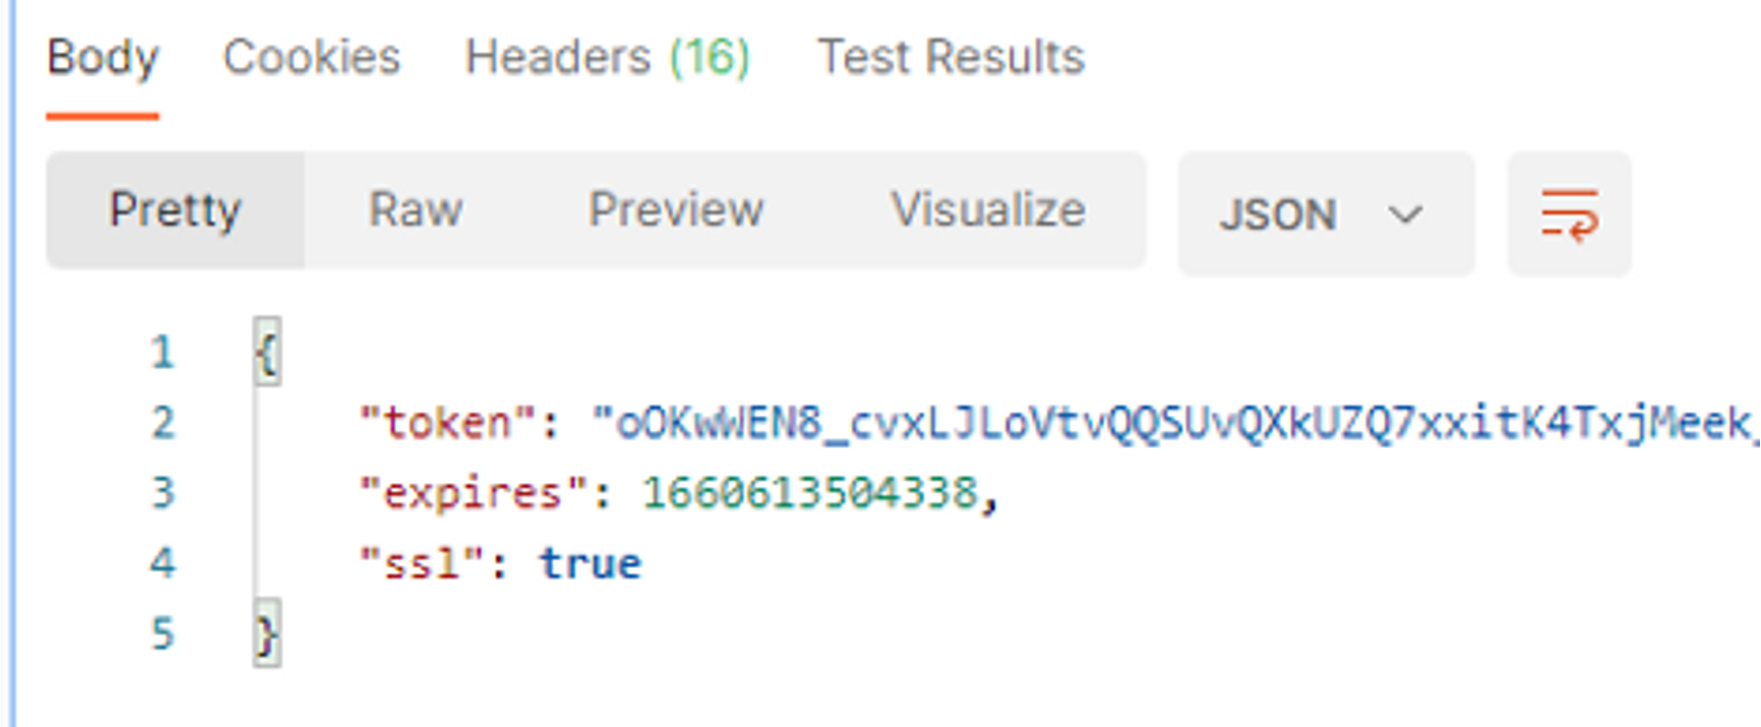
    You should hopefully see something like the below in the response pane.

    10. So now we can generate a token, we want to assign it to our environment so we can use it in all subsequent requests we make. To do this, select the Tests tab.

    11. The tests tab allows us to write tests against the response from the request, it also allows us to extract information from the response and assign it to our environment. Copy and paste the following in to the tests section.

    pm.test(“The response has all properties”, () => {
        const responseJson = pm.response.json();
        pm.expect(responseJson).to.have.all.keys(‘token’, ‘expires’,’ssl’);
        pm.expect(responseJson.ssl).to.eql(true); 
        pm.environment.set(“token”,responseJson.token) 
    });

    The above is a single test with some assertions, where pm is the Postman object.

    We can get the response as a JSON object by calling:
      pm.response.json()

    Using the object returned, we can then test the response, we check that we have the expected keys.
      pm.expect(responseJson).to.have.all.keys(‘token’, ‘expires’,’ssl’);

    We then test that the sll key is set to true.
      pm.expect(responseJson.ssl).to.eql(true);

    Then if all this is correct, we then set the “token” variable of our environment to the returned token.
      pm.environment.set(“token”,responseJson.token) 

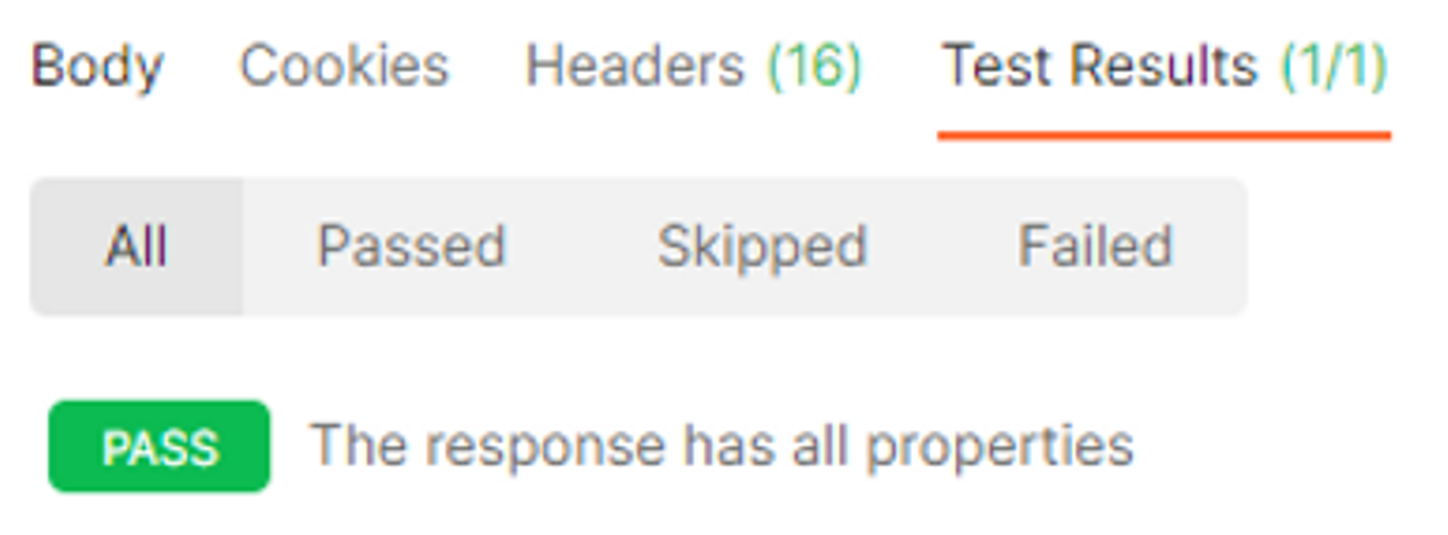
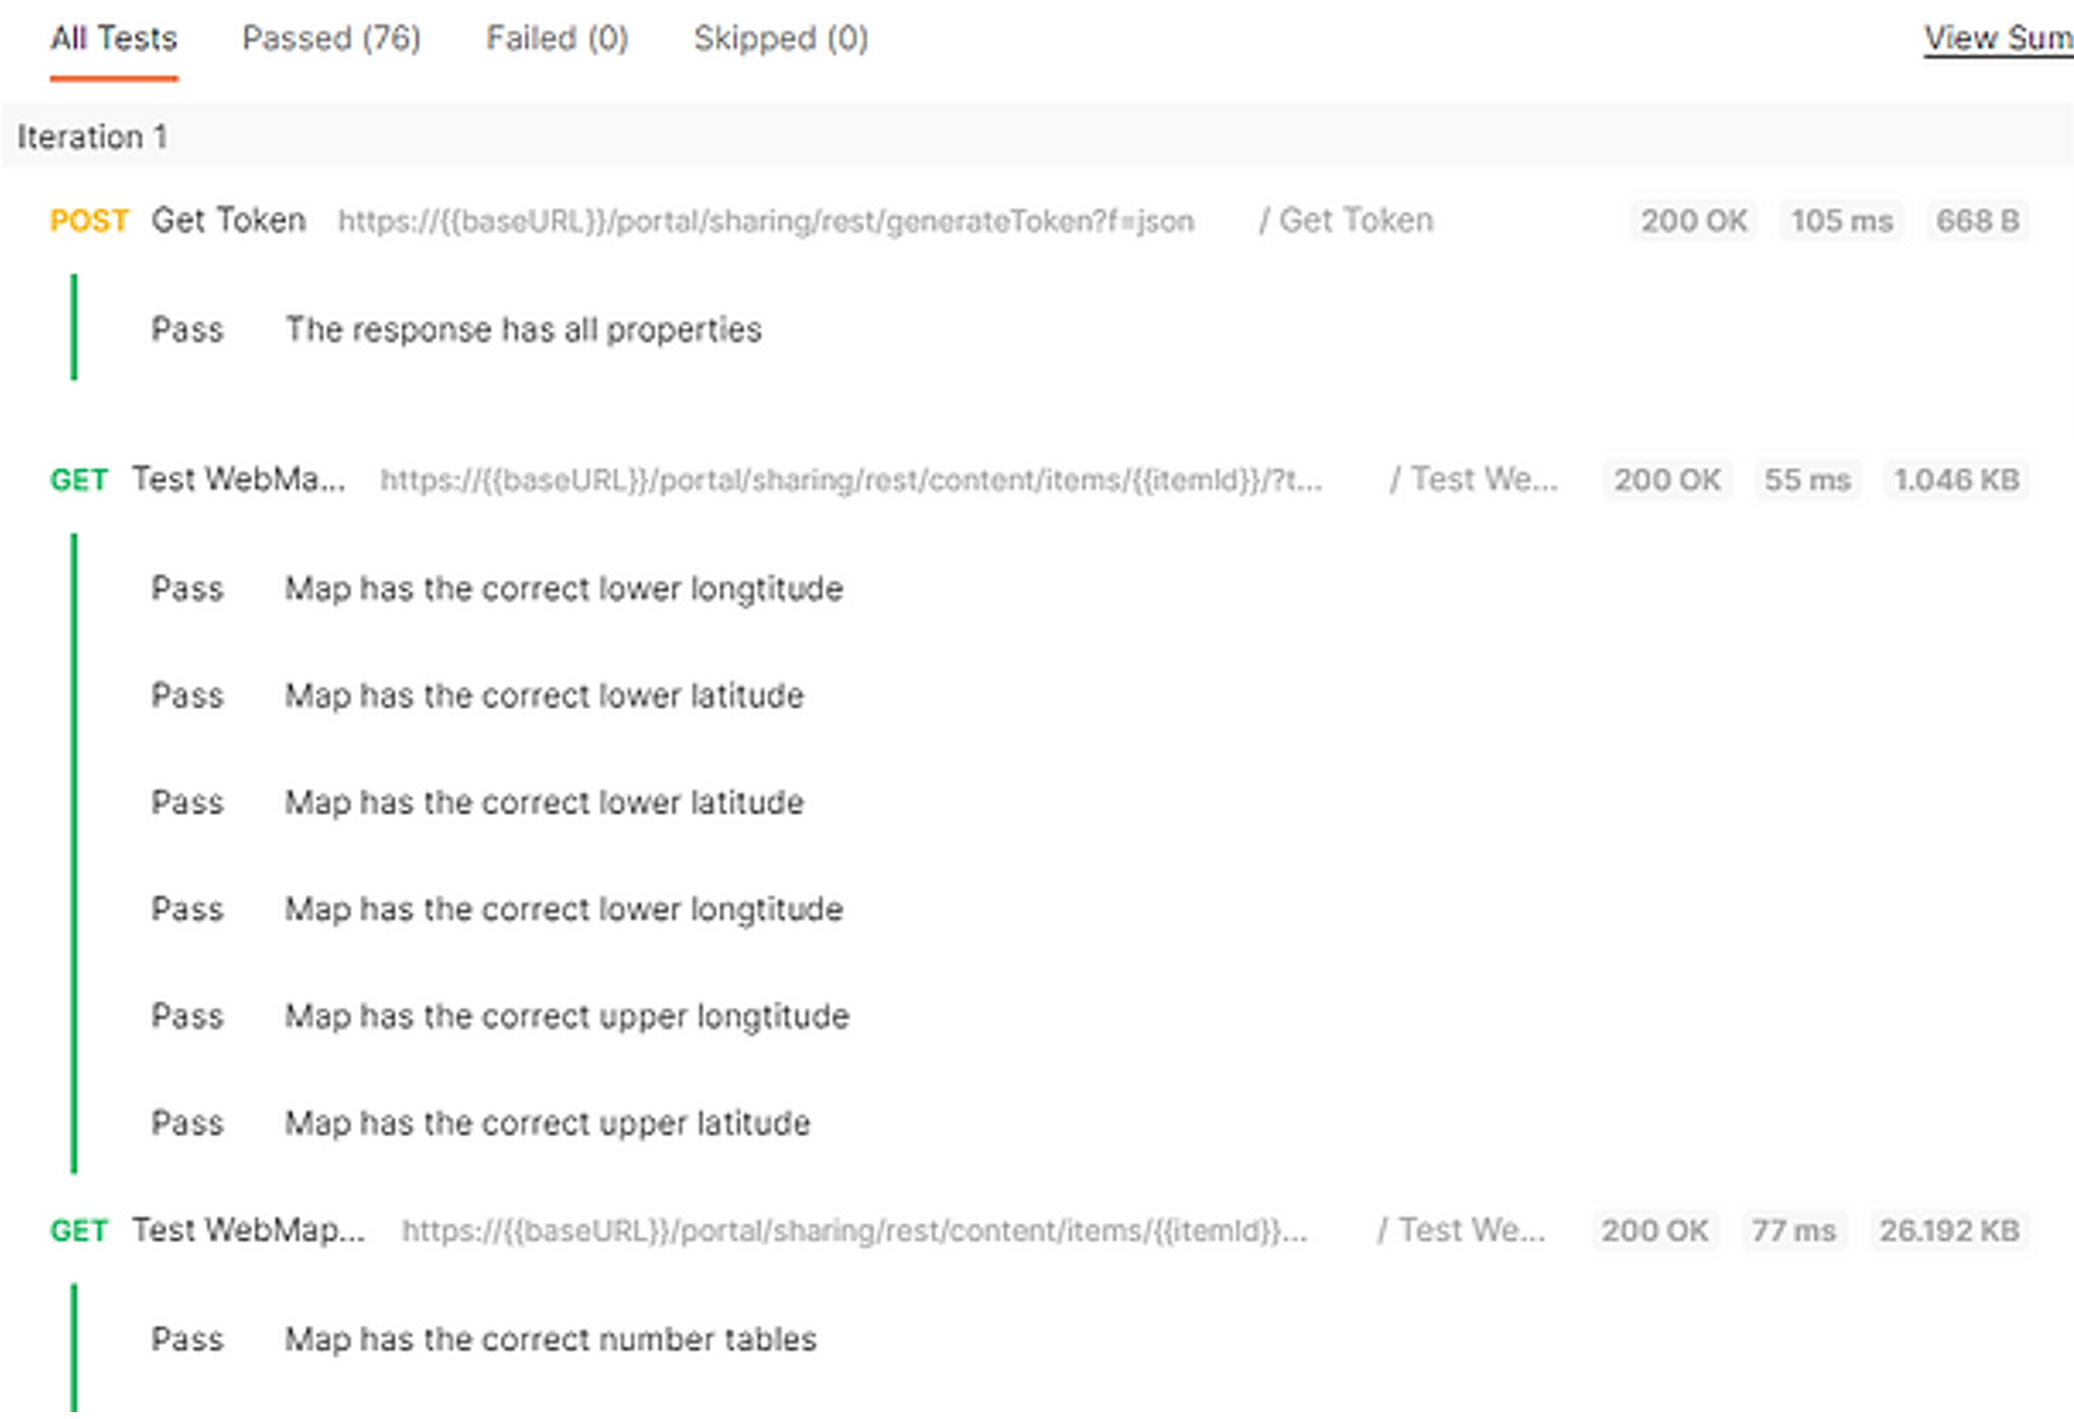
    12. Save the request with the new test and run it again, this time you should see the tests running.

    Now we have a token, we can move on to testing our web map.

    Testing a web map item

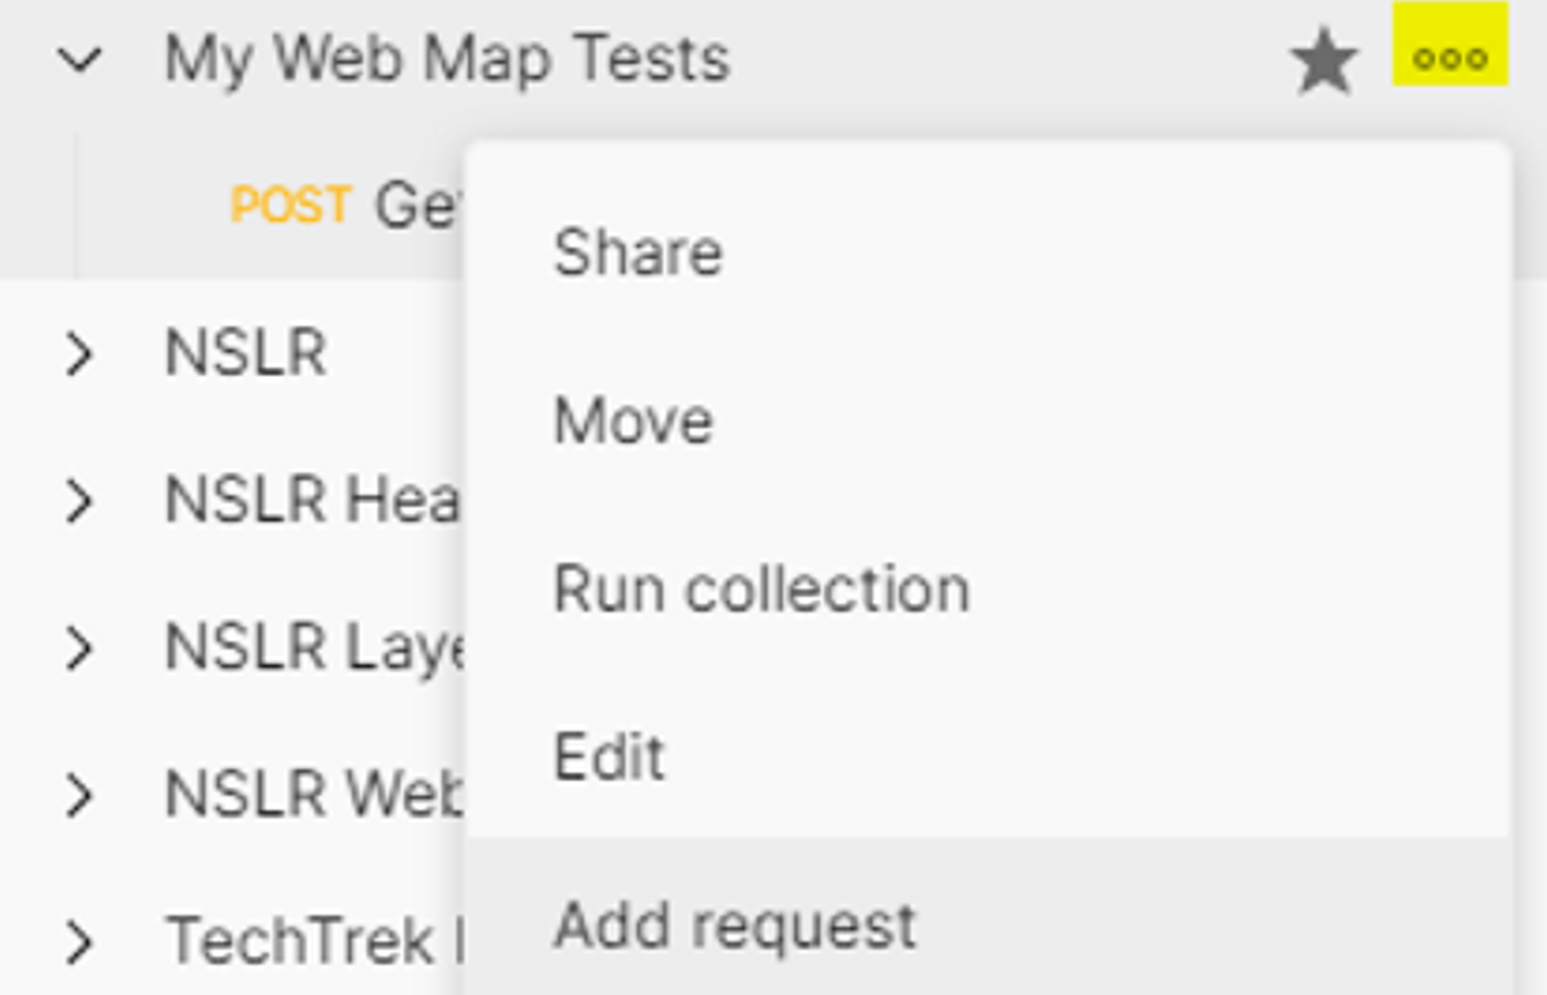
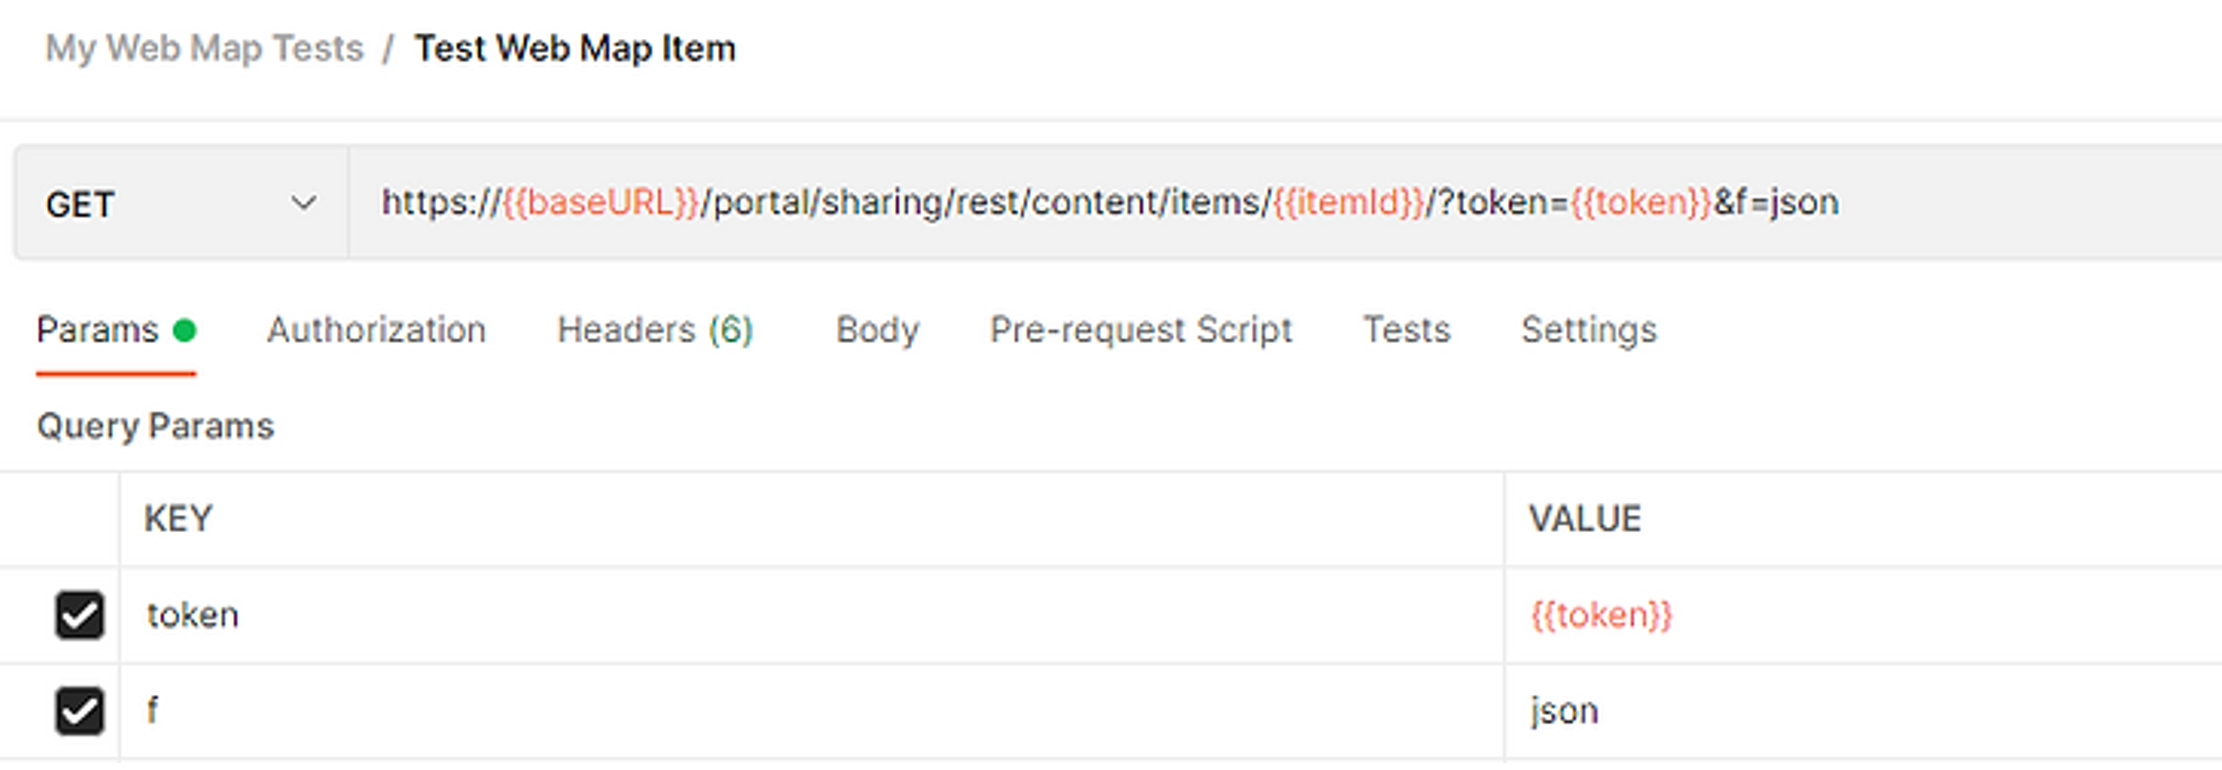
    1. Add a new request to the collection, by clicking the ellipsis next to the collection name, call it Test Web Map Item.

    2. Leave the request as a GET and add in the following URL.

      https://{{baseURL}}/portal/sharing/rest/content/items/{{itemId}}/?token={{token={{token}}&f=json

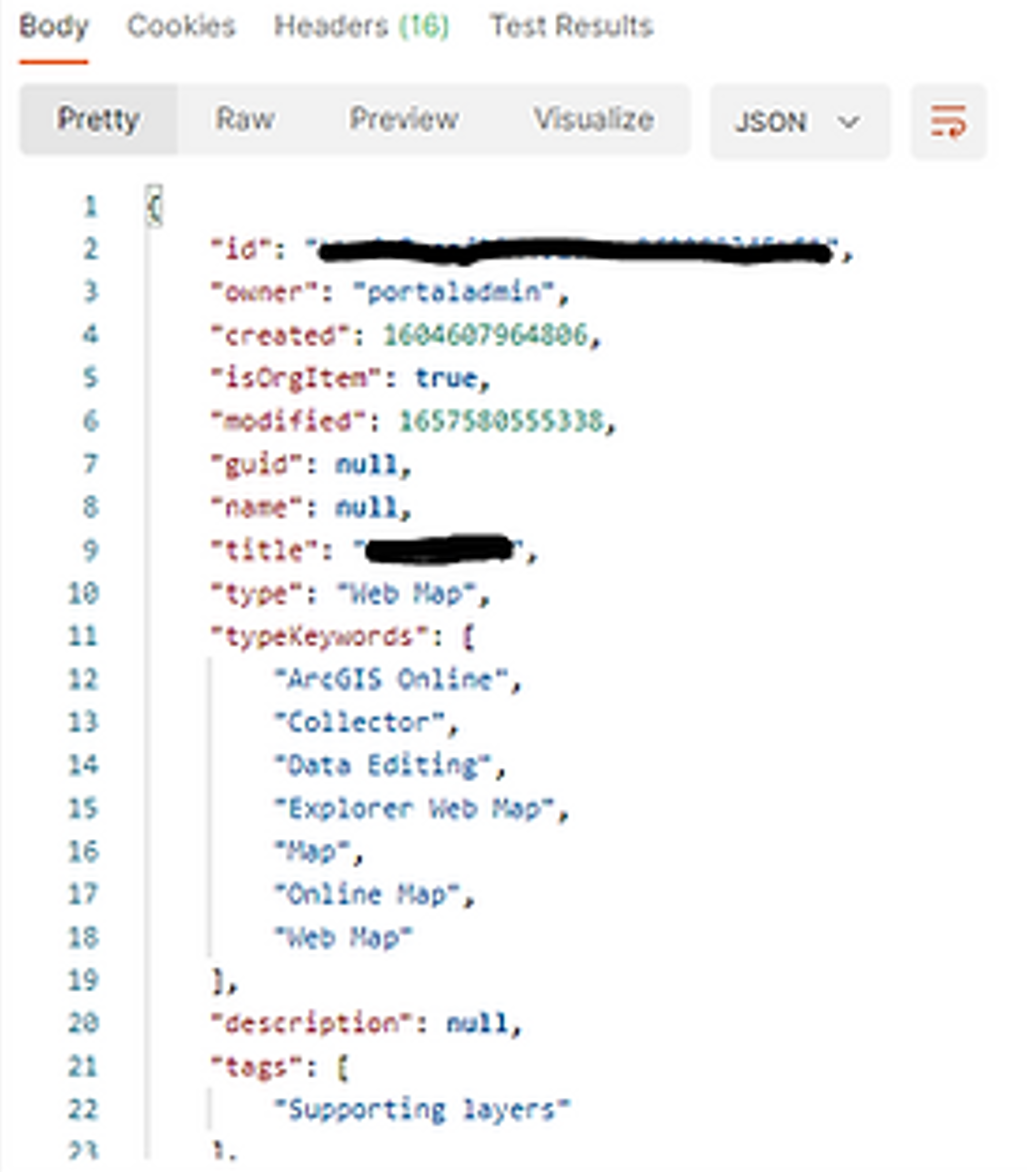
    3. Save the request and send it. You should see the item details of your web map returned.

    4. We can test to make sure that these values match what we expect, one useful thing to test is that the initial extent is what we expect. This ensures that the map will always open at the expected extent in each environment. To do that, switch to the Tests tab, and add in a const at the top of the screen with what we expect the extent to be.

    const extent =   [
            [
                163,
                -47
            ],
            [
                180,
                -33
            ]
        ]

    5. With this in place, we can then extract the results from our web map item and check that it matches what we expect.

    pm.test(“Map has the correct lower longtitude”, () => {
        const responseJson = pm.response.json();
        pm.expect(responseJson.extent[0][0]).equals(extent[0][0])
    });

    pm.test(“Map has the correct lower latitude”, () => {
        const responseJson = pm.response.json();
       pm.expect(responseJson.extent[0][1]).equals(extent[0][1])
    });
     

    pm.test(“Map has the correct upper longtitude”, () => {
        const responseJson = pm.response.json();
        pm.expect(responseJson.extent[1][0]).equals(extent[1][0])

    });
     

    pm.test(“Map has the correct upper latitude”, () => {
        const responseJson = pm.response.json();
       pm.expect(responseJson.extent[1][1]).equals(extent[1][1])
    });

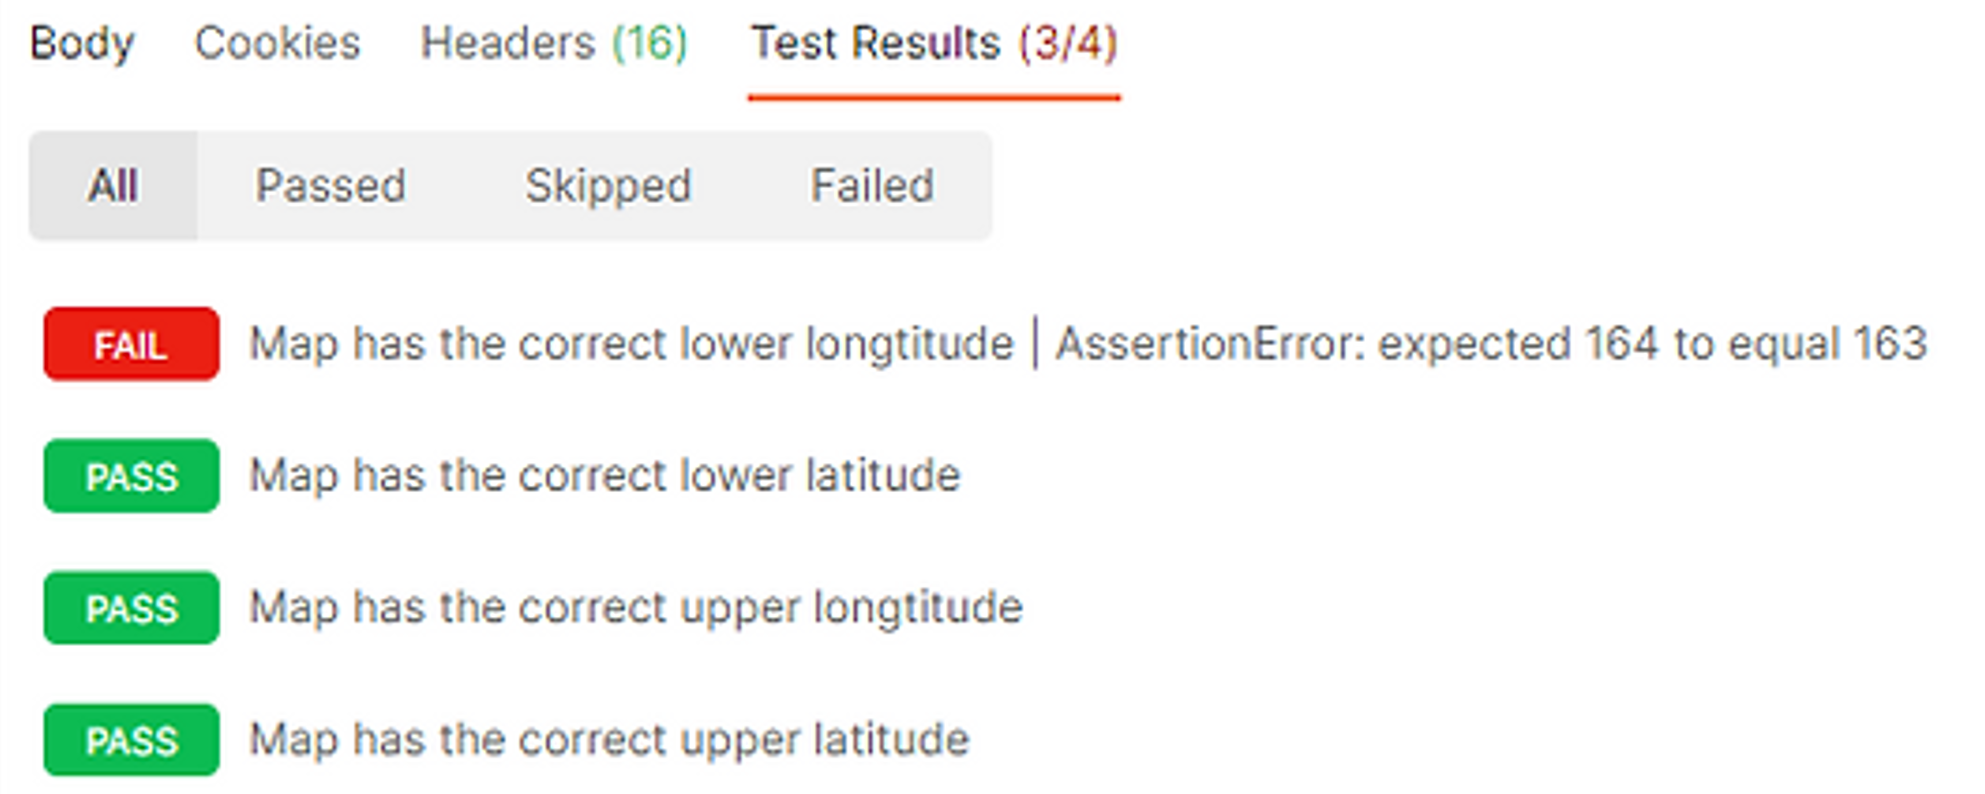
    6. Save the request and send it again to see the results. If a test fails, it will give an error similar to the following, this is why it is important to use descriptive names for your tests.

    Testing web map data

    Now we know how to test the item details of a web map, we can take this further and start to test that the layers, tables, popups and bookmarks within the web map match what we expect.

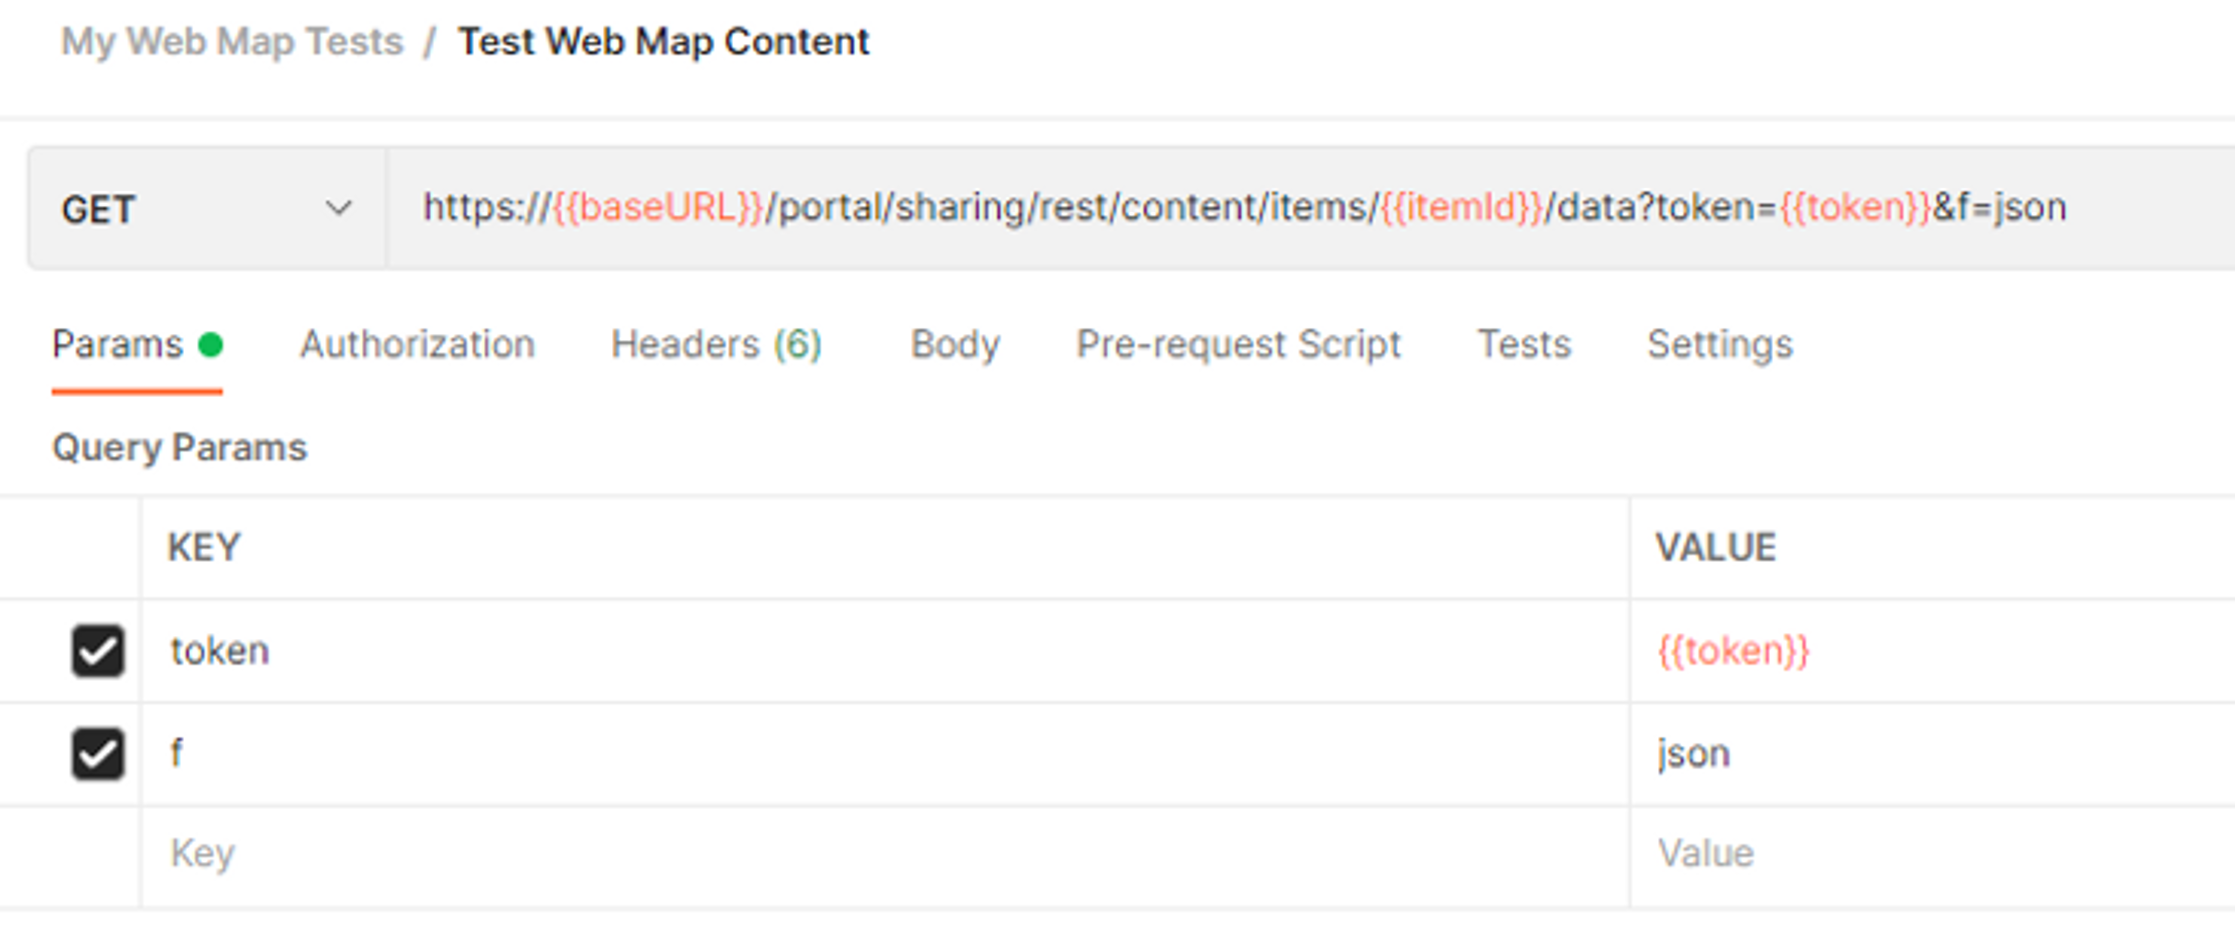
    1. As above, add a new request to your collection and call it Test Web Map Content and add the following URL.

      https://{{baseURL}}/portal/sharing/rest/content/items/{{itemId}}/data?token={{token}}&f=json

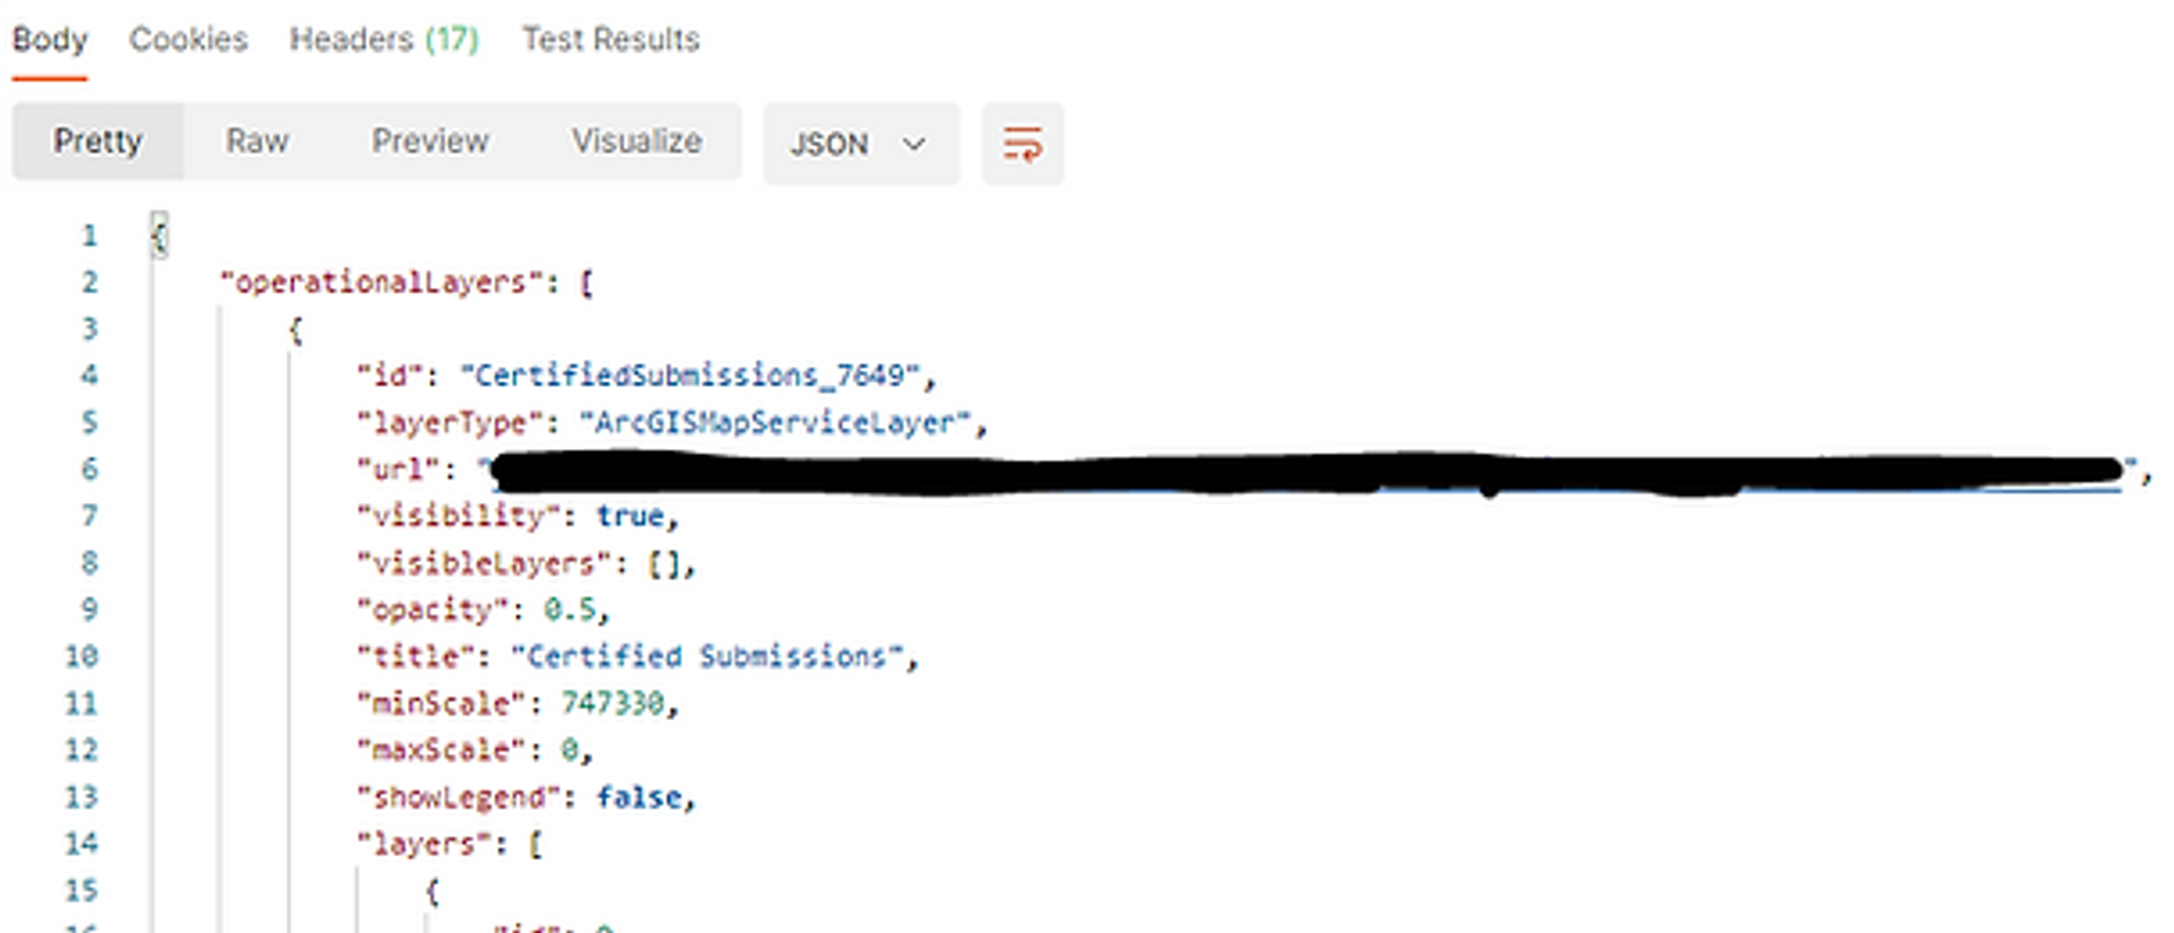
    2. Save and send the request, you should see the web map JSON returned.

    3. As above we can now create some constants in the Tests section and ensure that we have the number of layers and tables:

    We have the correct layer ids:

    We have the correct default layer visibility:

    That the visibility settings are correct:

    The popup matches what we expect (note this is a pretty high-level test you could get really detailed if you wanted).

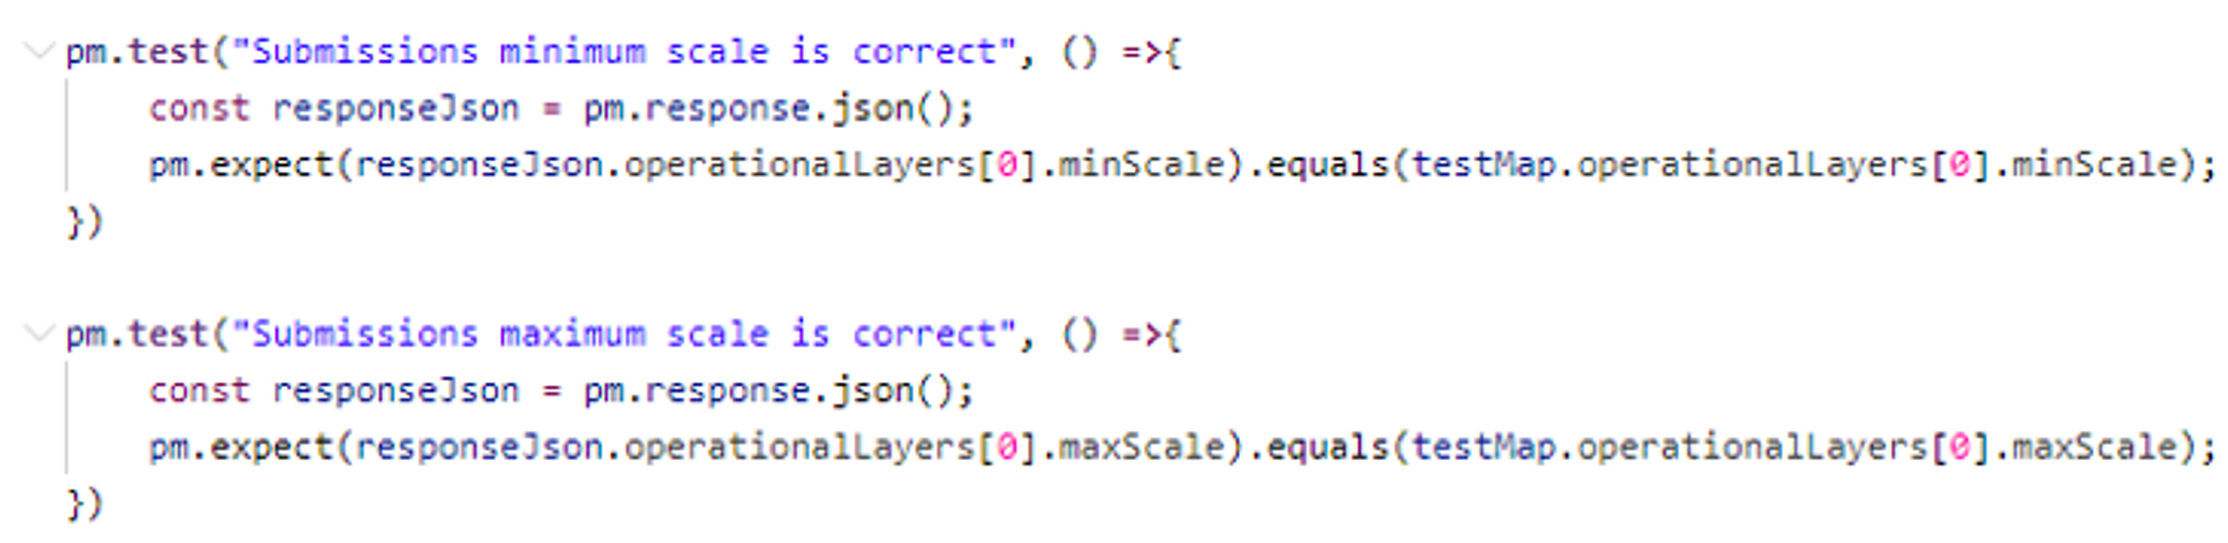
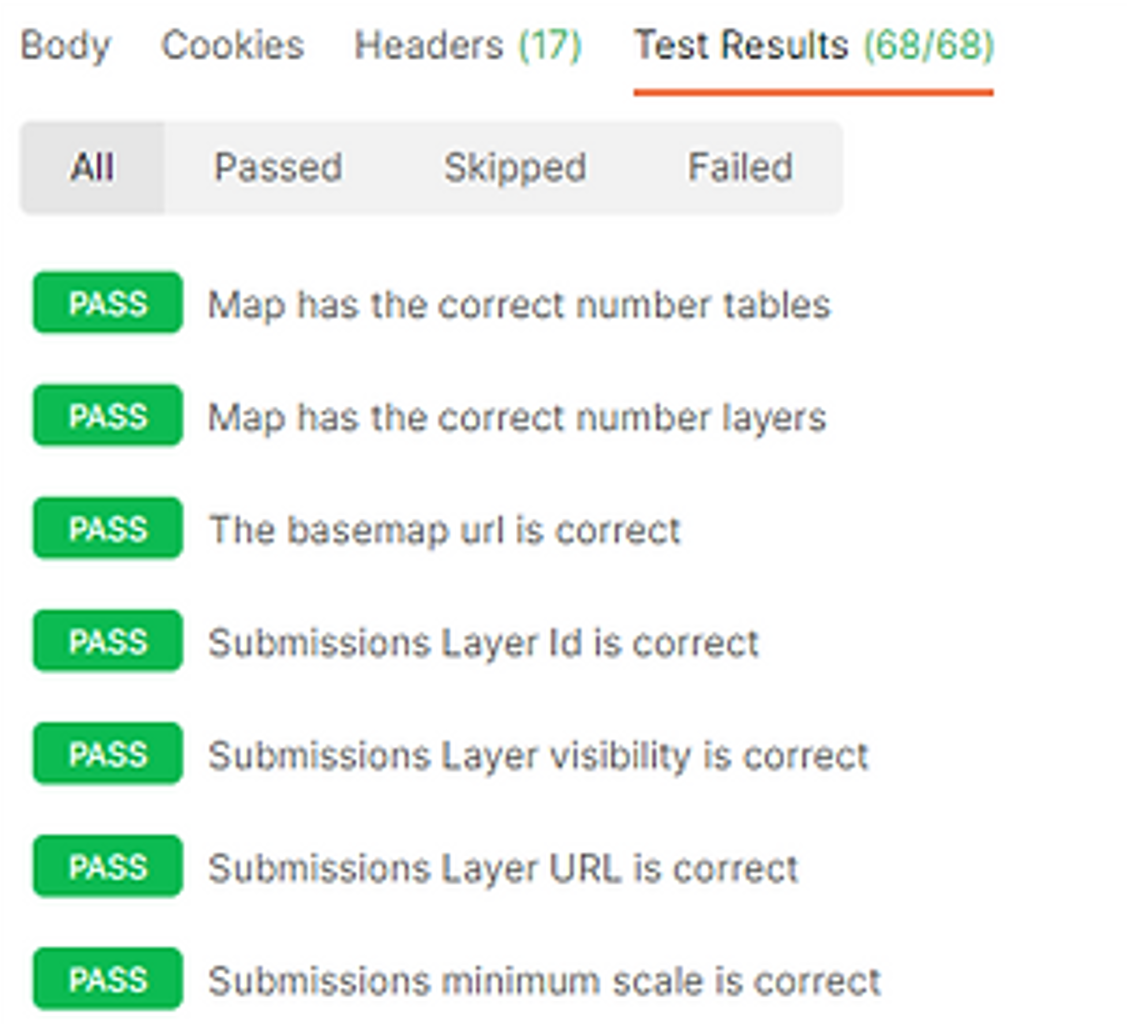
    As you can see below, you can add any number of tests to ensure that you are always using the expected web map.

    Running a collection

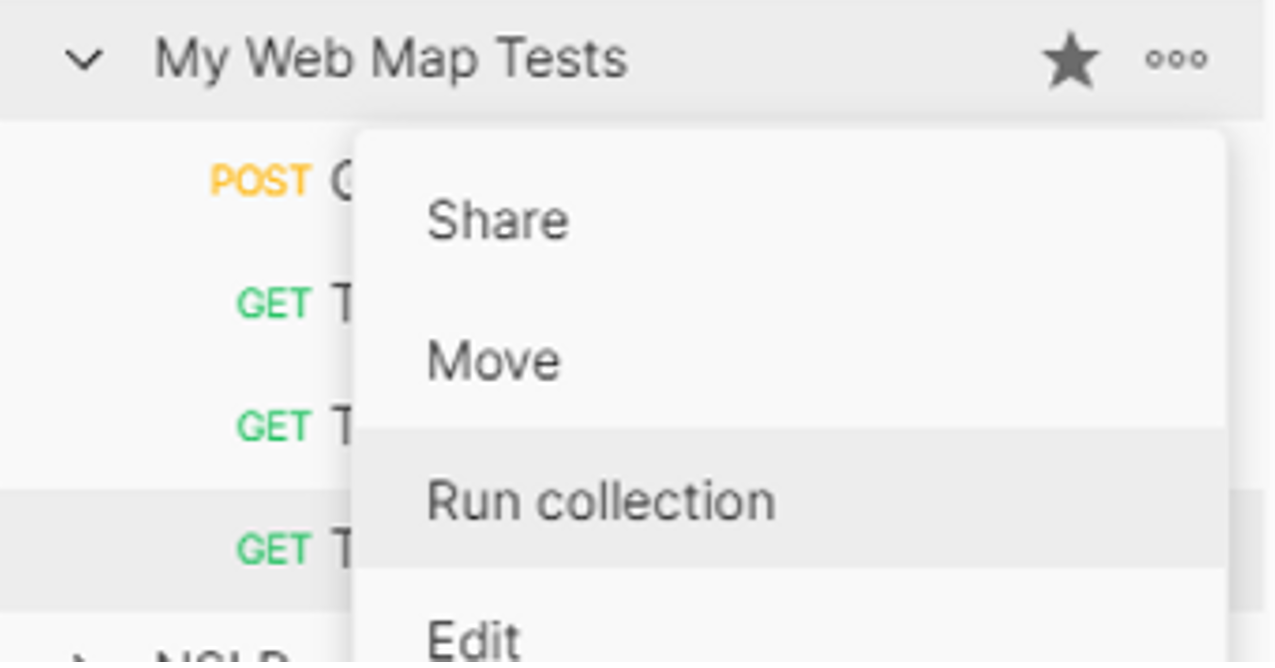
    You can run all requests within a collection in a single operation, by selecting Run Collection.

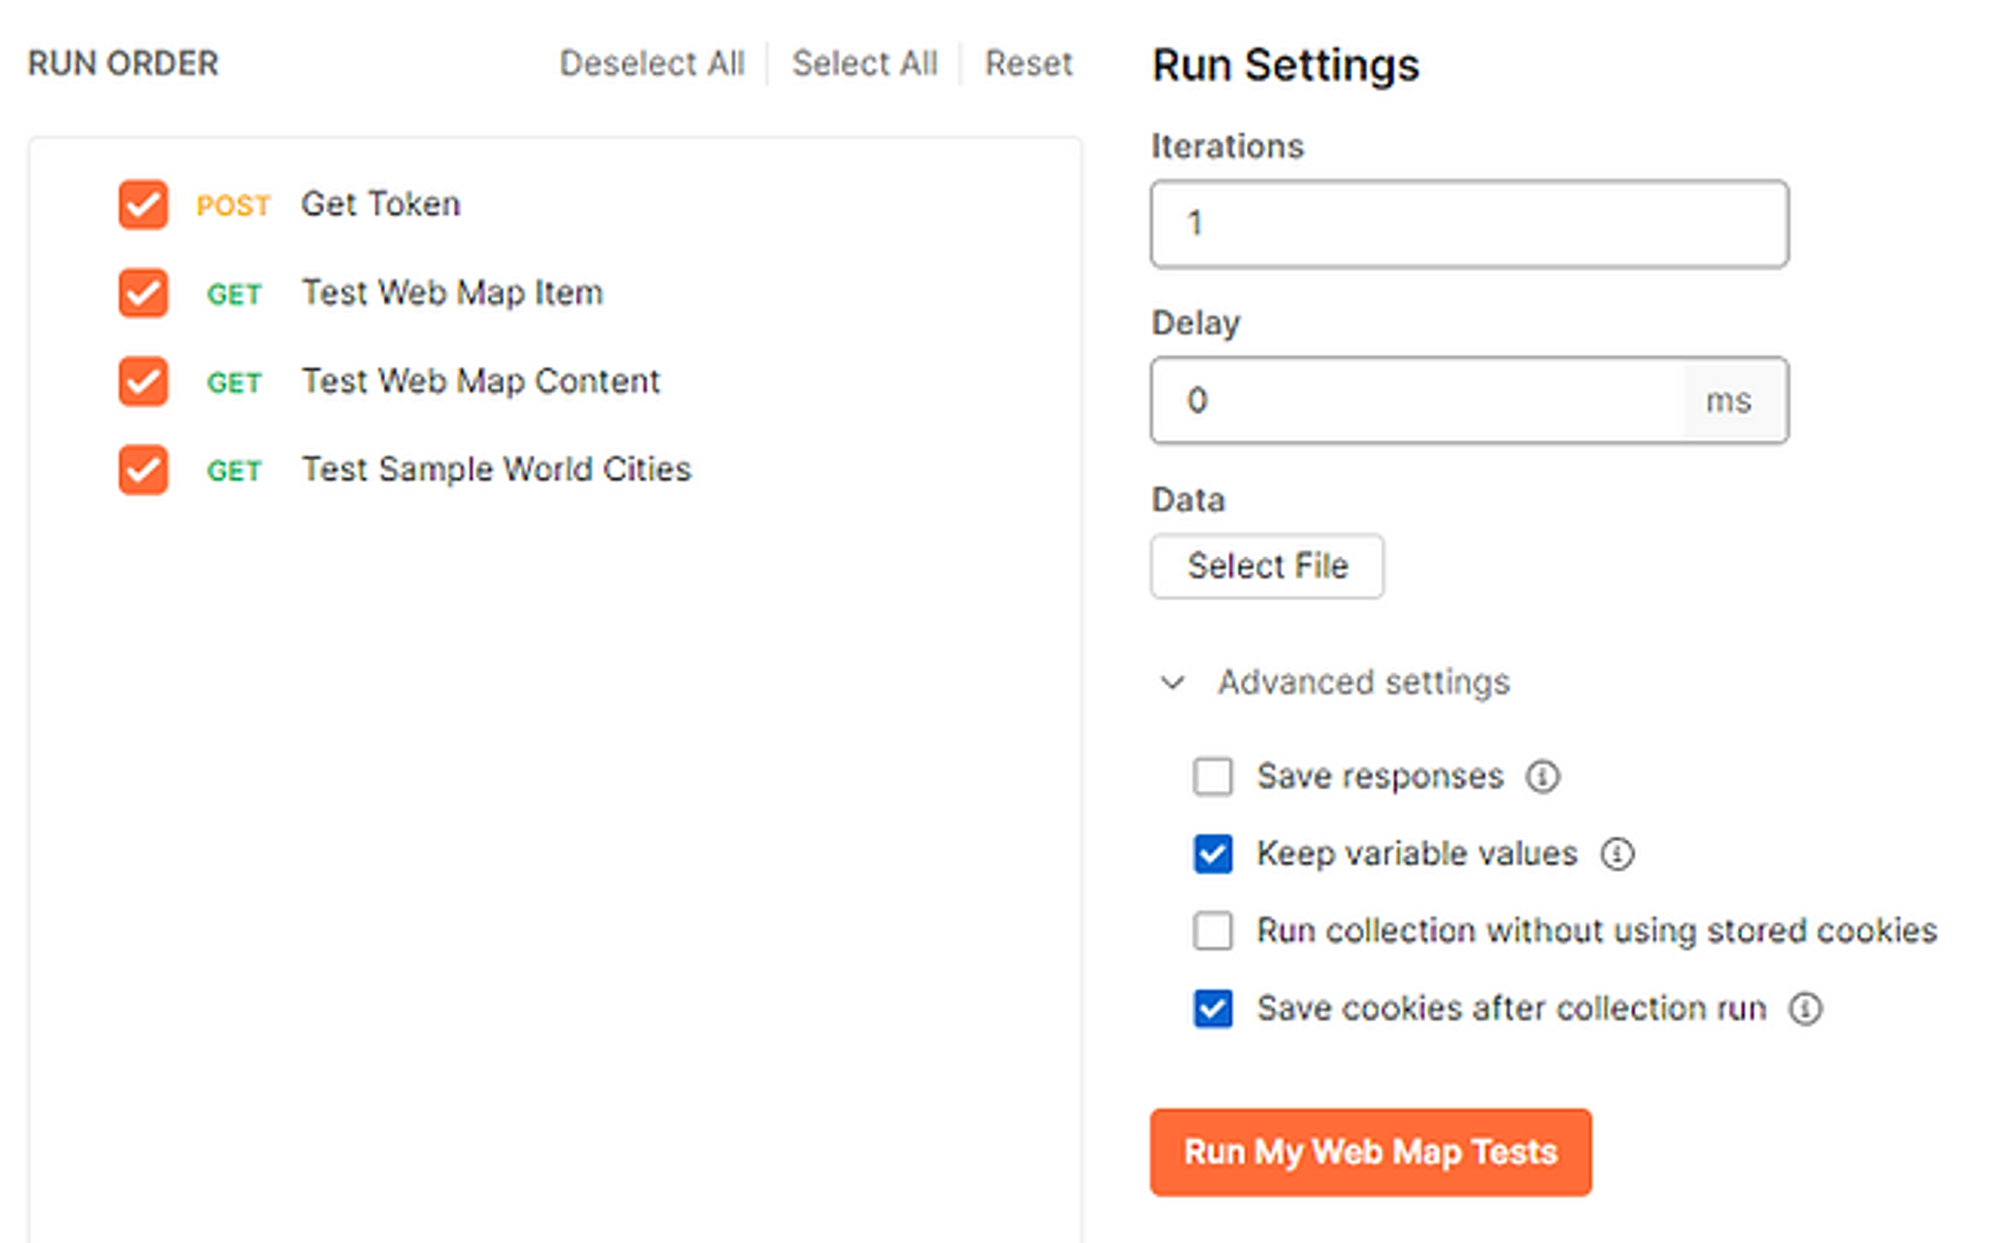
    A new page will open which will let you set the number of iterations of the test you would like to run, and let you rearrange the order in which your tests will run. (You should probably run the generate token request first though).

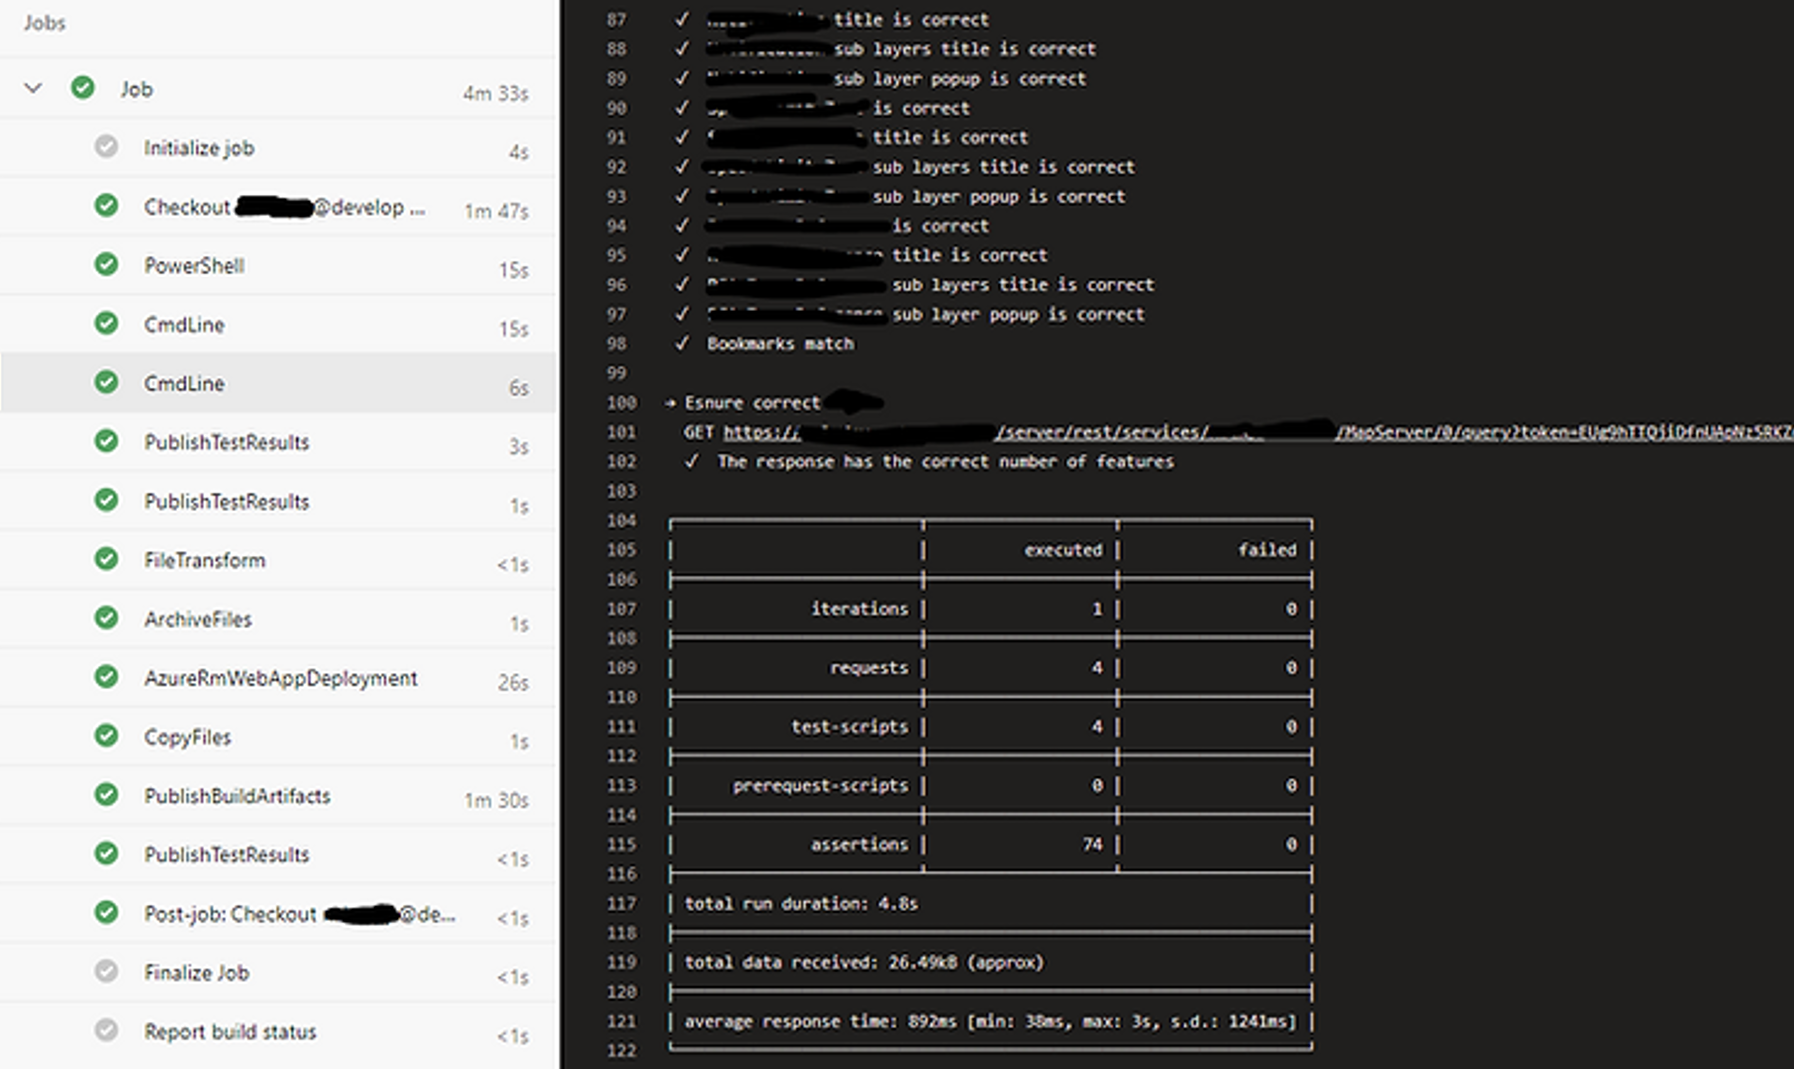
    After hitting Run, you will see a summary of the results of the requests and tests.

    Testing Services

    Using the same methods, you can also test services in your web map to ensure that they have the correct renderers, correct number of fields, that the correct domains exist and so forth.

    1. Add a new request to your collection (or create a new one for the services) and call it Test Sample World Cities and set the URL to the following.

      https://{{baseURL}}/server/rest/services/SampleWorldCities/MapServer?f=json&token={{token}}

    2. At the service level we can now add tests to check if the correct number of layers exist in the map.

    pm.test(“Service has the correct number of layers”, () => {
        const responseJson = pm.response.json();
        pm.expect(responseJson.layers.length).equals(3)
    });

    3. The name of the layer matches our expectation.

    pm.test(“First layer is named Cities”, () => {
        const responseJson = pm.response.json();
        pm.expect(responseJson.layers[0].name).equals(“Cities”)
    });

    4. The geometry of the layer is correct.

    pm.test(“First layer is a point layer”, () => {
        const responseJson = pm.response.json();       
    pm.expect(responseJson.layers[0].geometryType).equals(“esriGeometryPoint”)
    });

    Once you understand how to extract the data and test it, the possibilities are endless… You can test other service types, e.g., Geoprocessing services to check the correct parameters, send requests and get results.

    Running in a DevOps Pipeline

    As I mentioned at the top of the page, if you are working in a multi environment situation, it can be useful to test that each environment is in sync, before pushing out any application that relies on the web map data and services data being correct.

    To do this we can export our environment and collection from Postman and run them within an Azure DevOps build pipeline.

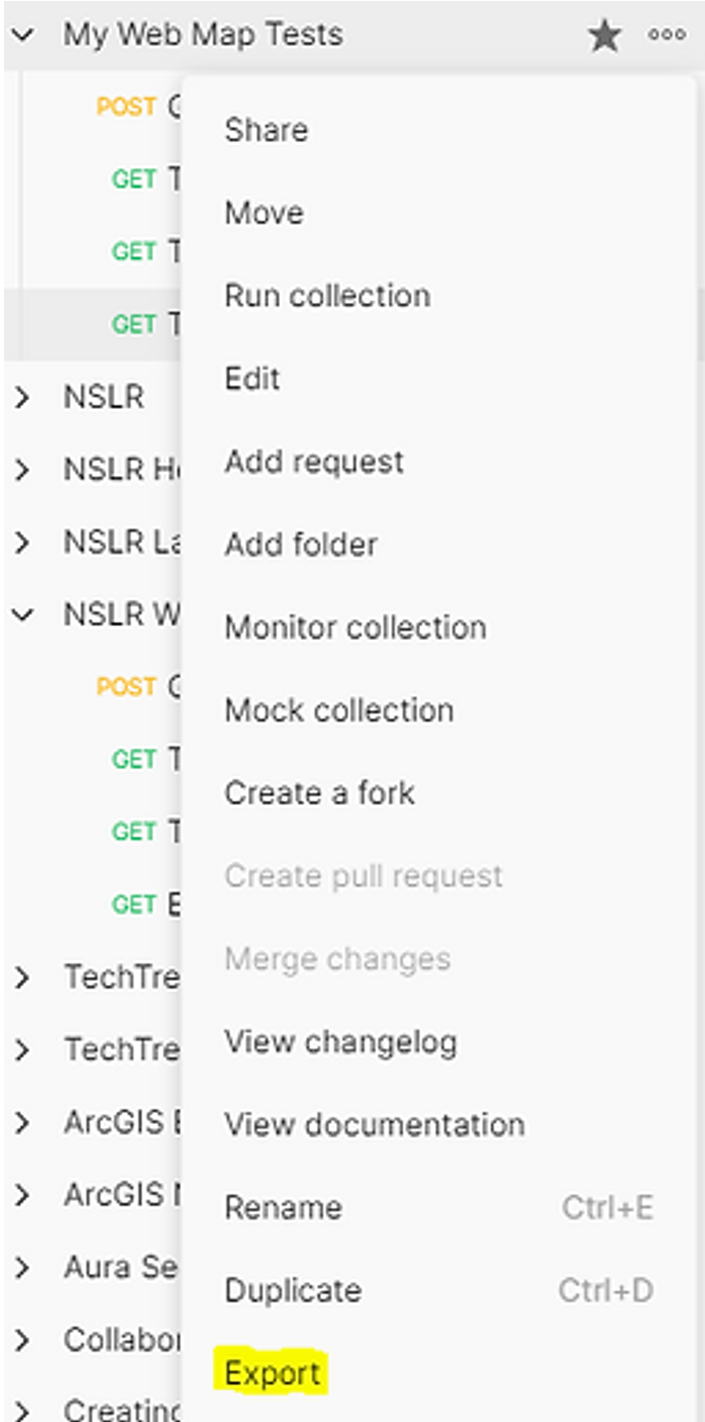
    1. To export a collection, click the ellipsis next to the name and select Export.

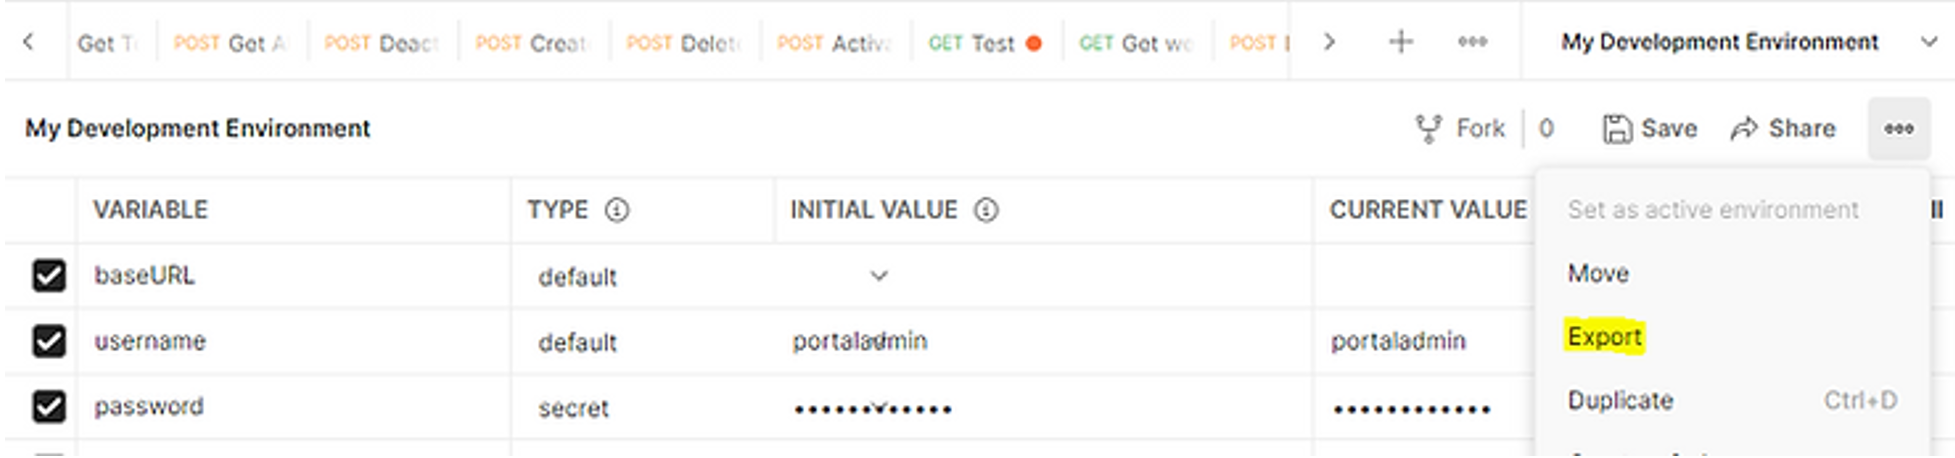
    2. You can do the same for an Environment:

    3. These will produce JSON files that you can add to your repository, which can then be consumed in a pipeline. You can create a different environment for each environment that you want to test, eg dev, test, preprod and production.

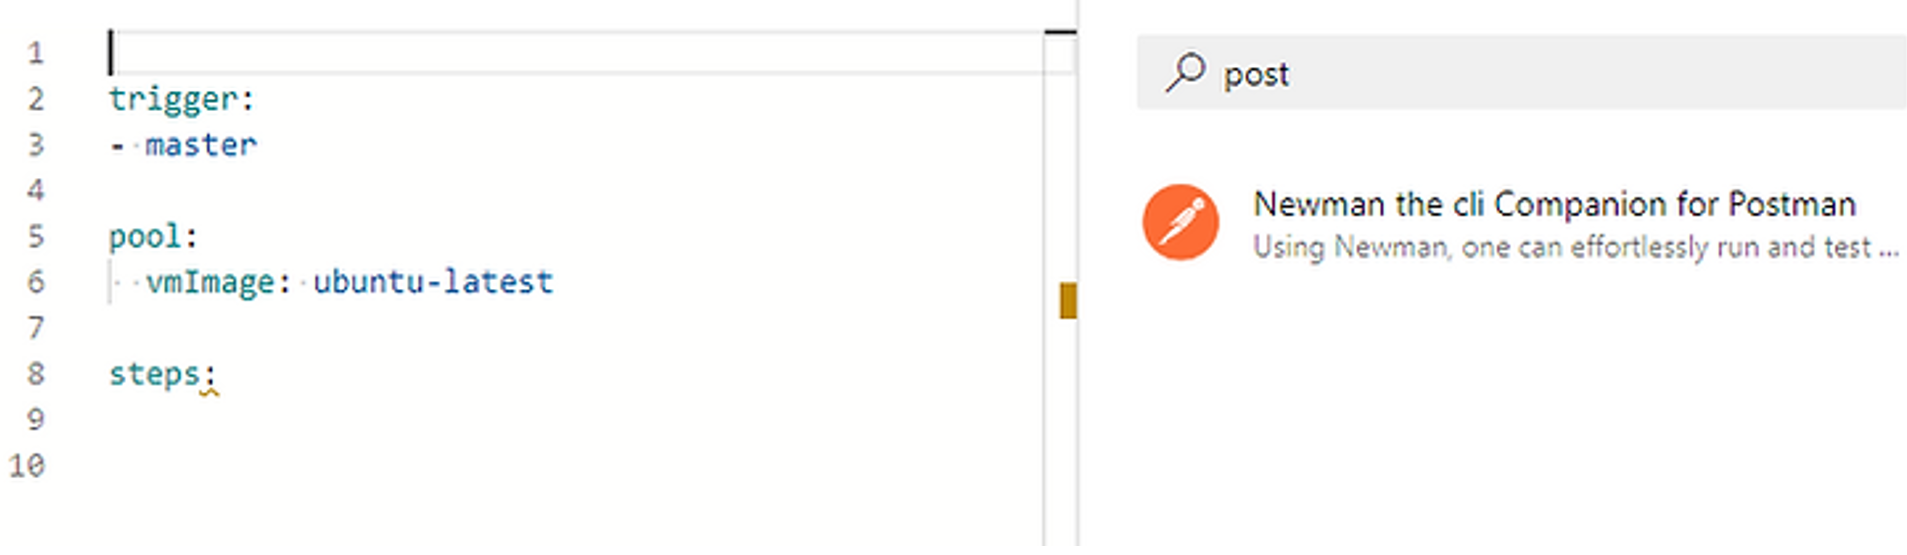
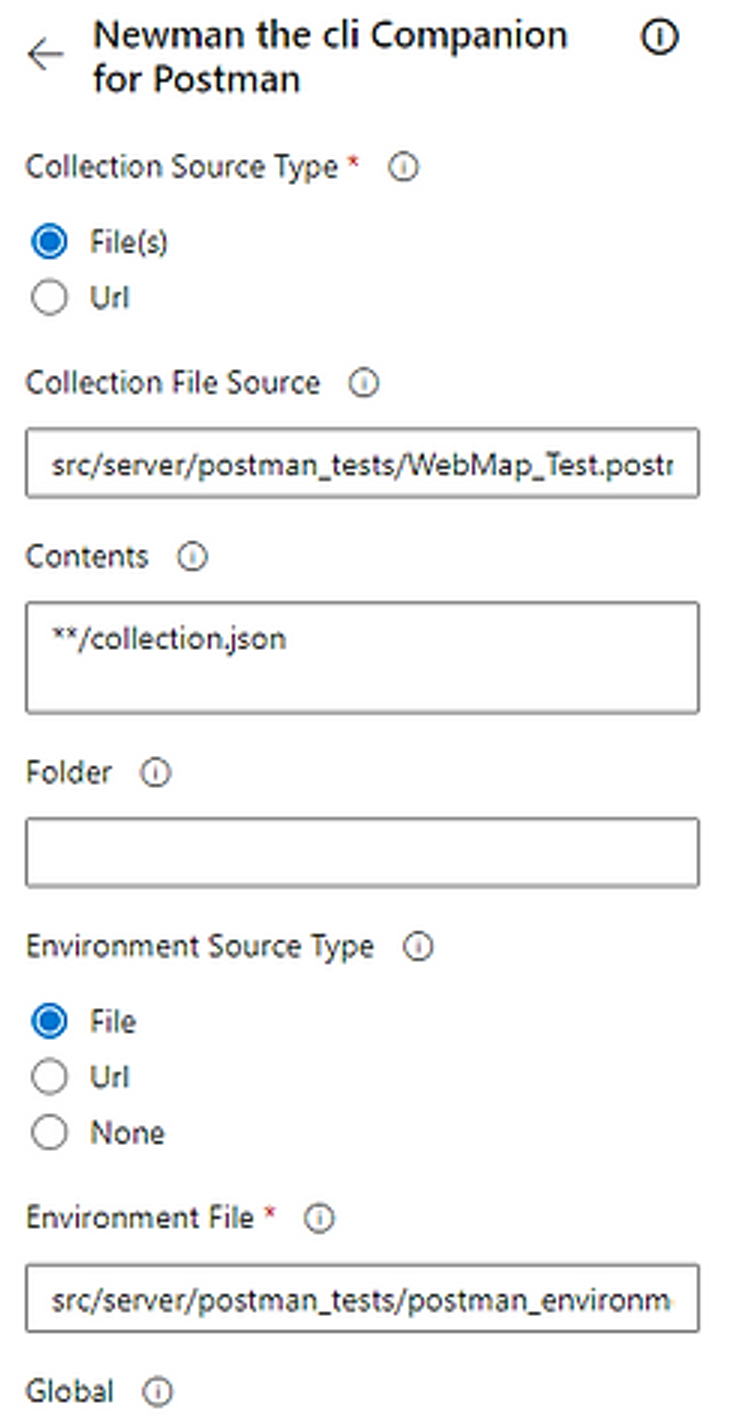
    4 Within Azure DevOps you can then add a Postman task to your build pipeline which will run your tests. You may need to add the Postman task to Azure DevOps from the Market Place first. https://marketplace.visualstudio.com/items?itemName=carlowahlstedt.NewmanPostman&targetId=a5f85cc1-9452-446a-a1c6-1984f3d63846

    5. Once added use the assistant and search for Postman.

    6. Within the dialog box

    • Add in the path to your exported collection, this contains all your requests and tests.
    • Add the path to your environment file

    7. With that done, now when you run your pipeline, the series of tests will run and fail your pipeline if one of the tests does not pass.

  • Creating and distributing Esri custom widgets (Part 3)

    Creating and distributing Esri custom widgets (Part 3)

    Deploying an Experience Builder widget to Enterprise.

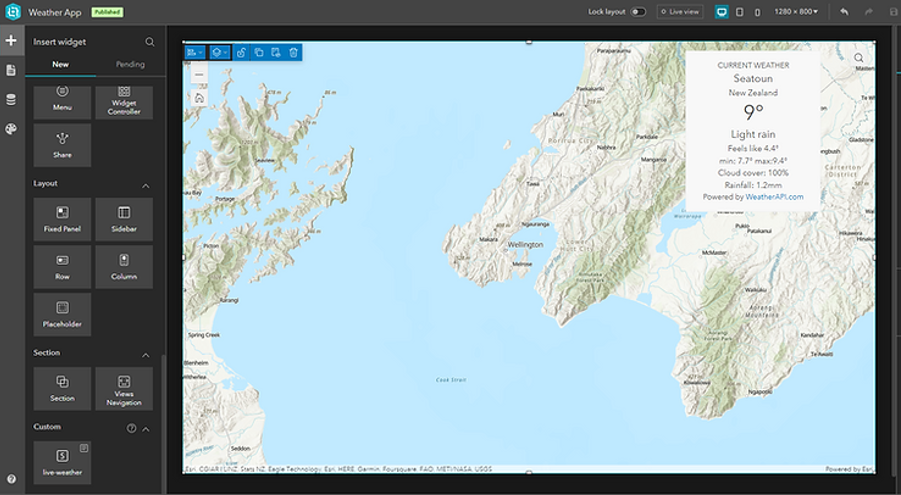
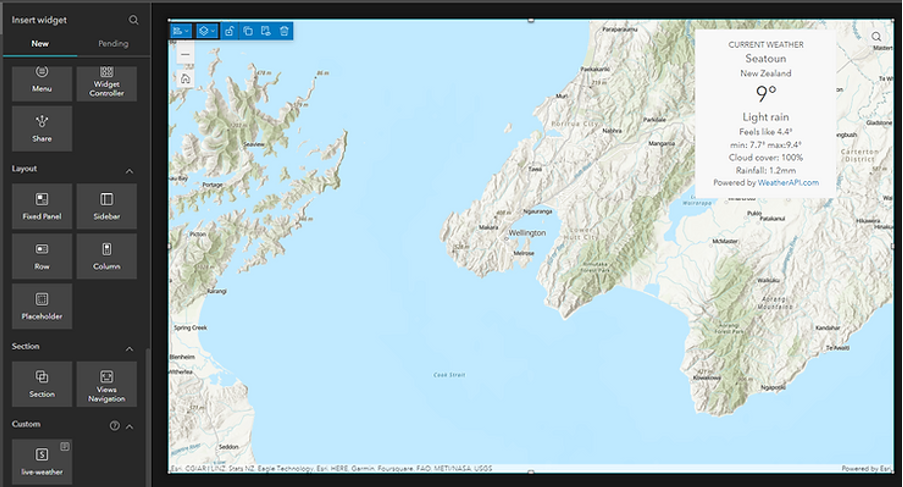
     In the first post in this series, I described how to create a custom Esri JavaScript API widget and publish that widget to npm using a CI/CD approach with Azure DevOps. The second post extended this workflow, by wrapping the widget in an Experience Builder widget and application and publishing that to an application. In this post, I will describe how we can modify the pipeline for our Experience Builder widget, to publish the widget to ArcGIS Enterprise. From here, the widget will be available within the ArcGIS Enterprise version of Experience Builder, so your users can add it in to their own applications. (Note, this workflow is only supported at ArcGIS Enterprise 11.0) 

    Prerequisites

    To complete this you will need:

    • Access to an ArcGIS Enterprise 11.x implementation.
    • An Azure DevOps account.
    • An Azure static web app (or you could use an App Service, or any other solution for hosting the widgets folder).

    1: Adding in a deployment script

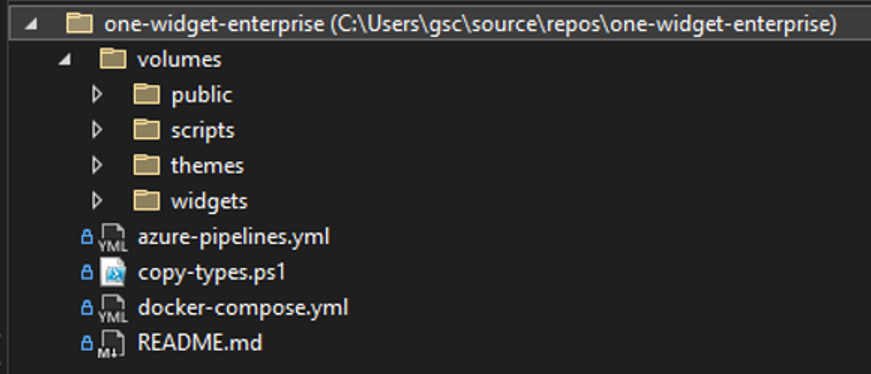
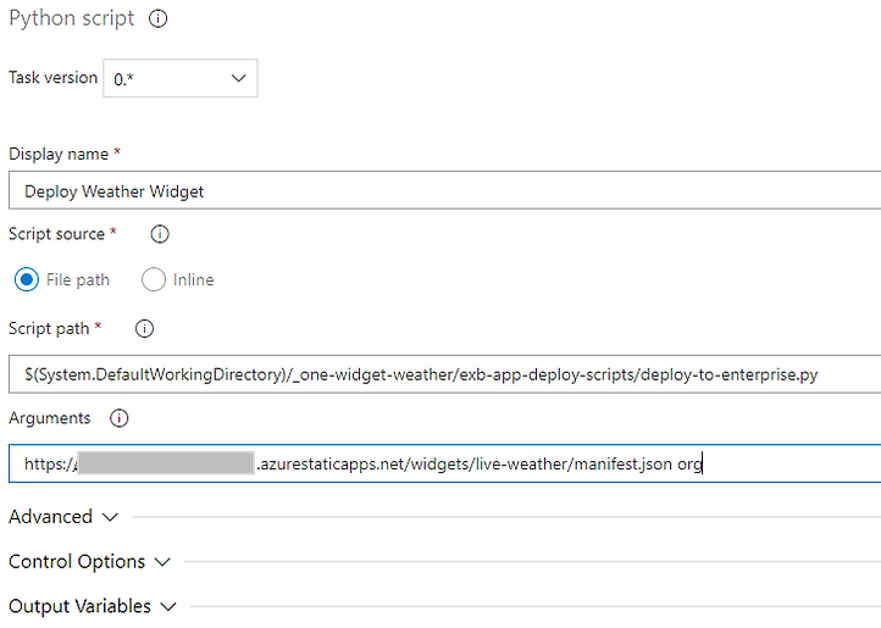
    To publish our widget to ArcGIS Enterprise, we will need to publish it to ArcGIS Enterprise as an item. To create a consistent publishing experience, we will script the deployment; as we are working within Azure DevOps, there is no opportunity to use the ArcGIS APIfor Python. However, as most of the Esri APIs are a wrapper around the REST API, if you know how to use the REST API, then you can pretty much do anything on the platform. If you have followed along with the previous posts, then you should have a folder structure that looks like the following. For the sake of simplicity, I have created a new repository with the same folder structure, as the focus is not on publishing an app, but a collection of widgets.  Add in a new folder called scripts.  Within the scripts folder, add two new files:config.jsondeploy-to-enterprise.py  In the first file (config.json), copy the following in.{  “portalURL”: “”,  “username”: “”,  “password”: “”}The values for the file will be inserted as part of the pipeline, where we can pull the values from a variable library, this gives us the flexibility to deploy to different portals, eg dev/test/preprod/production environments. The file will be read into the python file we are about to populate. You can download the python file from here  The file is fully commented, but at a high level the script does the following:1. The file expects two arguments, 2. A URL to the manifest file (more on this below)3. A sharing level, this can be one of two values, either org to share to the organisation, or everyone to share it publicly.4. The file will parse the config.json file to extract the base URL to the portal and the username and password.5. Next it will create a token to be used in the subsequent requests.6. We then download the mainfest.json for the widget from our input URL7. We then use this to check if the item has already been published to Enterprise.8. If we have not, then we create the parameters to publish the manifest to Enterprise, pulling some of the values out of the manifest.9. We then publish the manifest to Enterprise.10. Once published, we take the output itemId and use that to update the sharing to value we passed in as an argument(One thing to note about this file, is that it ignores certificate errors for ArcGIS Enterprise, this is due to my testing being run against a basic setup, where I didn’t apply any certs to the machine and just used the out-of-the-box self-signed certs, this should be removed for production workflows). 

    2: Update Build Pipeline

    With the file in the folder, we can now create our build pipeline to push the script out as an artifact for use in our release pipeline. To do this, we can modify the pipeline we used to push out our custom Experience Builder application. Essentially, what we do is the same process of loading in Experience Builder, but instead of triggering a build of the application, we just build the widgets, then extract them from the client/dist-prod folder. The full yaml is presented below. variables:- name: ExbVersion  value: 1.8 pool:  vmImage: ubuntu-latest steps: – task: CmdLine@2  displayName: Download Experience Builder  env:     ARCGIS_LIB_DOWNLOADER_USERNAME: <YOUR USERNAME>     ARCGIS_LIB_DOWNLOADER_PASSWORD: $(AGOLPassword)  inputs:    script: |      npx arcgis-lib-downloader -p arcgis-experience-builder -v $(ExbVersion) – task: CmdLine@2  displayName: Unzip Experience Builder  inputs:    script: |      unzip -q arcgis-experience-builder-$(ExbVersion).zip -d arcgis-experience-builder-$(ExbVersion) – task: CmdLine@2  displayName: Copy widgets  inputs:    script: |      dir      cp -r  volumes/widgets/* arcgis-experience-builder-$(ExbVersion)/ArcGISExperienceBuilder/client/your-extensions/widgets – task: CmdLine@2  displayName: Create App Directory    inputs:    workingDirectory: arcgis-experience-builder-$(ExbVersion)/ArcGISExperienceBuilder/server    script: |      mkdir public && cd public && mkdir apps && cd apps – task: CmdLine@2  displayName: NPM install client folder  inputs:    workingDirectory: arcgis-experience-builder-$(ExbVersion)/ArcGISExperienceBuilder/client    script: |      npm ci – task: CmdLine@2  displayName: NPM install dependancies for custom widget  inputs:    workingDirectory: arcgis-experience-builder-$(ExbVersion)/ArcGISExperienceBuilder/client/your-extensions/widgets/live-weather    script: |       npm install – task: CmdLine@2  displayName: Update NPM custom widget  inputs:    workingDirectory: arcgis-experience-builder-$(ExbVersion)/ArcGISExperienceBuilder/client/your-extensions/widgets/live-weather    script: |       npm update @eaglegis/weather-widget – task: CmdLine@2  displayName: NPM install server folder  inputs:    workingDirectory: arcgis-experience-builder-$(ExbVersion)/ArcGISExperienceBuilder/server    script: |      npm ci – task: CmdLine@2  displayName: Build widgets  inputs:    workingDirectory: arcgis-experience-builder-$(ExbVersion)/ArcGISExperienceBuilder/client    script: |      npm run build:prod  – task: CopyFiles@2  inputs:    SourceFolder: ‘arcgis-experience-builder-$(ExbVersion)/ArcGISExperienceBuilder/client/dist-prod/widgets’    Contents: |      **      !**/arcgis/**      !**/common/**      !**/layout/**      !**/survey123/**      !**/ba-infographic/**      !**/chunks/**    TargetFolder: ‘$(Build.ArtifactStagingDirectory)/$(Build.BuildId)’    CleanTargetFolder: true    OverWrite: true – task: PublishBuildArtifacts@1  inputs:    PathtoPublish: ‘$(Build.ArtifactStagingDirectory)/$(Build.BuildId)’    ArtifactName: ‘exb-app-widgets’    publishLocation: ‘Container’ – task: CopyFiles@2  inputs:    SourceFolder: ‘volumes/scripts’    Contents: ‘**’    TargetFolder: ‘$(Build.ArtifactStagingDirectory)/Scripts’    CleanTargetFolder: true    OverWrite: true – task: PublishBuildArtifacts@1  inputs:    PathtoPublish: ‘$(Build.ArtifactStagingDirectory)/Scripts’    ArtifactName: ‘exb-app-deploy-scripts’    publishLocation: ‘Container’  The below simply copies any custom widgets out of the widgets folder, note we ignore any of the Esri OOTB widgets.- task: CopyFiles@2  inputs:    SourceFolder: ‘arcgis-experience-builder-$(ExbVersion)/ArcGISExperienceBuilder/client/dist/widgets’    Contents: |      **      !**/arcgis/**      !**/common/**      !**/layout/**      !**/survey123/**      !**/ba-infographic/**      !**/chunks/**    TargetFolder: ‘$(Build.ArtifactStagingDirectory)/$(Build.BuildId)’    CleanTargetFolder: true    OverWrite: trueThe next task copies the files as an artifact where it can be consumed by our release pipeline.- task: PublishBuildArtifacts@1  inputs:    PathtoPublish: ‘$(Build.ArtifactStagingDirectory)/$(Build.BuildId)’    ArtifactName: ‘exb-app-widgets’    publishLocation: ‘Container’ Finally, we also extract our python script from the folder and copy that out as an artifact to use in the release pipeline.- task: CopyFiles@2  inputs:    SourceFolder: ‘volumes/scripts’    Contents: ‘**’    TargetFolder: ‘$(Build.ArtifactStagingDirectory)/Scripts’    CleanTargetFolder: true    OverWrite: true – task: PublishBuildArtifacts@1  inputs:    PathtoPublish: ‘$(Build.ArtifactStagingDirectory)/Scripts’    ArtifactName: ‘exb-app-deploy-scripts’    publishLocation: ‘Container’ 

    3: Create the release pipeline

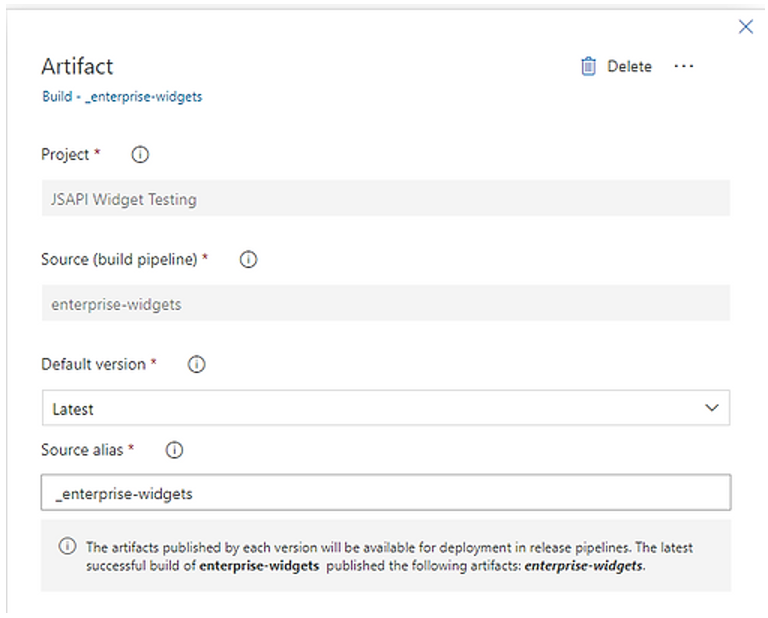
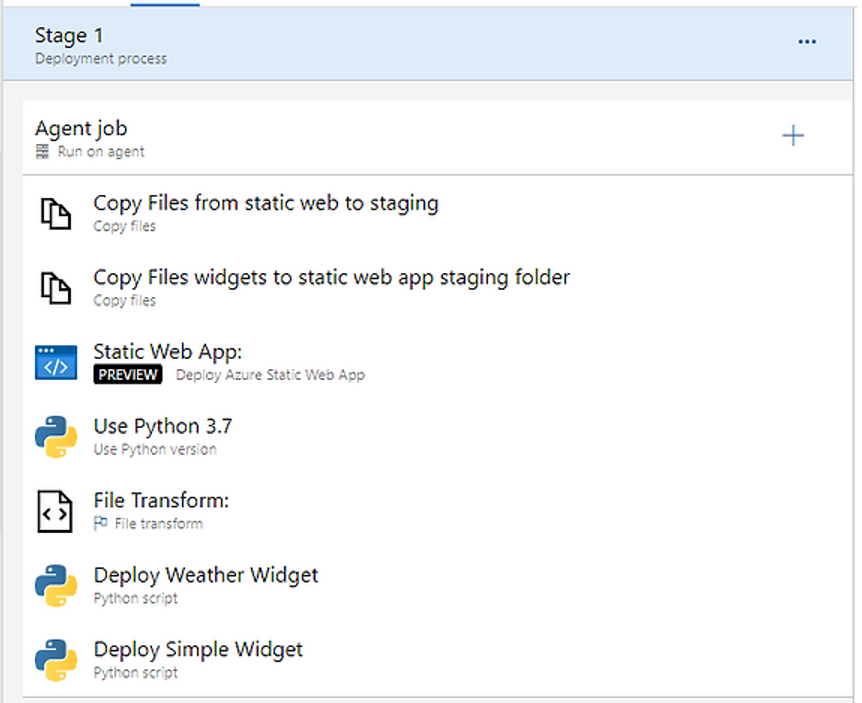
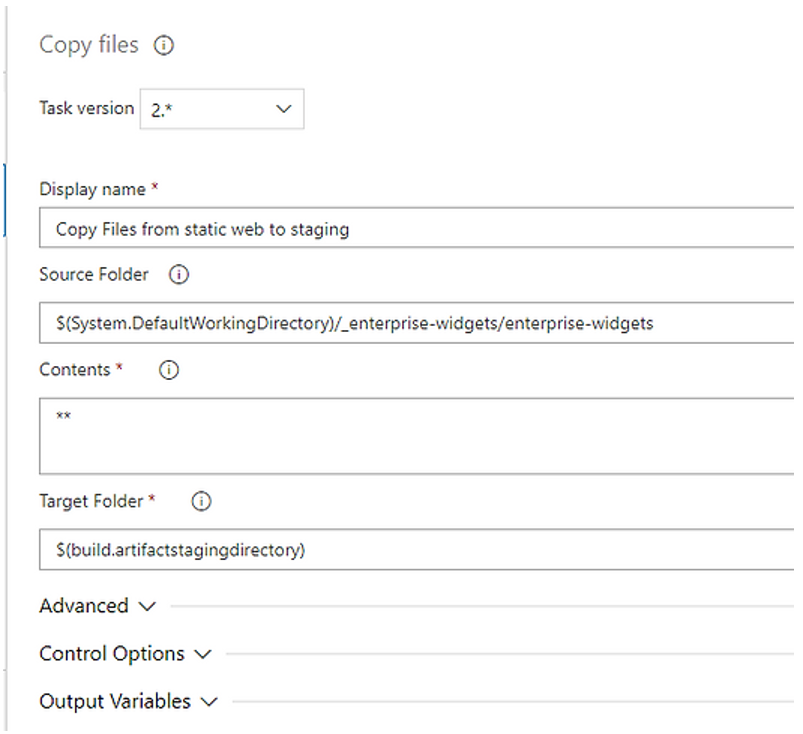
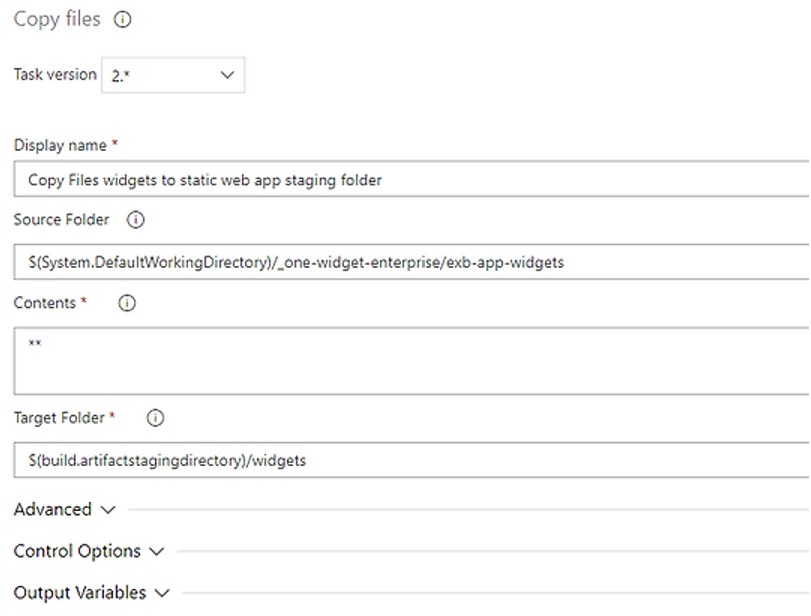
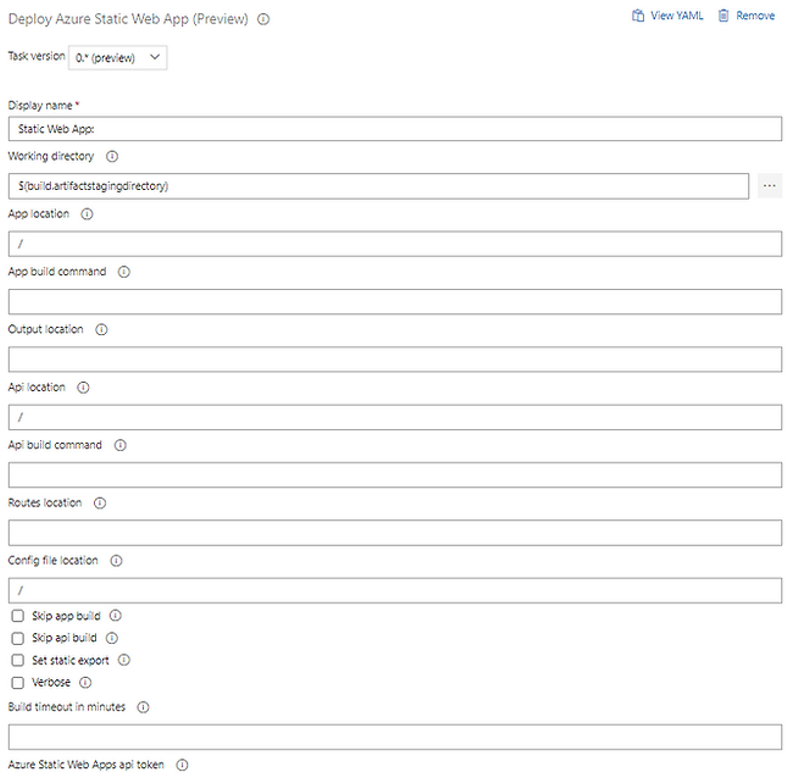
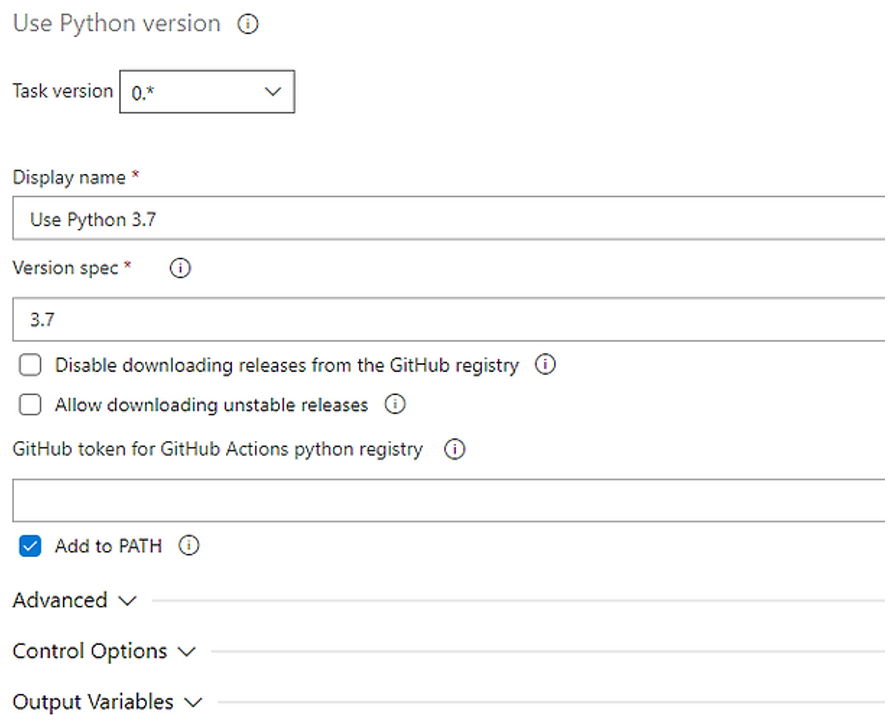
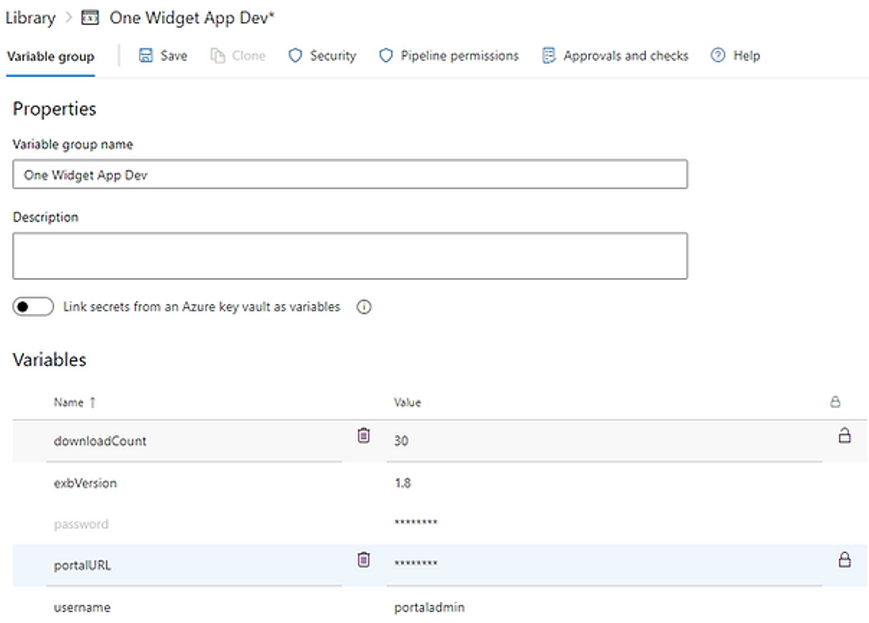
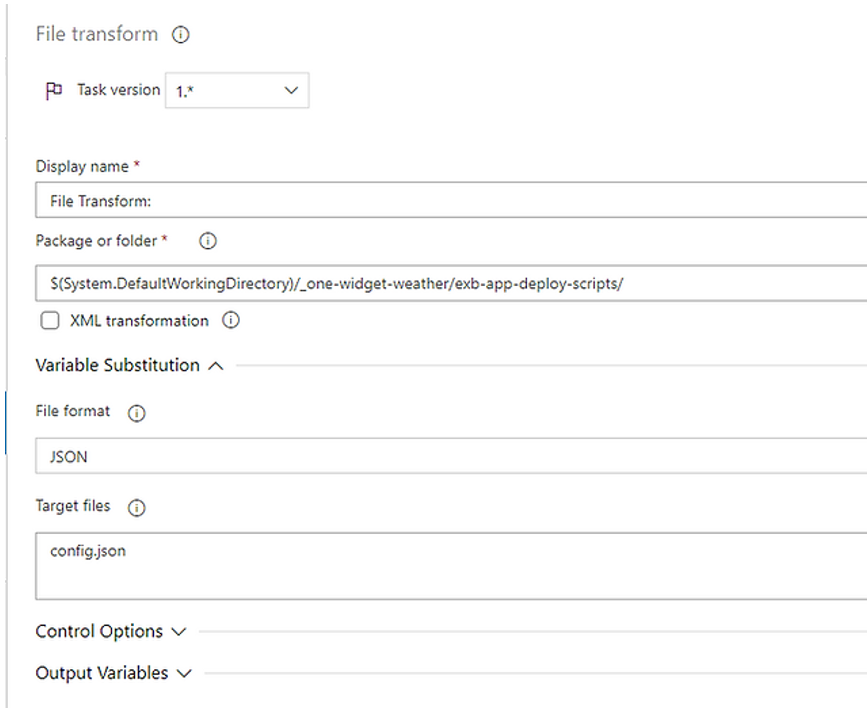
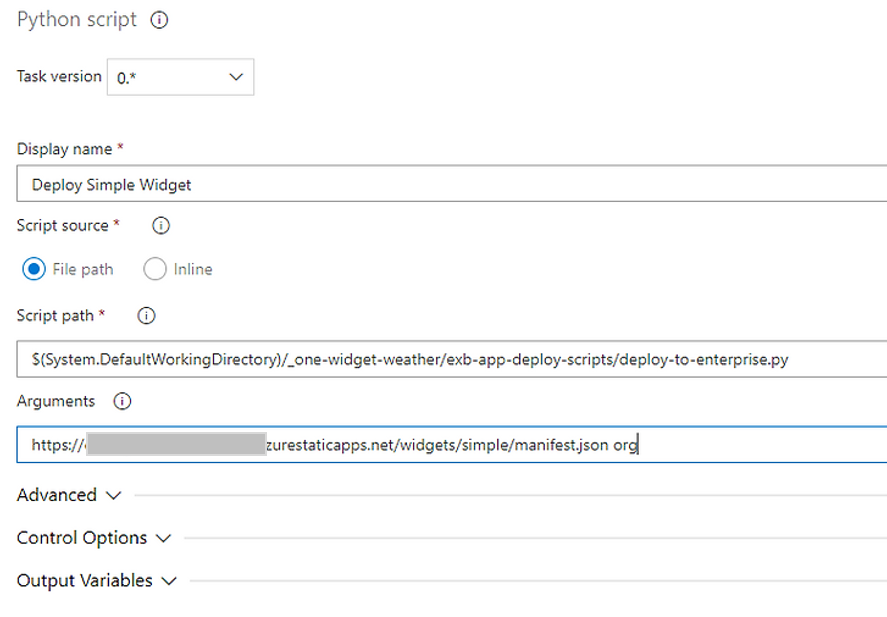
    Finally, we will update our build pipeline. We need to publish our widget to a place where it can be accessed by ArcGIS Enterprise. This could be anywhere that will allow the files to be served, whether this is a folder on a web server, or in this example, an Azure Static Web Site. One thing you will need to ensure is that you have the correct CORS policy set, this is important as it will restrict the applications that can access your widget and ensure ArcGIS Enterprise can access the correct files. I will not go into the details of setting up a Static Web Site, there are plenty of tutorials out there for that. Just know that I have a repository set-up for my static website that is being created through a separate pipeline and published as an artifact. Create a new release pipeline.  Give it a meaningful name.  Add the two output artifacts from the build pipeline, the first is the build output from the widget repository pipeline.  The second is the build from the static web site. Next, add a new stage to the pipeline, and add in the following tasks• Two Copy Files tasks, • a Static Web App task (*if using a static web app) • a Use Python Task, • a File Transform TaskFinally, for each widget you have to publish, add a Python Script task.  The first copy files task will copy the output for our static website into the staging directory.  The second task will copy our output widgets into a widgets folder within the staging directory.   With our widgets now part of our static website, we can publish the website.  Once the website is published, we need to now publish an item to ArcGIS Enterprise, this is where we will run our script.Set the python version.   I have pushed the URL of the portal, username, and password into a variable library, which I have then linked into the pipeline. By using this approach, I could have multiple stages, pushing to different environments (dev/test/prod) and use different variable libraries for each stage.   Next, we run the file transform, to push in the variables above to our config file (note, not all variables are being used).  Finally, I call the script to publish an item to ArcGIS Enterprise, passing in the URL to the manifest file which is part of the static website. In this case, Azure has assigned a random name for the website, as I am using the free tier, but hopefully, you get the idea. I also pass in the sharing level for the widget, in this case, org to share the widget only with logged-in users.  If I also want to publish more widgets from the folder, then this is just a case of adding the same task again but changing the URL.  We now have a method of updating our custom widgets without having to login to web servers and copy files. The script handles ensuring that we only publish to Enterprise once, and also makes sure that we have all the correct information for the widget.  This may not be the perfect approach to creating and publishing widgets to Enterprise but is something that we have come up with as a way of being able to update and ensure that we can distribute the widget to ArcGIS Enterprise. There may be better ways of hosting the widgets, you could potentially have each widget in a separate repository depending on how you want to structure your projects and repositories.

  • Wrapping widgets in Experience Builder and publishing apps in Azure DevOps.

    Wrapping widgets in Experience Builder and publishing apps in Azure DevOps.

    In the first post in this series, I described how to create a custom Esri JavaScript API widget and publish that widget to npm using a CI/CD approach with Azure DevOps.

    In this post, I will describe how we can wrap this widget within an Experience Builder custom widget and publish it in an Experience Builder application via Azure DevOps.

    Overview

    In this post we will create a repository that:

    1. Uses Docker to create an Experience Builder application.
    2. Includes a custom widget by wrapping it in an Experience Builder widget.
    3. Creates an automated build and deployment of the application via DevOps.
    4. Demonstrates a simple and fast method for bumping the Experience Builder version.

    Prerequisites

    To complete this you will need:

    1. Docker desktop installed on your machine.
    2. Familiarity with Experience Builder Developer Edition.
    3. An ArcGIS Online or ArcGIS Enterprise account you can configure Experience Builder with.
    4. An Azure DevOps account, and preferably an Azure App Service (you can create free ones).

    1: Getting started

    As stated above, you will need to have Docker installed on your machine to follow through with this workflow. If you do not have it installed, you can grab it for your particular OS below:

    Windows
    Mac
    Linux

    Next, you should create a new repository in Azure DevOps and clone this to your local machine. If you do not know how to do that, see the instructions here.

    Using Docker means we do not need to have all the Experience Builder folders in our repository, we only need folders related to widget development, and if we are creating an application, the folders that relate to that.

    Using a docker-compose file, we can map these folders into our Docker container, Experience Builder will pick up any code changes in our local files and compile them for use in the container.

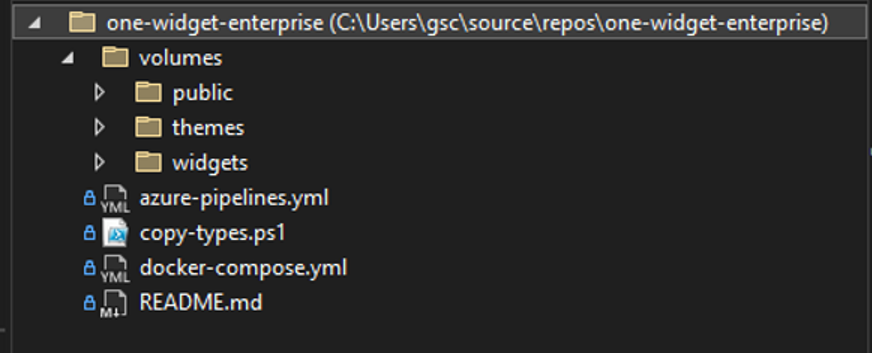
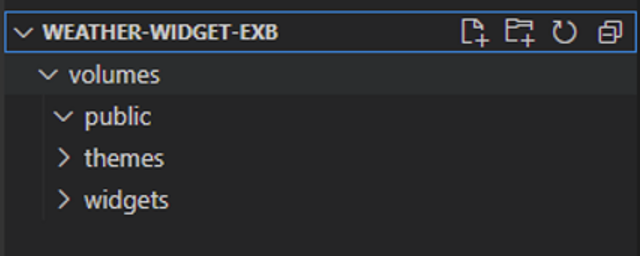
    Create a folder structure in your repository as follows.

    volumes
    –public
    –themes
    –widgets


    You may not necessarily need all these folders for this exercise, but this will give you a template for working with Docker and mapping volumes if you choose to do something different to the widget we are creating today.

    2: Getting Docker up and running

    Now we have the folder structure sorted, we need to get Docker up and running and map the folders we have just created into our container.

    We also need to do a secondary step to pull some information out of our container, to make it easier for us to develop against the Experience Builder framework.

    The first thing we need to do is create a docker-compose file, this is what we will use to launch our container and start-up Experience Builder. I have created a series of Experience Builder images for Docker for the different versions that are hosted on the Docker repository, feel free to use these, or if you wish to create your own, I will be creating another post that will explain the process to do this.

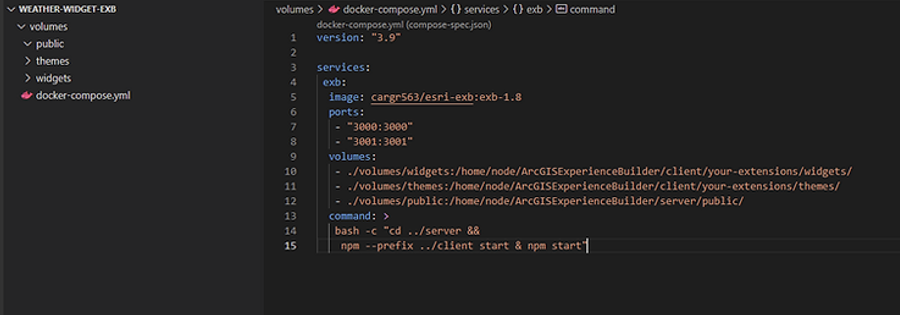
    Create a file called docker-compose.yml in the root of your repository and add the following.

    version: “3.9”

    services:
     exb:
      image: cargr563/esri-exb:exb-1.8
      ports:
       – “3000:3000”
       – “3001:3001”
      volumes:
       – ./volumes/widgets:/home/node/ArcGISExperienceBuilder/client/your-extensions/widgets/
       – ./volumes/themes:/home/node/ArcGISExperienceBuilder/client/your-extensions/themes/
       – ./volumes/public:/home/node/ArcGISExperienceBuilder/server/public/
      command: >
       bash -c “cd ../server &&
         npm –prefix ../client start & npm start”

    The yml above pulls the image from the esri-exb image, and grabs the 1.8 version, using the exb-1.8 tag.

    We map the ports on the container, to our localhost, so we can run Experience Builder as if it were on our own machine.

    The volumes section is where we map the folders that we have created into the container.

    Finally, once the container has started, we run the command to start the Experience Builder server and start the client folder to look for changes.

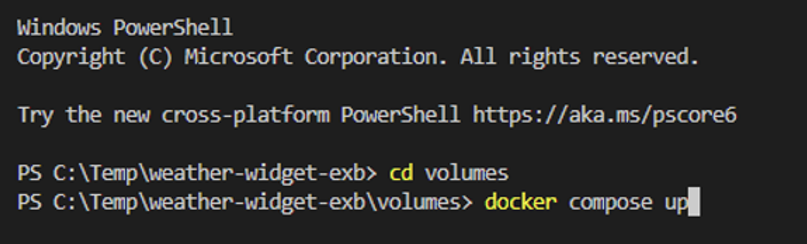
    To start all of this up, open a terminal window and ensure you are at the root of your repo (the same location as your docker-compose file.

    Run the following command

    docker compose up

    You should now see Docker pull the container, start it up, install the widget, and then run the commands to start Experience Builder.

    You will also see a series of errors, as we do not have any content in our widget folder yet.

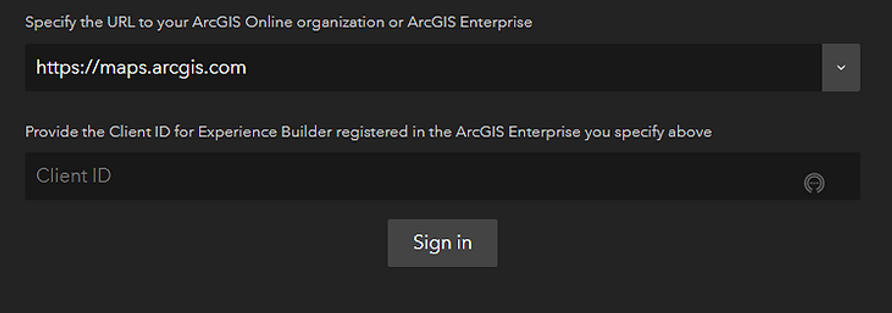
    With the command running, you should now be able to access Experience Builder in your browser by going to https://localhost:3001/

    You should hopefully see the following.


    Follow the instructions here to get set up with the Developer Edition of Experience Builder to create a client id.

    3: Creating the application

    The next step is to wrap the custom JSAPI widget we created in the first section into an Experience Builder widget.

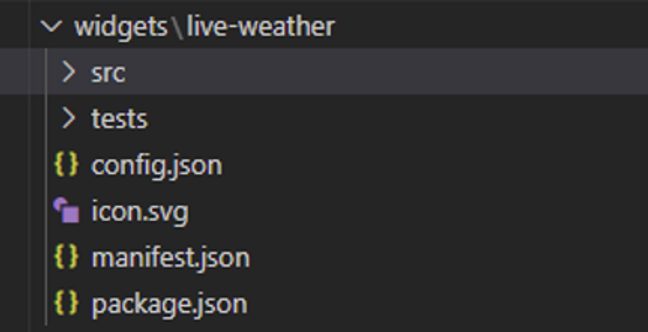
    To do this, we will create a new folder under the /widgets folder for our widget, call it live-weather

    Download the following code and copy it into your live-weather folder.

    widget.zip

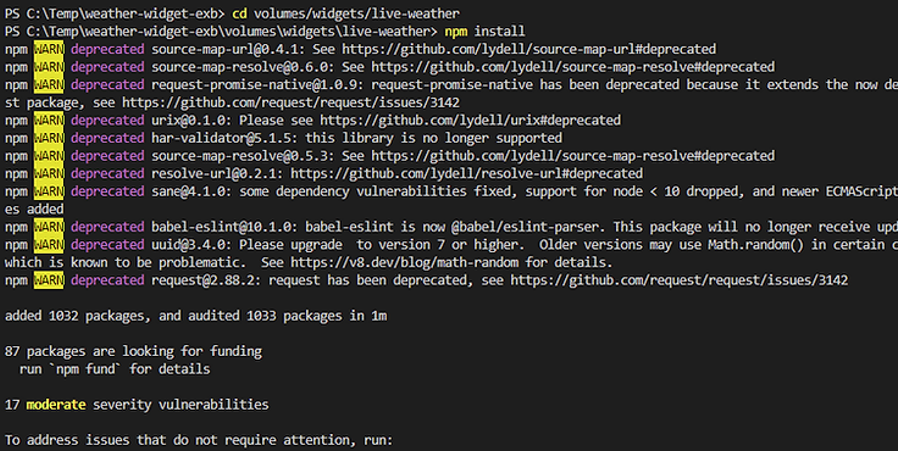
    As the code above already has a package.json included, you can run npm install at the root of the live-weather folder to install the widget and dependencies.


    You could also install this at the Experience Builder level as part of the docker compose. If this is required, I can provide details on how to do this, however, it is better to do it at this level as it will only be required by the widget we are creating.

    Next, we need to install the types from Experience Builder which ensures we are using the correct commands. The types are installed as part of the container, and now that we have started it (you must have started it at least once) we can copy those types out of the container to our local development machine.

    Note: if you upgrade the container to a new version of Experience Builder, you will have to run the command again, to ensure you are using the correct types for the Experience Builder version.

    Run the following command to get the id of the container, we will need this for the next step.

    docker ps -aqf “ancestor=cargr563/esri-exb:exb-1.8”

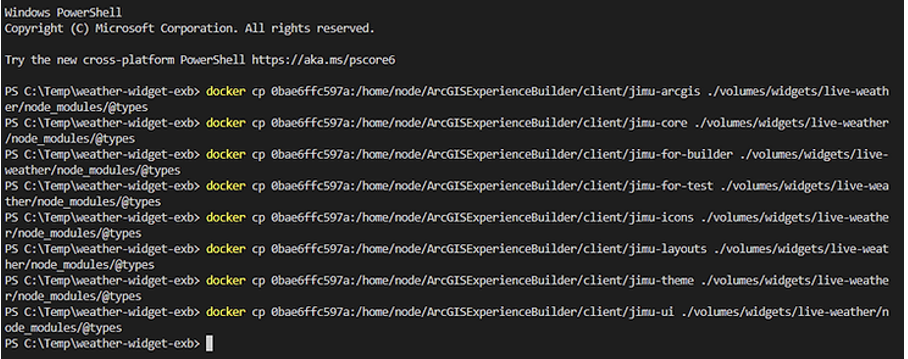
    This will return the id of the container. Substitute the container id in the below and run the commands to copy the types in to your local development machine.

    docker cp <containerId>:/home/node/ArcGISExperienceBuilder/client/jimu-arcgis ./volumes/widgets/live-weather/node_modules/@types
    docker cp <containerId>:/home/node/ArcGISExperienceBuilder/client/jimu-core ./volumes/widgets/live-weather/node_modules/@types
    docker cp <containerId>:/home/node/ArcGISExperienceBuilder/client/jimu-for-builder ./volumes/widgets/live-weather/node_modules/@types
    docker cp <containerId>:/home/node/ArcGISExperienceBuilder/client/jimu-for-test ./volumes/widgets/live-weather/node_modules/@types
    docker cp <containerId>:/home/node/ArcGISExperienceBuilder/client/jimu-icons ./volumes/widgets/live-weather/node_modules/@types
    docker cp <containerId>:/home/node/ArcGISExperienceBuilder/client/jimu-layouts ./volumes/widgets/live-weather/node_modules/@types
    docker cp <containerId>:/home/node/ArcGISExperienceBuilder/client/jimu-theme ./volumes/widgets/live-weather/node_modules/@types
    docker cp <containerId>:/home/node/ArcGISExperienceBuilder/client/jimu-ui ./volumes/widgets/live-weather/node_modules/@types

    4: Understanding the code

    Inspect the code and comments to understand how we are wrapping the widget, to make this work you will need to create a free account at https://www.weatherapi.com/ and obtain use your API key in the widget initialisation.

    If you would like to understand the code more, see the sample code from Esri here.

    The final thing to do is create an application with the widget, or if you want to skip all that, then you can copy the below code into the public folder.

    apps.zip

    Ensuring it looks like the following.

    5: The build pipeline

    For us to create the build pipeline, the first thing we need to do is create some variables that we will use throughout the process.

    To get started, in the Experience Builder repository, click the button to set up the build.


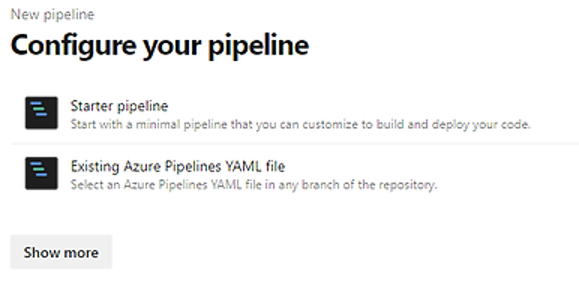
    This will open the pipeline editor, select Starter Pipeline from the options presented.


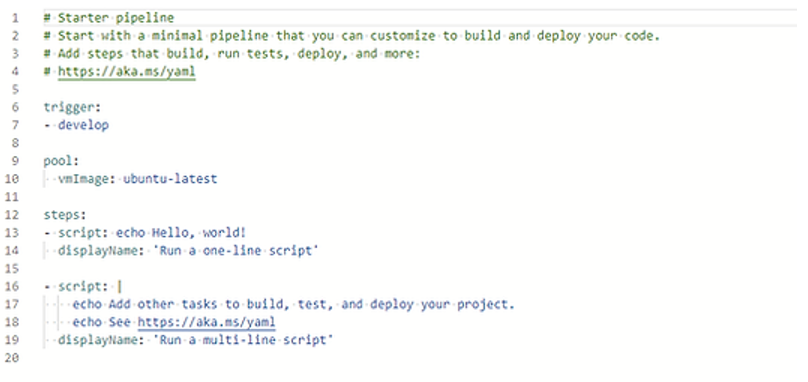
    You will now see a starter pipeline with some hello world code.


    Remove all code from line 13 down.

    We now need to add in a pipeline variable, this will be a variable that is only available to the pipeline, eg it cannot be shared with any other pipeline like the ones created in a variable library. Click the Variables button to add a new variable.

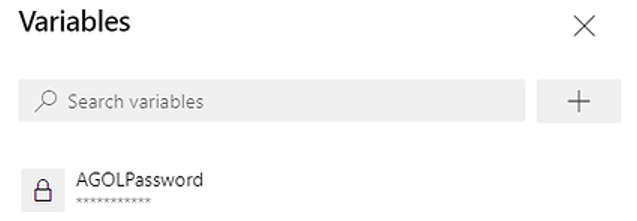
    In the page that appears, add a new variable called AGOLPassword and add your password to your ArcGIS Online account. Ensure you hit the padlock to keep the value secret.

    Next, click the Library section to add a new Variable Group.

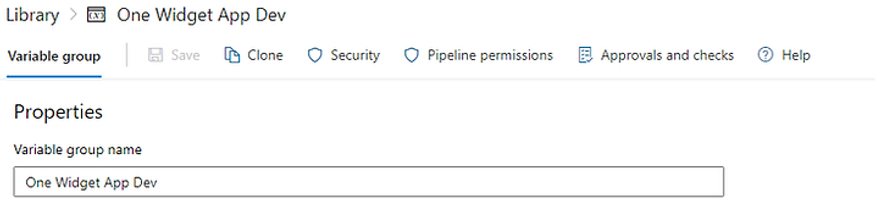
    Call the group One Widget App Dev.


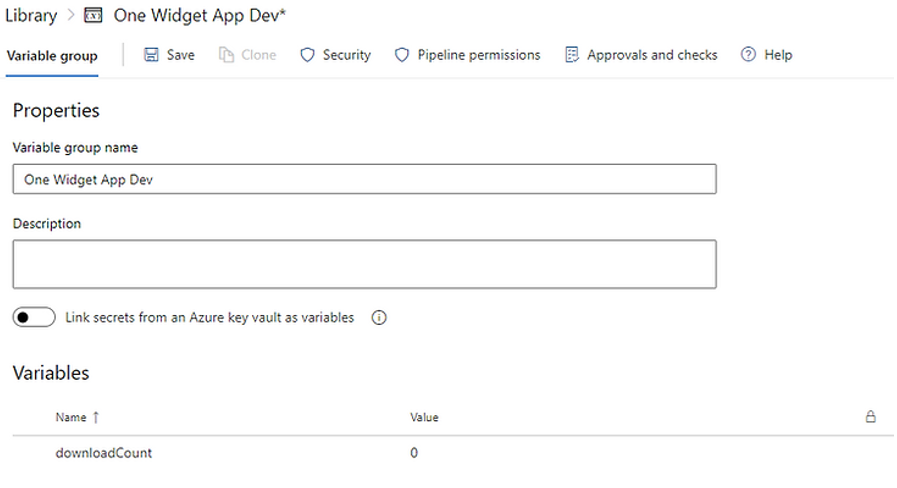
    Add a variable to the group called downloadCount and set its value to 0. There is no need to keep this value secret.

    Take note of the variableGroupId in the address bar, we will need this when we are creating the build pipeline. In this instance, it is 6

    With that done we can now go back to editing our pipeline.

    The build pipeline for the Experience Builder application is somewhat complex; download the file below open it up and copy the contents into your azure-pipelines file.

    azure-pipelines.zip

    Below is a detailed explanation of each step

    At the top of the file, we declare the variables that we want to use within the pipeline. The first one we are pulling from a variable group, using the group identifier, and assigning it to a variable in the pipeline, this is a count of the number of times we have built the application, this is done as Experience Builder has a cache busting mechanism, and without it, we would need to ask users to clear their cache each time we made a release.

    variables:

    – group: One Widget App Dev
    – name: cdnNo
       value: $[variables.downloadCount]

    The second variable is a system access token, we need this as we will be programmatically updating our variable library.

    – name: SYSTEM_ACCESSTOKEN
       value: $(System.AccessToken)

    The second variable is the version we are targeting. By doing this we can make it simple to upgrade the version of Experience Builder.

    – name: ExbVersion
       value: 1.8

    In the next step, we use the out-of-the-box tools from Esri to download Experience Builder into the pipeline, we need to supply the command line with a username and password, and we supply the password as the variable we created.

    – task: CmdLine@2
        displayName: Download Experience Builder
        env:
            ARCGIS_LIB_DOWNLOADER_USERNAME: gsc_eaglegis
            ARCGIS_LIB_DOWNLOADER_PASSWORD: $(AGOLPassword)
        inputs:
            script: |
                npx arcgis-lib-downloader -p arcgis-experience-builder -v $(ExbVersion)

    Once Experience builder has been downloaded into the pipeline, we need to extract the files.

    – task: CmdLine@2
        displayName: Unzip Experience Builder
        inputs:
            script: |
    unzip -q arcgis-experience-builder-$(ExbVersion).zip -d arcgis-experience-builder-$(ExbVersion)

    In this step we copy the widgets that we have created out of our repository in to the pipeline.

    – task: CmdLine@2
        displayName: Copy widgets
        inputs:
            script: |
                dir
                cp -r volumes/widgets/* arcgis-experience-builder-$(ExbVersion)/ArcGISExperienceBuilder/client/your-extensions/widgets

    As Experience Builder has never started, we need to create the app directory to hold our application.

    – task: CmdLine@2
        displayName: Create App Directory
        inputs:
            workingDirectory: arcgis-experience-builder-$(ExbVersion)/ArcGISExperienceBuilder/server
            script: |
                mkdir public && cd public && mkdir apps && cd apps

    In this step we take the current download count and increment it in the download_times.json file. We use PowerShell to achieve this. Its important to note, that in the below, the assumption is that our application is in the 0 folder.

    – task: PowerShell@2
        displayName: Update the download times in JSON
        inputs:
            targetType: ‘inline’
            script: |
            # Create the download count file and update the contents to our download count
            $dwnCount = ($(cdnNo) -as [int]) + 1
            Write-Output $dwnCount
            Set-Content -Path volumes\public\apps\0\download-times.json -Value $dwnCount

            Write-Output $(cdnNo)

    After we have updated the download count, we need to go back to our variable library and update the count in there. Again, we need to use PowerShell to achieve this. This where we need to add id of the variable library. You can see this being used below after the reference to ..variablesgroups/6? We also need to ensure that the build process has the correct permissions to update the library.

    – task: PowerShell@2
        displayName: Update the download times in libraries
        inputs:
            targetType: ‘inline’
            script: |
                $NewValue = ($(cdnNo) -as [int]) + 1
                $VariableName = “downloadCount”
                Write-Host “NewValue : $NewValue”
                $url = “$($env:SYSTEM_TEAMFOUNDATIONCOLLECTIONURI)$env:SYSTEM_TEAMPROJECTID/_apis/distributedtask/variablegroups/6?api-version=6.0-preview.2”
                Write-Output “$(SYSTEM_ACCESSTOKEN)”
                Write-Host “URL: $url”
                $authHeader = @{Authorization = “Bearer $(SYSTEM_ACCESSTOKEN)”}
                $definition = Invoke-RestMethod -Uri $url -ContentType “application/json” -Headers $authHeader
                Write-Output “$definition”
                Write-Host “Pipeline = $($definition | ConvertTo-Json -Depth 100)”
                $definition.variables.downloadCount.value = $NewValue
                $definitionJson = $definition | ConvertTo-Json -Depth 100 -Compress
                Write-Output “$definitionJson”
                Invoke-RestMethod -Method Put -Uri $url -Headers $authHeader -ContentType “application/json” -Body ([System.Text.Encoding]::UTF8.GetBytes($definitionJson)) | Out-Null

    Next, we copy our application from the repository into the app folder we created, so that we can create our application.

    – task: CmdLine@2
        displayName: Copy app directory
            inputs:
                script: |
                    dir
                    cp -r volumes/public/apps/* arcgis-experience-builder-$(ExbVersion)/ArcGISExperienceBuilder/server/public/apps

    Next, we do the install for the client folder.

    – task: CmdLine@2
        displayName: NPM install client folder
            inputs:
                workingDirectory: arcgis-experience-builder-$(ExbVersion)/ArcGISExperienceBuilder/client
                script: |
                    npm ci

    Next, we install the dependancies for our custom widget.

    – task: CmdLine@2
        displayName: NPM install dependancies for custom widget
        inputs:
            workingDirectory: arcgis-experience-builder-$(ExbVersion)/ArcGISExperienceBuilder/client/your-extensions/widgets/live-weather
            script: |
                npm install

    We do a check for updates to our custom widget.

    – task: CmdLine@2
        displayName: Update NPM custom widget
            inputs:
                workingDirectory: arcgis-experience-builder-$(ExbVersion)/ArcGISExperienceBuilder/client/your-extensions/widgets/live-weather
            script: |
                npm update @eaglegis/weather-widget

    Finally for Experience Builder we install the server.

    – task: CmdLine@2
        displayName: NPM install server folder
            inputs:
                workingDirectory: arcgis-experience-builder-$(ExbVersion)/ArcGISExperienceBuilder/server
                script: |
                    npm ci

    With server installed, we can now call the build command to build our widgets in to the dist folder.

    – task: CmdLine@2
        displayName: Build widgets
        inputs:
            workingDirectory: arcgis-experience-builder-$(ExbVersion)/ArcGISExperienceBuilder/client
            script: |
            npm run build:dev

    Next, we run the download script which compiles our application and puts all the required files into a single zip file.

    – task: CmdLine@2
        displayName: Run download script
        inputs:
            workingDirectory: arcgis-experience-builder-$(ExbVersion)/ArcGISExperienceBuilder
            script: |
                node -e “require(‘./server/src/middlewares/dev/apps/app-download.js’).zipApp(‘0’, ‘app.zip’)”

    We then unzip that file, as we will need to access the internal files later in our release pipeline.

    – task: CmdLine@2
        displayName: Unzip Experience Builder
        inputs:
            workingDirectory: arcgis-experience-builder-$(ExbVersion)/ArcGISExperienceBuilder
            script: |
                unzip -q app.zip -d app
                chmod -R 777 app

    We copy the application to our staging directory.

    – task: CopyFiles@2
        inputs:
          SourceFolder: ‘arcgis-experience-builder-$(ExbVersion)/ArcGISExperienceBuilder/app’
          Contents: ‘**’
          TargetFolder: ‘$(Build.ArtifactStagingDirectory)/$(Build.BuildId)’
          CleanTargetFolder: true
          OverWrite: true

    Finally, publish the application to the aritfact directory to make it available to the rest of DevOps.

    – task: PublishBuildArtifacts@1
        inputs:
          PathtoPublish: ‘$(Build.ArtifactStagingDirectory)/$(Build.BuildId)’
          ArtifactName: ‘exb-app-deploy’
          publishLocation: ‘Container’

    6: Create Release Pipeline

    The last step is to take the artifact we have created and publish this to the internet. Below we will publish to an Azure App Service, but you can publish to a container, a static website, or anything you would like.

    To complete, this you should already have an Azure account and have created an Azure App Service within that account.

    Go to the Releases section.

    Add a new release.

    Select the Azure App Service Deployment template.

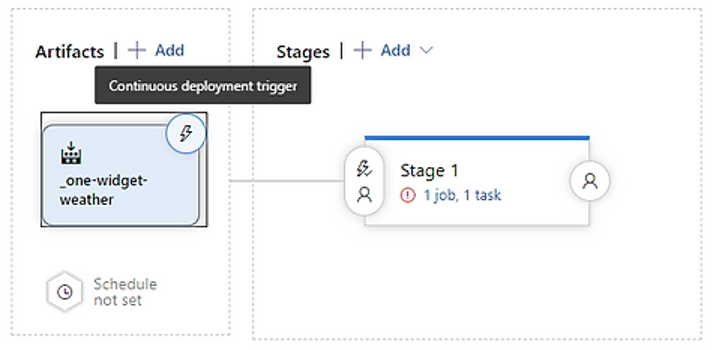
    In the Artifacts window, add the artifact from the build pipeline.


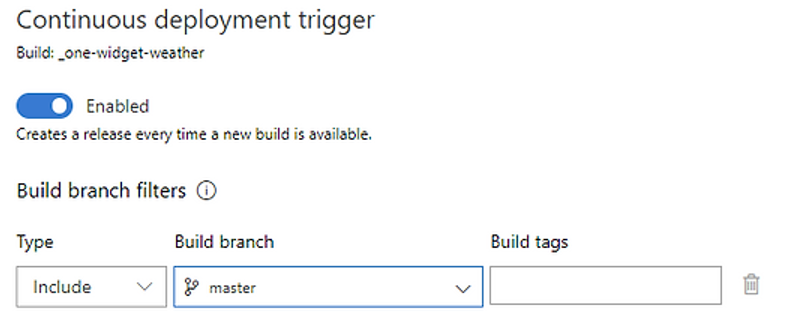
    Set up the continuous deployment trigger by clicking the lightning bolt.


    Configure the trigger as follows.

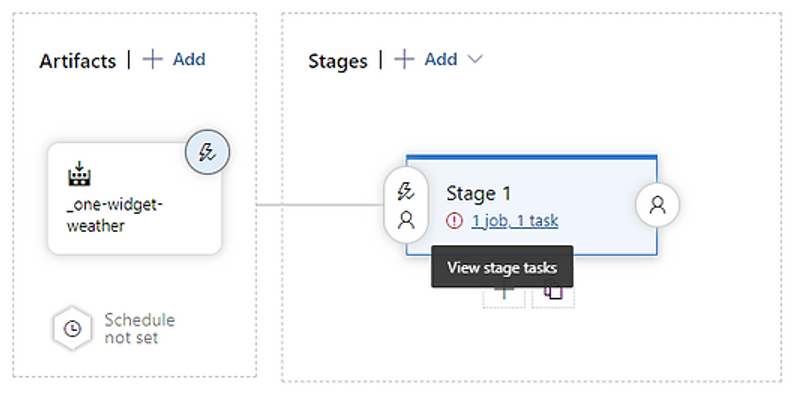
    Next, open the Stage.

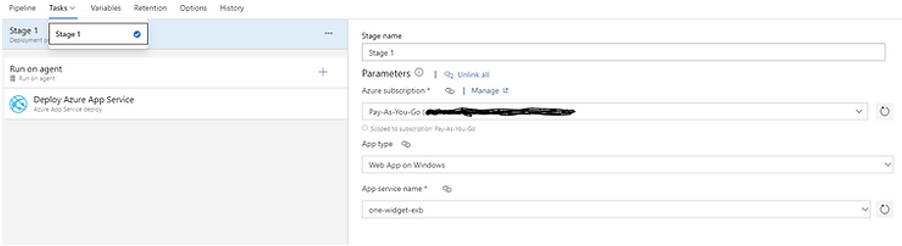
    With Stage 1 selected, configure it as follows.

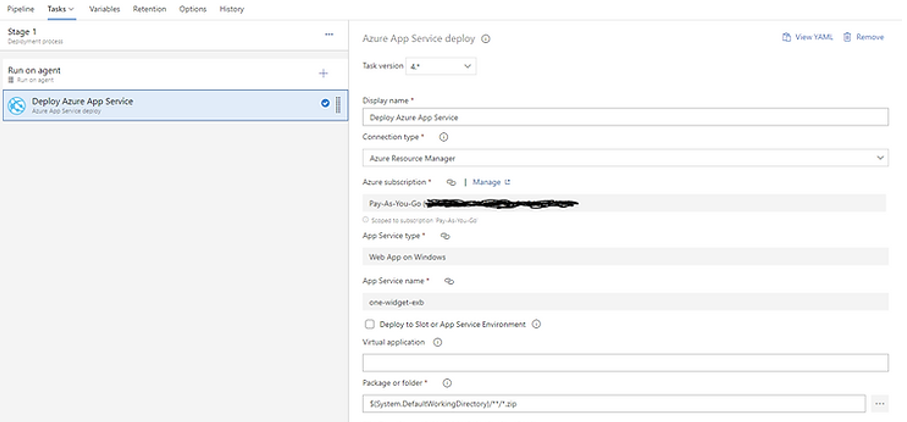
    Next, click on the Deploy Azure App Service task, and configure as per below, substituting in your own values.

    And that is it! If you want to add in pre-deployment approvals, then you can do that at the overview page of the release pipeline.

    This release pipeline is quite basic, in a future post, I will show how you can create a pipeline for a secure app working against multiple different environments, Dev, Test, PreProd and Production, substituting in variables for each environment.

    An example of the resulting app from the above can be viewed here

  • Creating and distributing Esri custom widgets (Part 1)

    Creating and distributing Esri custom widgets (Part 1)

    This is the first of four posts where I will describe an end-to-end workflow for developing a custom Esri JavaScript widget and distributing it across multiple locations. Specifically showing how to:

    1. Build a single standalone custom Esri JavaScript API widget.
    2. Use the widget within an Experience Builder application.
    3. Use the widget within a standalone Esri JavaScript Application.
    4. Publish the widget to ArcGIS Enterprise 11.0 (To be done once 11.0 is released).

    An example of the widget can be viewed below.

    https://one-widget-app.azurewebsites.net/

    Inspiration for this came from the blog posts by Gavin Rehkemper on the Esri GeoNet site:

    https://community.esri.com/t5/gis-blog/the-one-widget-part-1/ba-p/896799

    https://community.esri.com/t5/gis-blog/the-one-widget-part-2/ba-p/896887

    The details of how to publish to npm, were modified from the details in this blog post from Georgi Parlakov here.

    Overview

    In this first post, we will:

    1.     Create a repository for our widget

    2.     Add tools to support building and testing our widget

    3.     Automatically build and publish the widget to npm

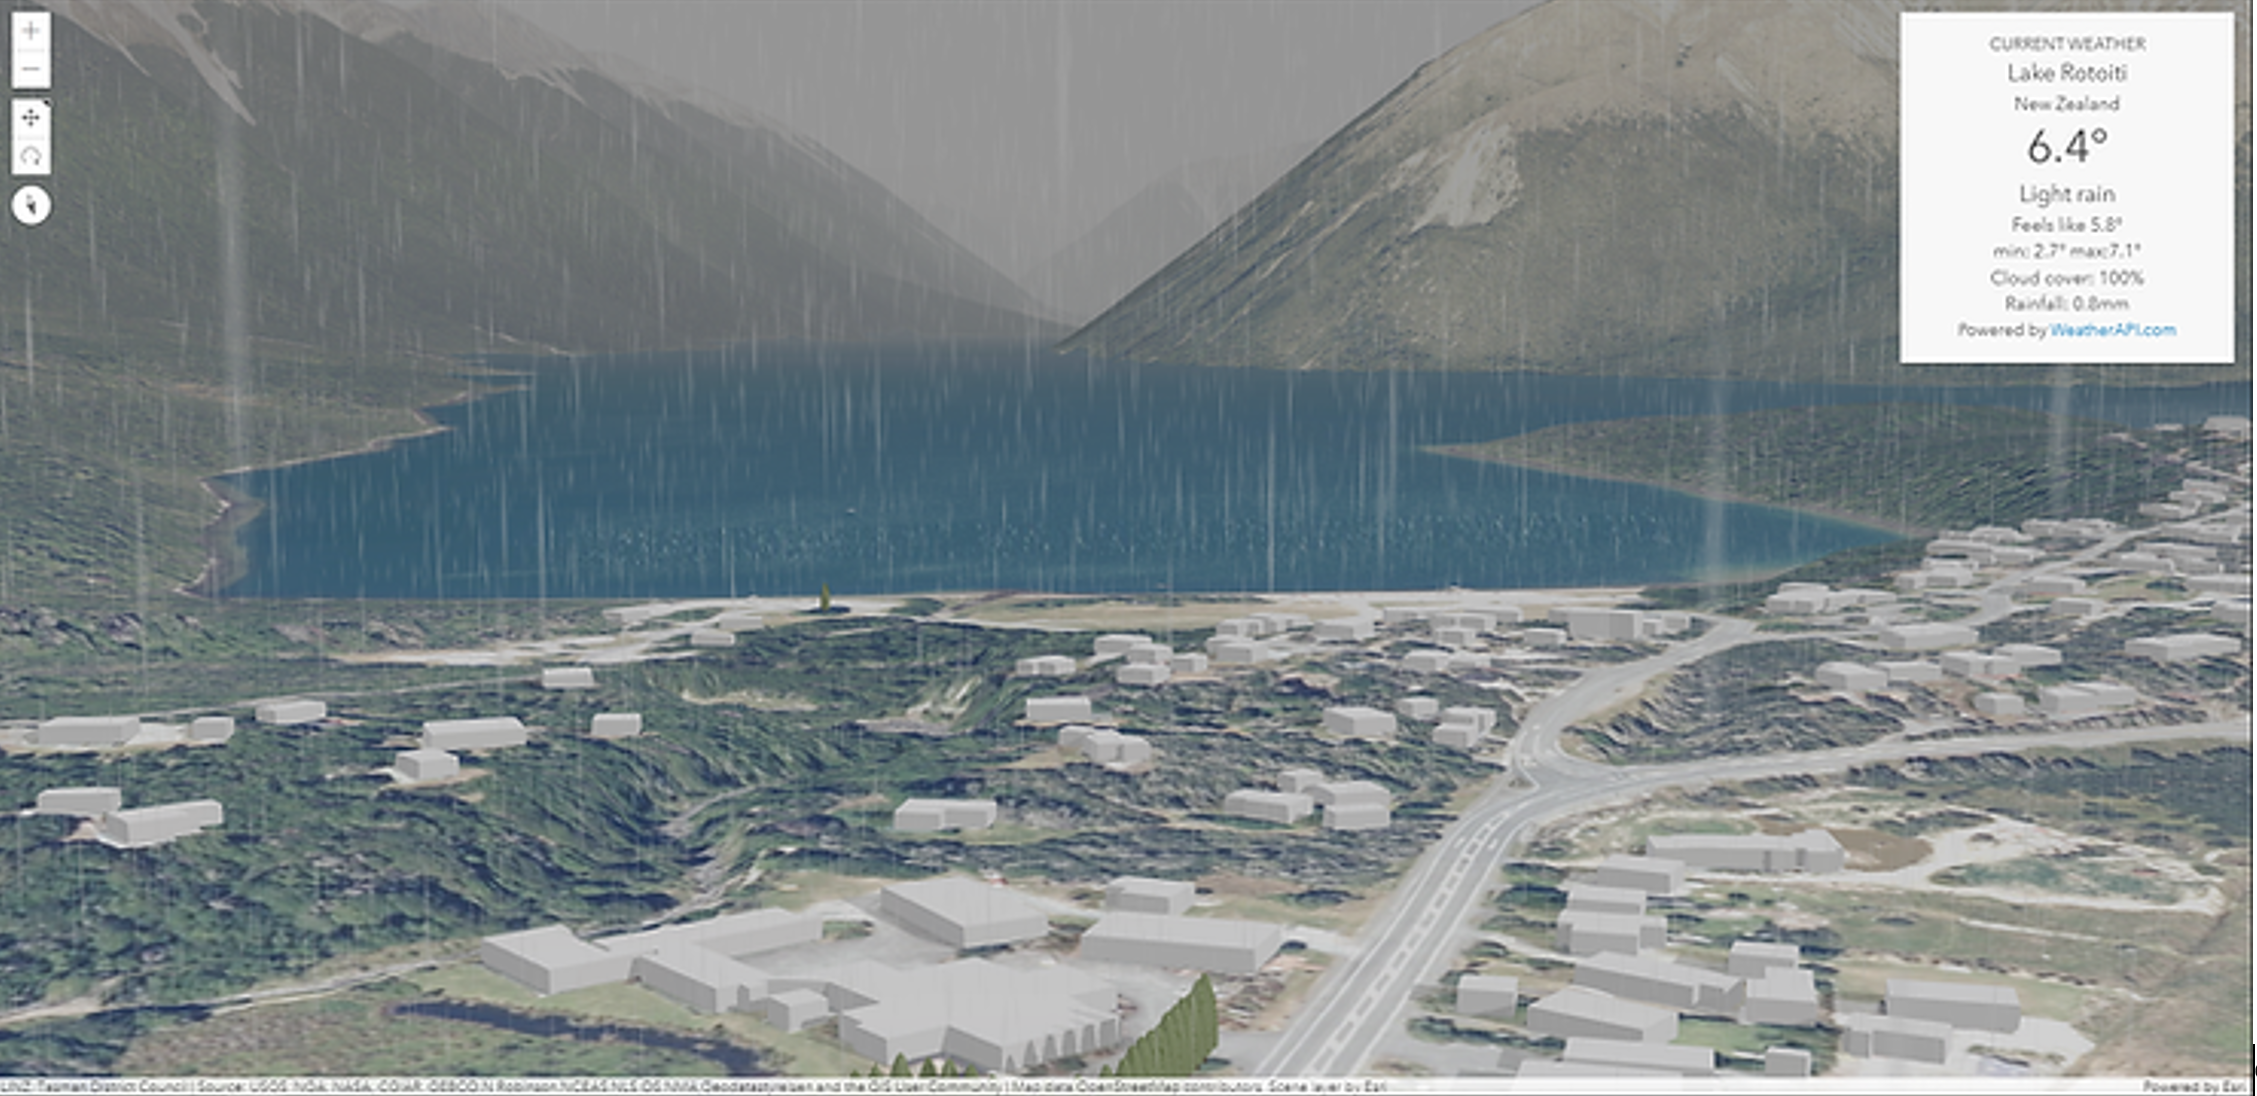
    The widget we are building is a live weather widget, which will take the current location on the map, and return the current weather at that location, additionally, if we use it with a SceneView, we can use the latest tools from the Esri JavaScript API, to create a realistic view of the location
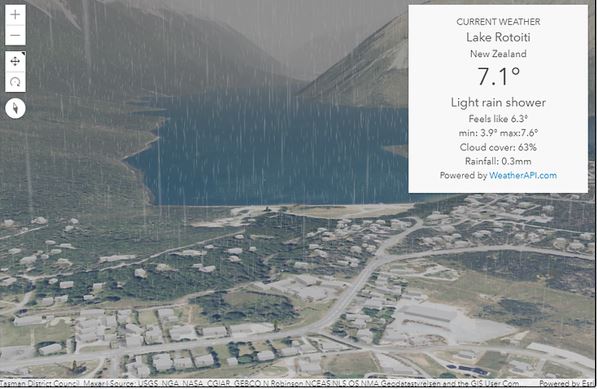


    To use the weather API, you will need an API key, you can create a free account at WeatherAPI.com to get one.

    You will also need an npm account as well, these are free, however, if you also want to create an organisation and create private packages, then this will cost $7 USD per user a month.

    1: Create your repository

    If you do not have an Azure DevOps organisation, you can sign up and create one for free.

    Within Azure DevOps, create a new project then navigate to the Repos->Files page.


    Your project may already have a repository in it, from the drop box, select New repository
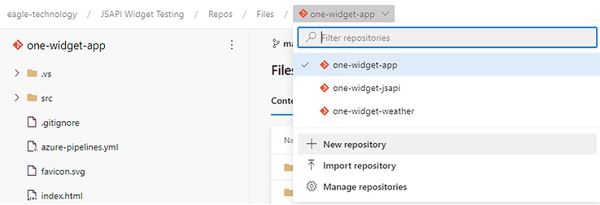
    Enter a name for your repository and accept the rest of the defaults.
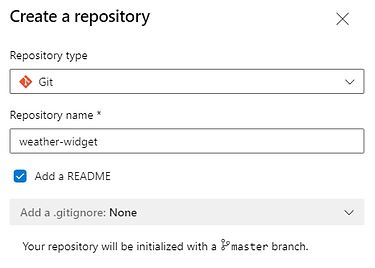

    Now that we have the repository created, we need to clone it on to our local machine so we can start developing.

    In the top right of the screen click the ellipsis and select Clone.
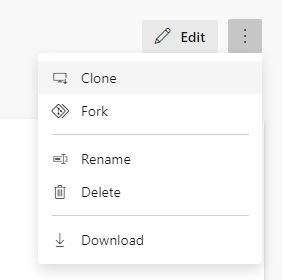
    Next select the IDE that you want to use, in this example, we will use VS Code. (Ensure you have VS Code installed already, the link to download is here)
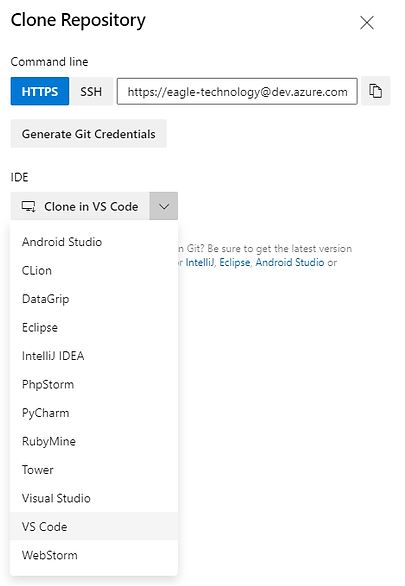
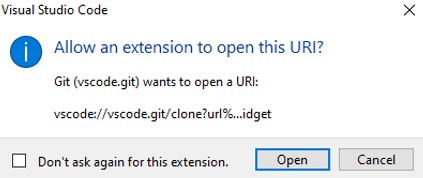
    Allow the extension to open the URI.
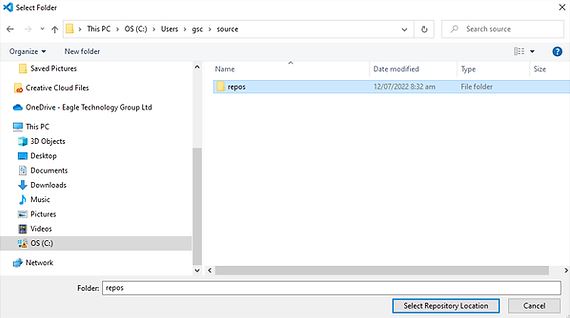
    Enter a folder location to store the repository, it’s a good idea to have a single folder for all your development projects.


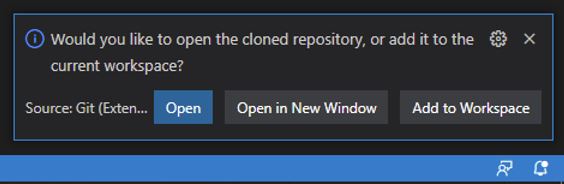
    VS Code will now clone the repository and ask you if you want to open it, select Open.


    Within the root of the repository, build out a folder structure as below.

    widget

     –src

        –model

        –view-model

    The widget folder will hold all of the files for our custom widget. The src folder contains the .tsx and ts files for our widget. The model folder will hold any files relating to any data-related classes that we will create. The view-model folder will hold any view-model classes that we create.

    2: Get set up with npm

    The next step in creating the custom widget is to install some of the libraries we will need to support our widget. We will use NPM to scaffold out the details of our widget and allow us to install these libraries.

    NPM will create a package.Json file that will store the details of our widget, and which extra libraries we will need to install to support it and it can also be used to build and publish our application.

    Open a command prompt or use the terminal window in VS Code (if you are using it) and navigate to the root of your widget, if you have followed the folder structure suggested in the first section, this will be the /widget directory.

    1.     Run the command

    npm init



    The first question will be the package name, give your widget a name, use lowercase letters, and use the – character for spaces. As we are publishing to a npm organisation, we add in the name of the organisation (scope) and then the name we want to give to our widget.

    Accept the default for the version. Enter a meaningful description for the widget, this will be displayed in the npm website when the package is published. For the entry point enter dist/index.js Accept the default entry for the test command. Hit Enter to accept for the default git repository (if you have created the repo this should be pre-populated). Enter some keywords that will make your widget searchable. Hit Enter to accept the default for the license.
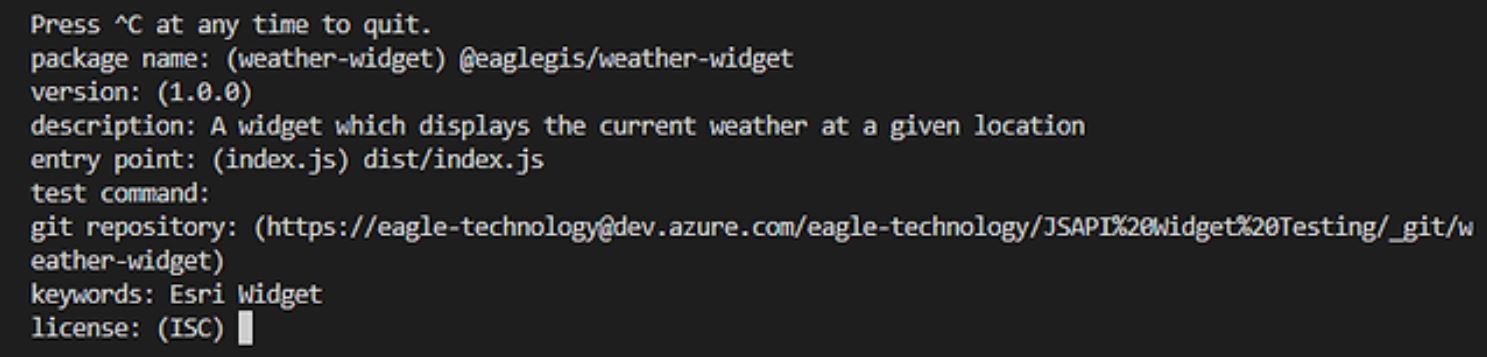
    You should see a readout of what npm is about to create, hit enter to accept it.
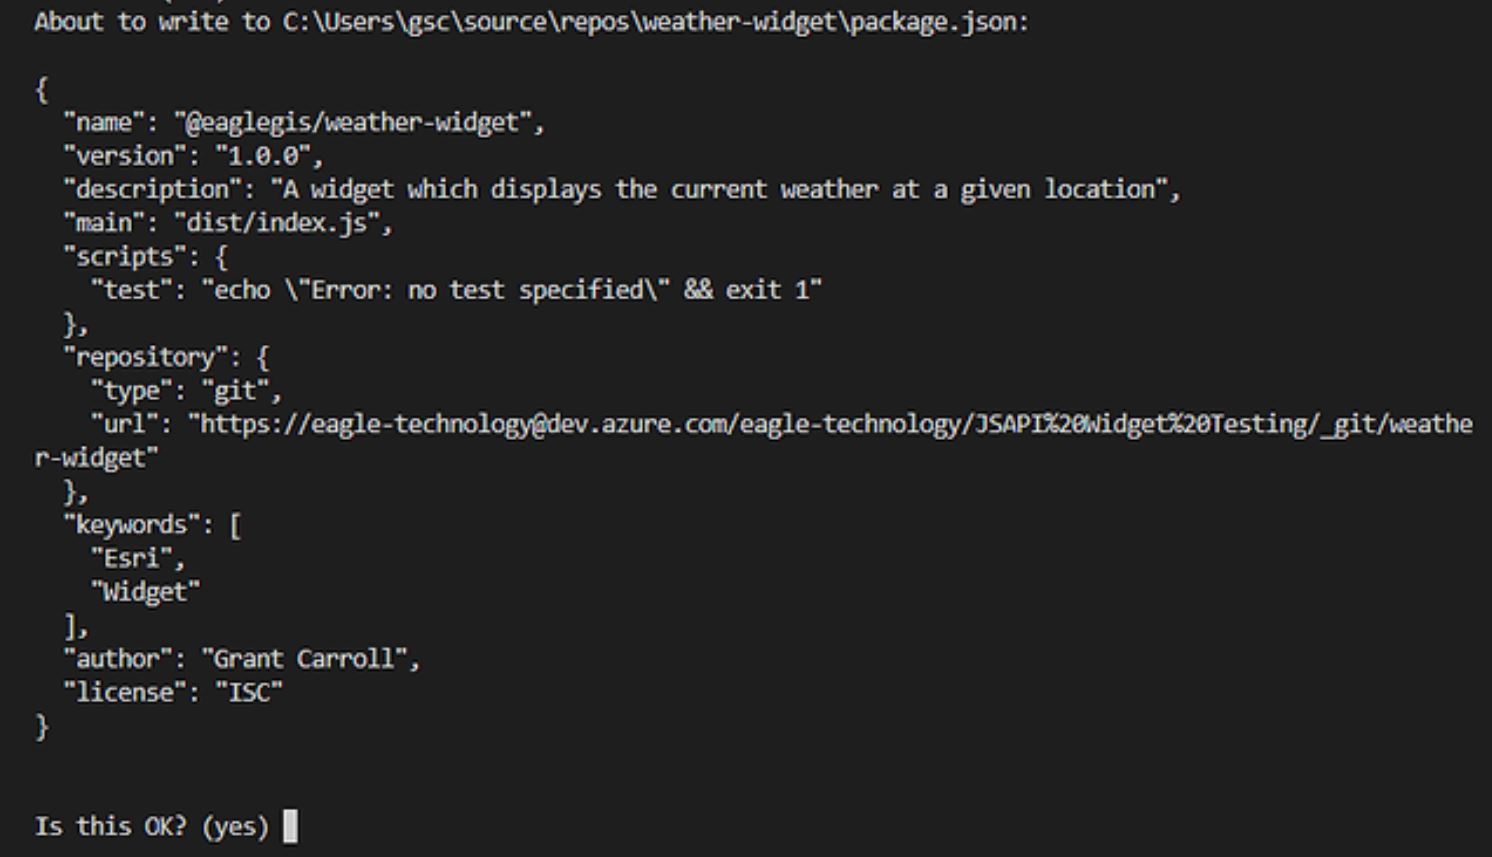
    You should now see a package.json in your folder.
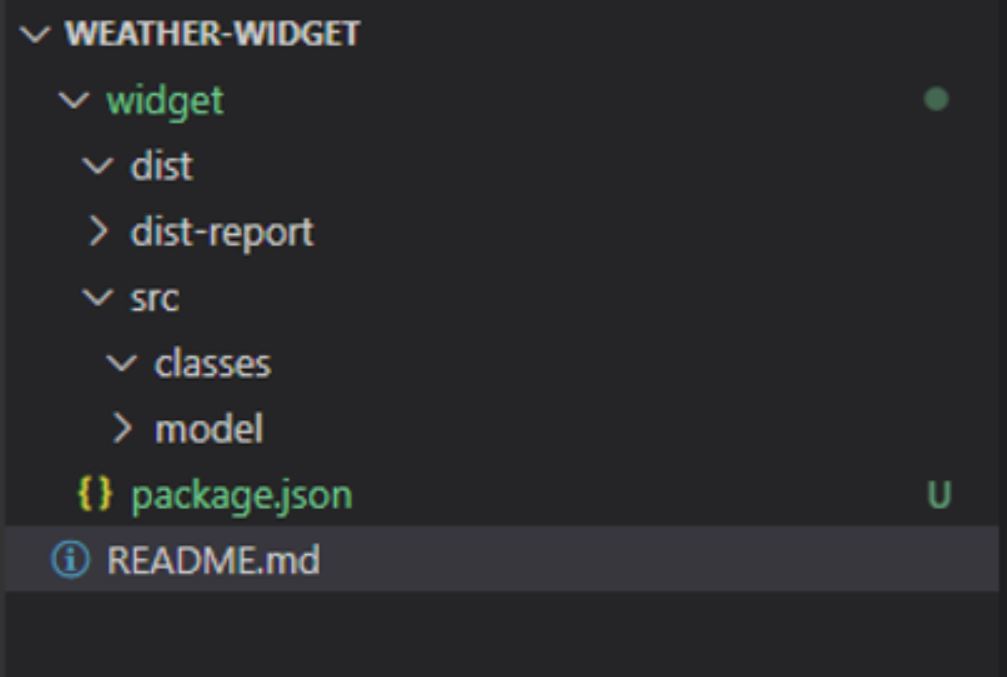
    Open the package.json file and add the following.

    “module”: “dist/index.es.js”,

    “jsnext:main”: “dist/index.es.js”,

    “source”: “./src/widget.tsx”,

    “type”:”module”,

    “types”: “dist/widget.d.ts”,

    The next step is to install the libraries that will be used to allow us to create and build the desired functionality in the widget.

    Open a command prompt/terminal window and ensure that you are in the widget folder.

    Enter the following command to install the Esri JSAPI.

    npm install @arcgis/core

    rollup.js is a build system that will package our widget into an output module which we can then publish to npm.

    Enter the following command and hit enter.

    npm install –save-dev rollup

    npm install –save-dev rollup-plugin-commonjs

    npm install –save-dev rollup-plugin-peer-deps-external

    npm install –save-dev rollup-plugin-node-resolve

    npm install –save-dev rollup-plugin-typescript2

    To ensure we are writing good quality code, we should install a test system so that we can write unit tests to help prevent regressions coming into our code. We will use the jest library for testing.

    Enter the following commands.

    npm install –save-dev jest typescript

    npm install –save-dev ts-jest @types/jest

    npm install –save-dev ts-jest

    npm install –save-dev ts-node

    As we want to report the details of our test results to DevOps, we should also install JUnit which allows us to produce output that can be read by DevOps.

    npm install –save-dev jest-junit

    Finally, we will install copyfiles which will allow us to push files from our build into our demo app where we can debug it.

    npm install –save-dev copyfiles

    4: Configure components

    Add a .gitignore

    In the widget folder, add a new file and call it .gitignore and add the following to it.

    node_modules

    .DS_Store

    dist

    dist-report

    *.local

    package-lock.json

    This will tell git that we do not want to push these files up into our repository.

    Configure TypeScript

    All the code that we write will be done in TypeScript. TypeScript is a superset of JavaScript that provides strong typing for JavaScript, it helps prevent issues that can occur with JavaScript and ultimately aids in producing better code.

    Within the widget folder, create a new file called tsconfig.json.

    Once created enter the following into the file. This will tell the TypeScript complier how we want to compile the TypeScript we write into JavaScript.

    {

        “compilerOptions”:

        {

            “outDir”: “dist”,

            “esModuleInterop”: true,

            “lib”: [ “ES2020”, “DOM” ],

            “module”: “ES2020”,

            “target”: “ES2020”,

            “experimentalDecorators”: true,

            “importHelpers”: true,

            “jsx”: “react”,

            “jsxFactory”: “tsx”,

            “allowJs”: true,

            “declaration”: true,

            “moduleResolution”: “Node”,

            “noImplicitAny”: true,

            “noImplicitReturns”: true,

            “noUnusedLocals”: true,

            “noUnusedParameters”: true,

            “preserveConstEnums”: true,

            “resolveJsonModule”: true,

            “sourceMap”: true,

            “strict”: true,

            “suppressImplicitAnyIndexErrors”: true

        },

        “include”: [ “src” ],

        “exclude”: [“dist”,”node_modules”]

    }

    Configure rollup.js

    The purpose of rollup.js is to create the build for us, which will take our TypeScript and compile it into JavaScript. There are a few configurations we need to provide to ensure we get something that works for us and ensures our tests run correctly.

    In the /widget folder add a new file called rollup.config.js

    Copy the following code into the new file.

    import typescript from “rollup-plugin-typescript2”;

    import commonjs from “rollup-plugin-commonjs”;

    import external from “rollup-plugin-peer-deps-external”;

    import resolve from “rollup-plugin-node-resolve”;

    import pkg from “./package.json”;

    export default {

        input: “src/widget.tsx”,

        inlineDynamicImports: true,

        output: [

            {

                file: pkg.main,

                format: “cjs”,

                exports: “named”,

                sourcemap: true

            },

            {

                file: pkg.module,

                format: “es”,

                exports: “named”,

                sourcemap: true

            }

        ],

        plugins: [

            external(),

            resolve(),

            typescript({

                rollupCommonJSResolveHack: true,

                exclude: “**/__tests__/**”,

                clean: true

            }),

            commonjs({

                include: [“node_modules/**”],

                namedExports: {

                    “node_modules/react/react.js”: [

                        “Children”,

                        “Component”,

                        “PropTypes”,

                        “createElement”

                    ],   

                    “node_modules/react-dom/index.js”: [“render”]

                }

            })

        ]

    };

    Your widget folder should now look like this.
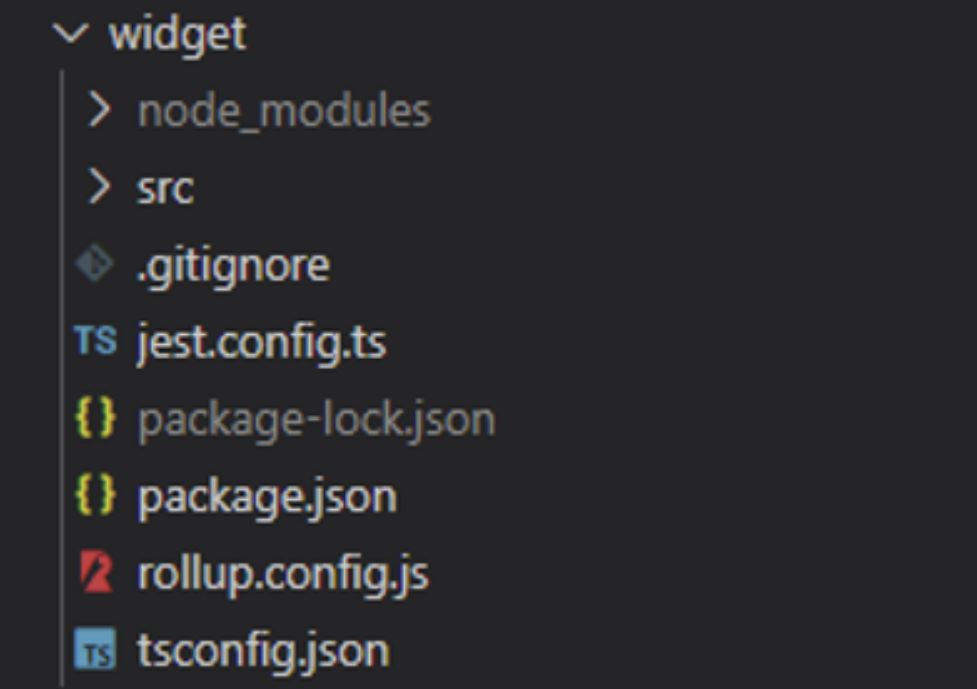

    There will be an error on the tsconfig.json file, but this is because the compiler has nothing to compile. So, let’s add the files to the src folder to allow us to build our widget.

    5: Scaffold the widget

    The code presented here will let you build out a weather widget that will take the input coordinates from a MapView or SceneView and display the current weather. The function of the widget is not the important lesson. The main lesson is to understand how to create a custom Esri JSAPI widget.

    Things to note.

    ·       For a full explanation of how to create a custom widget, look at the Esri developer documentation.

    ·       You must subclass the widget, without this the render method never gets called and nothing will refresh in your widget.

    ·       The widget must extend the base widget class from @arcgis/core/widgets/Widget.js



    ·       There are no frameworks used here, we are building a widget without anything like React/Vue/NextJS, etc. We use tsx to create the UI, but the TypeScript complier knows how to translate this into the correct UI for us (no React in involved).

    ·       The only mandatory method you need to provide is a render () method. See the widget lifecycle for the other methods that are available.

    ·       Any class you create should extend from Accessor and use marked properties, this is so that they can be watched by the Esri framework. See more details here.

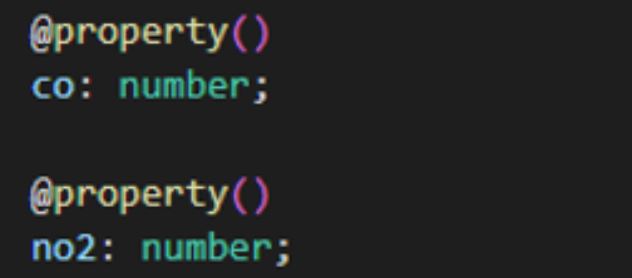
    ·       It’s a good idea to create interfaces for your TypeScript classes to allow for subtyping and inheritance.

    ·       The goal is to understand how to build a widget in a standard way using a Model-View-ViewModel (MVVM) pattern.

    The MVVM pattern means that as much as possible, we remove any logic out of our UI, and instead push that into the ViewModel which is responsible for providing/updating data back to the UI to be displayed. Any data we have is represented by the Model which is our representation of the data. This pattern has the added advantage that if a change to the UI is required, a user/developer can consume just the ViewModel and put their own UI on instead.

    With this in mind, download the attached files which contain all the files for the widget itself below

    widget-files.zip

    Unzip the files and copy them into your project, it should be obvious where they go. When you are done, your project should look like this.
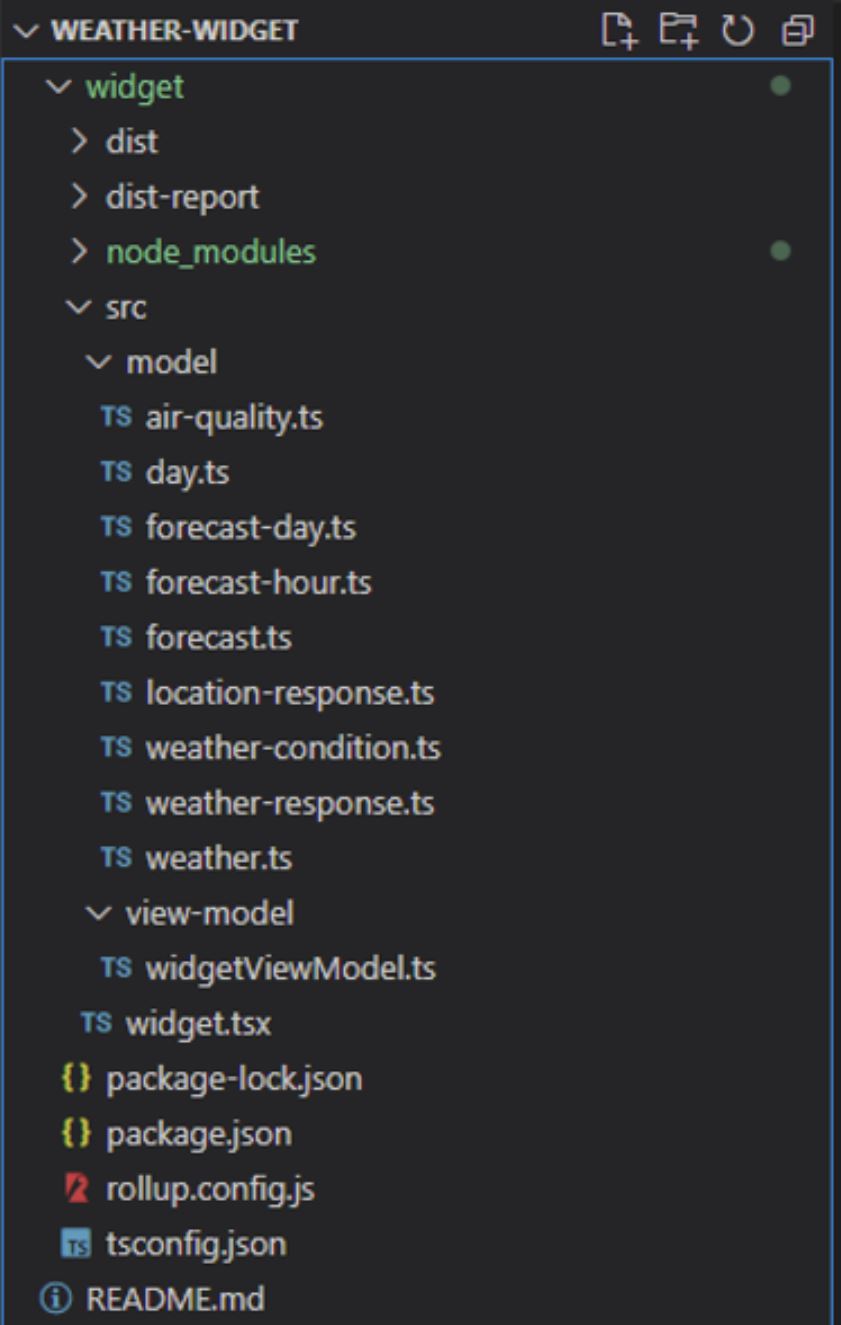
     

    Model folder

    The model folder contains a set of TypeScript files which are an implementation of the results we get back from the Weather API. These classes are used to hold the details, by creating the classes and creating the structure we can make use of the typing ability in TypeScript to ensure that we are not trying to access properties that don’t exist, or we are using them in the wrong way, e.g., trying to perform a mathematical operation on a string.

    View-Model folder

    The view-model folder contains our view model, this is a core part of the code for the application, it makes the calls to the Weather API to get the current weather, parses the results and updates the other properties on the view-model.

    widget.tsx

    The widget.tsx is our view, this is an extension of the base widget class in the Esri JSAPI. It contains the lifecycle methods and is also responsible for instantiating the view-model.

    6: Create the demo application
     

    To debug our widget, we need an application to test it in. In this step, we will create a simple application that we can load our widget into. Using this, we can use the browser debugging tools to find and fix any issues with our widget.

    To create the application, navigate to the root of the weather widget folder using a command prompt or terminal window.

    Enter the following command

    npm create vite@latest demo –template vanilla-ts
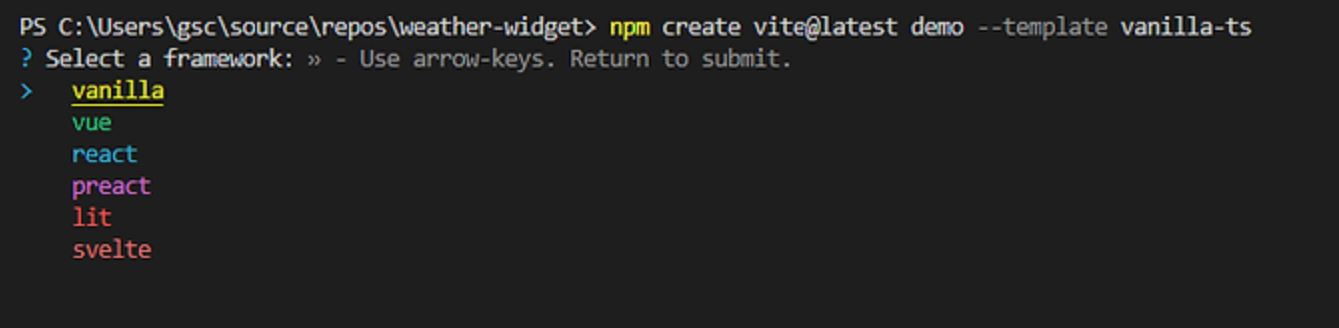
    Select the vanilla option.

    Then select the vanilla-ts option.

    You should then see something like the one below.
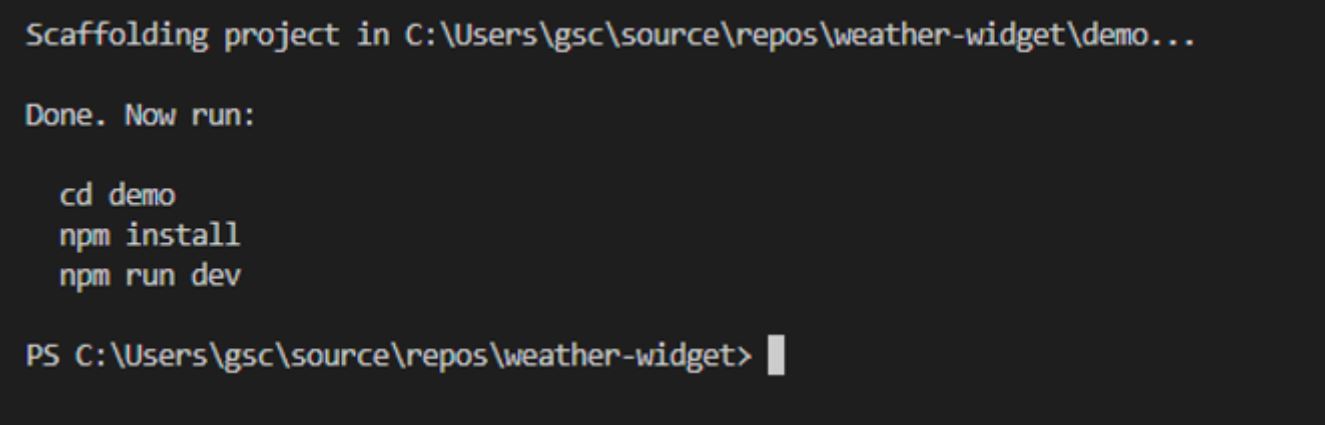
    Next, follow the instructions and enter

    cd demo

    then

    npm install
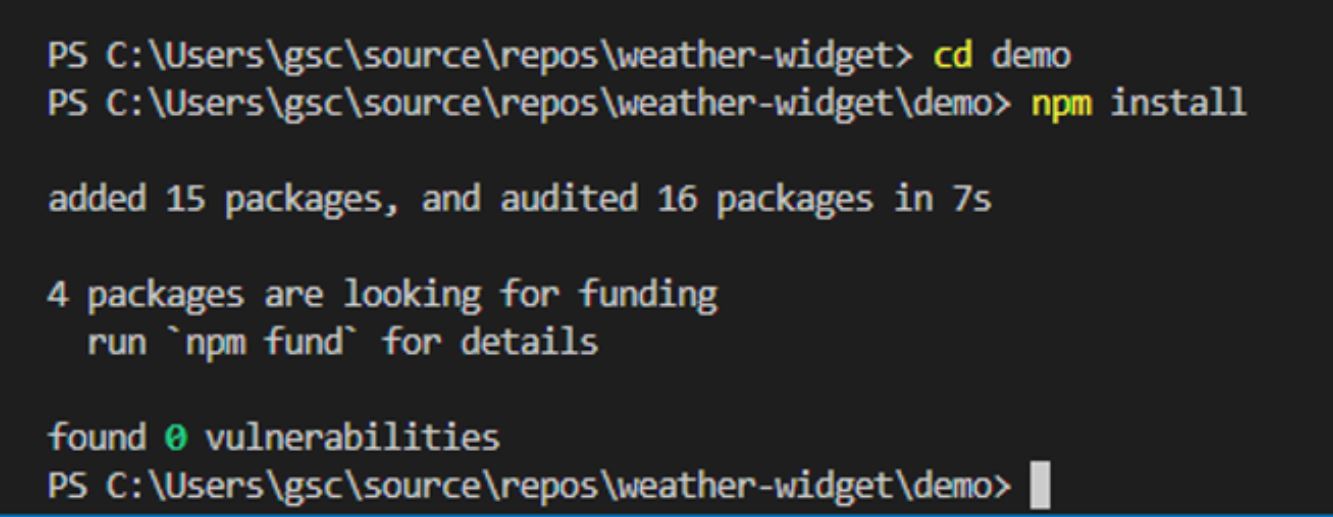
    Now try

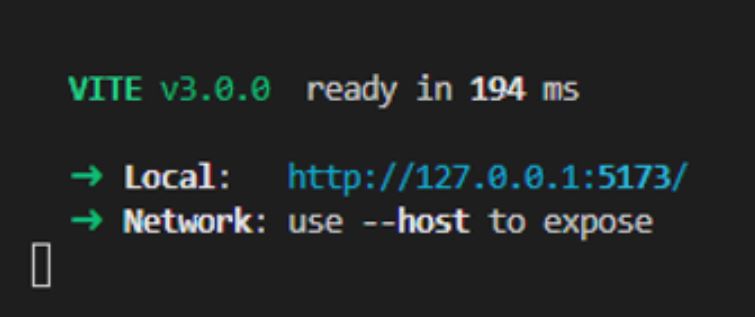
    npm run dev

    You should see something like this.
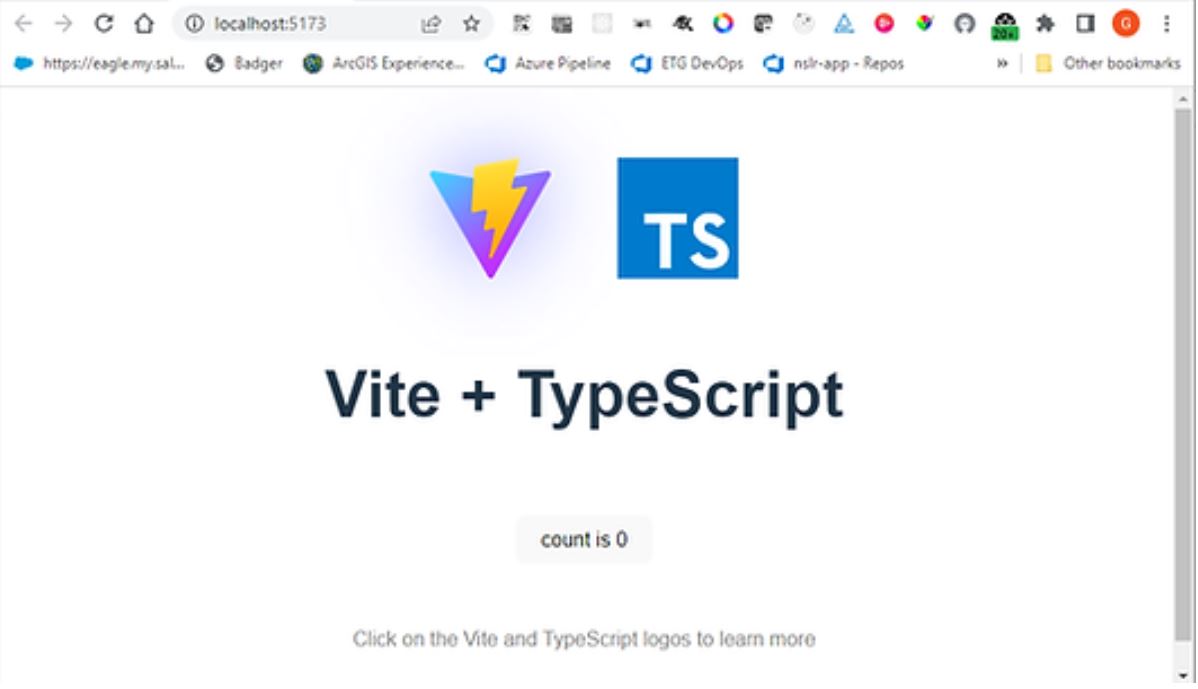
    Open a browser at http://localhost:5173 , you should see the basic application.
    We now need to update the demo application to allow us to debug our widget.

    Open the index.html page under /demo and update the title to ArcGIS Demo Application.

    Update the id of the div to viewDiv.



    Open the demo/src folder and delete counter.ts.

    Open the style.css file and replace the contents with the following:

    @import ‘https://js.arcgis.com/4.24/@arcgis/core/assets/esri/themes/light/main.css’;

    @import ‘https://s3-us-west-1.amazonaws.com/patterns.esri.com/files/calcite-web/1.2.5/css/calcite-web.min.css’;

    #viewDiv {

        padding: 0;

        margin: 0;

        height: 100vh;

        width: 100vw;

    }

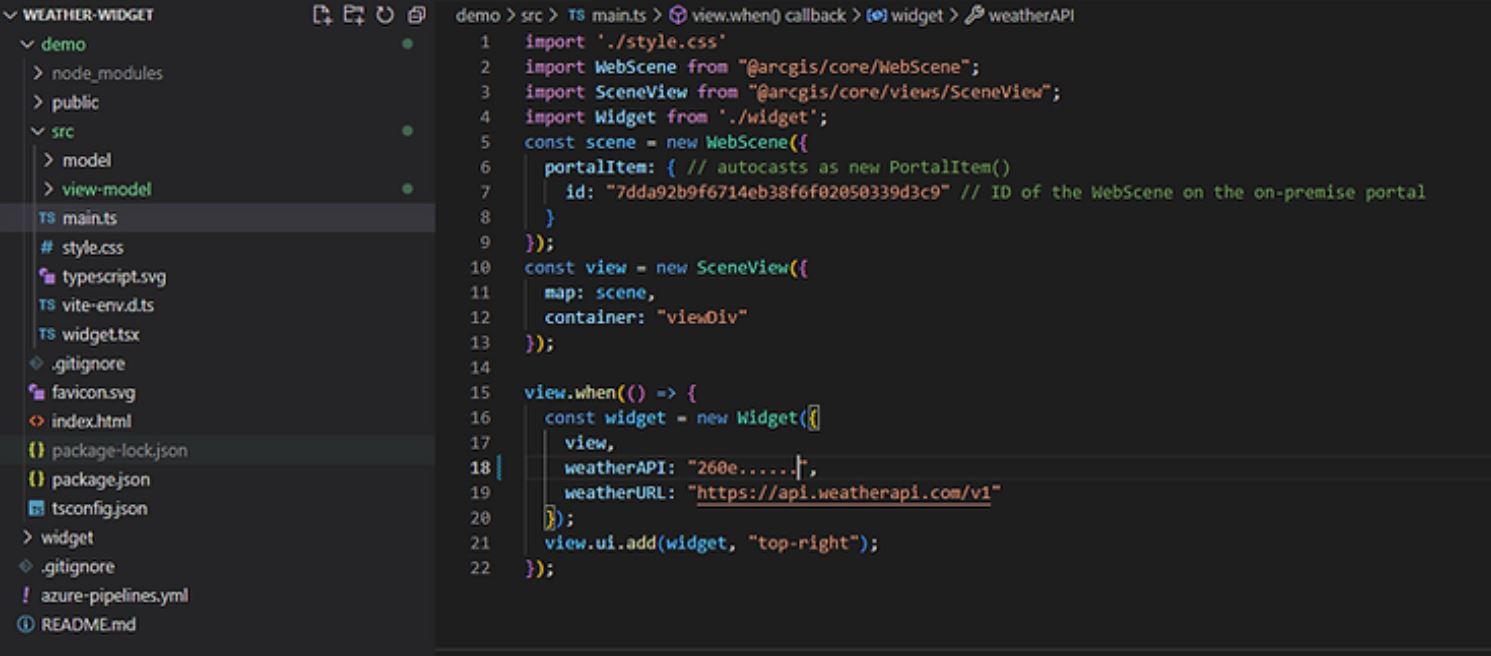
    Next open main.ts and replace the contents with the following. Make sure you add in your API Key from WeatherAPI.com

    import ‘./style.css’

    import WebScene from “@arcgis/core/WebScene”;

    import SceneView from “@arcgis/core/views/SceneView”;

    import Widget from ‘./widget’;

    const scene = new WebScene({

        portalItem: {

            id: “7dda92b9f6714eb38f6f02050339d3c9”

        }

    });

    const view = new SceneView({

        map: scene,

        container: “viewDiv”

    });

    view.when(() => {

        const widget = new Widget({

            view,

            weatherAPI: “<ENTER YOUR API KEY HERE>”,

            weatherURL: “https://api.weatherapi.com/v1”

        });

        view.ui.add(widget, “top-right”);

    });

    The code above imports our dependencies ,creates a new WebScene from an item in ArcGIS Online, then adds it to a new SceneView. When the SceneView is ready we add in our weather widget.
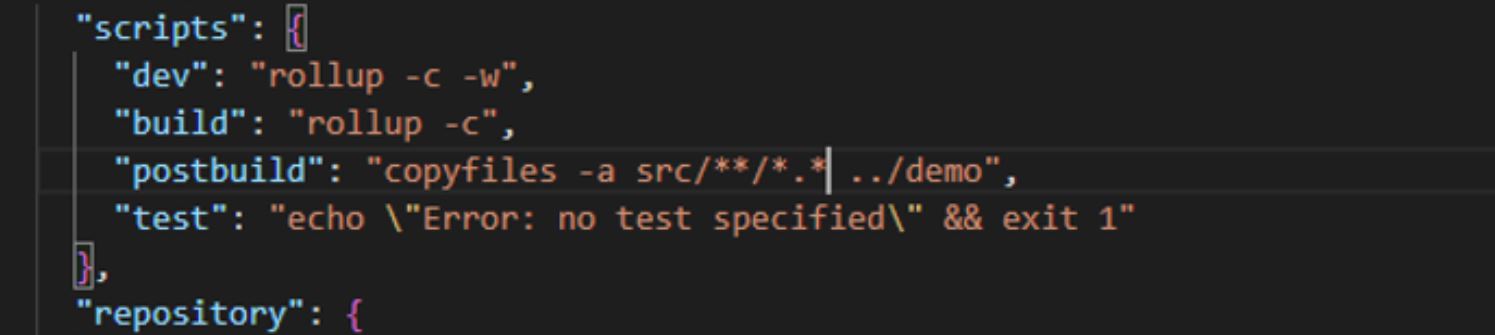
    Next, we want to pull in our widget files into the demo application, to make this simpler we can use npm to copy the files across for ius. To do this, open the package.json file in the widget folder and find the scripts section.

    Add in the following to the section.

    “dev”: “rollup -c -w”,

    “build”: “rollup -c”,

    “postbuild”: “copyfiles -a src/**/*.* ../demo”

    The dev script creates a watch that will build the files we have any time that we do a commit. The build script will run a build, while the postbuild will run once the build script has run. The postbuild will copy the files from our /src folder into the demo folder where the demo application can pick them up.
    Run the below command to test the build and copy process.

    run npm build

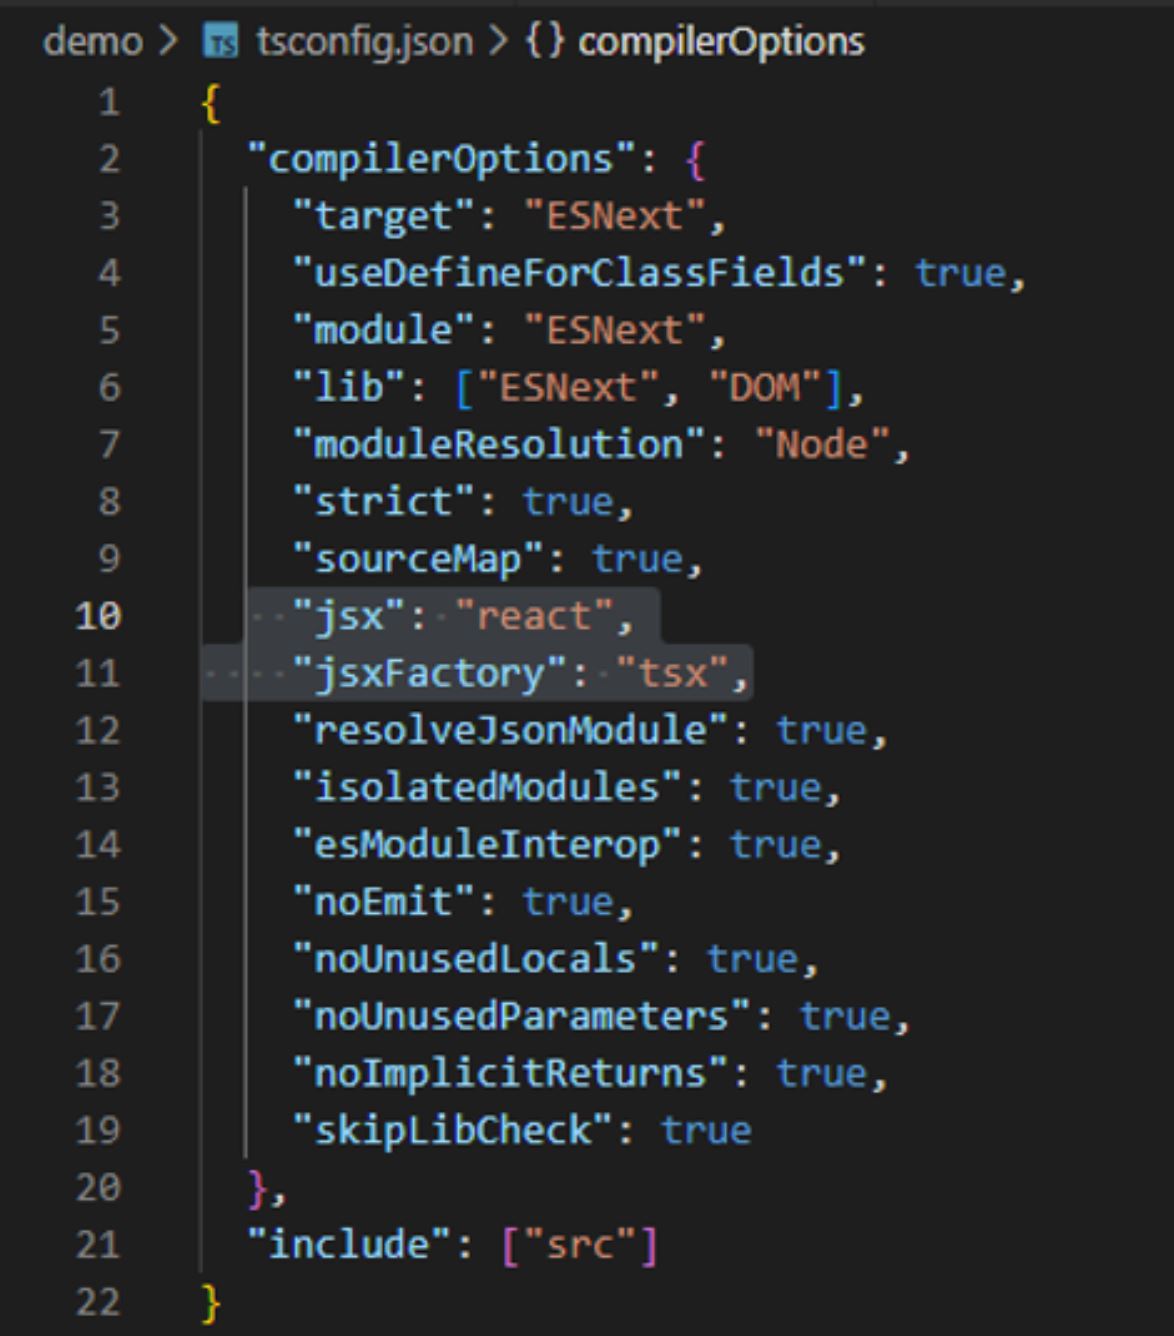
    The TypeScript complier will complain at this stage about the widget import. To fix this, open the tsconfig.json file in the demo folder and add in the following options to the complier options.

    “jsx”: “react”,

    “jsxFactory”: “tsx”,


    Within a console cd back to the demo folder and try:

    npm run dev.

    You should now be able to open a browser and see a web scene loaded and the widget up in the top right corner.
     

    7: Add in testing with Jest

    Now we have our weather widget up and running, we want to make sure that we keep it running, and that when we write new code, we don’t introduce new issues. This is where unit testing can help us.

    Jest is a test library we can use to write tests against our code. We will need to configure our project to work with it first.

    Open the package.json file and update the test command to the following

    “test”: “node –experimental-vm-modules node_modules/jest/bin/jest.js”

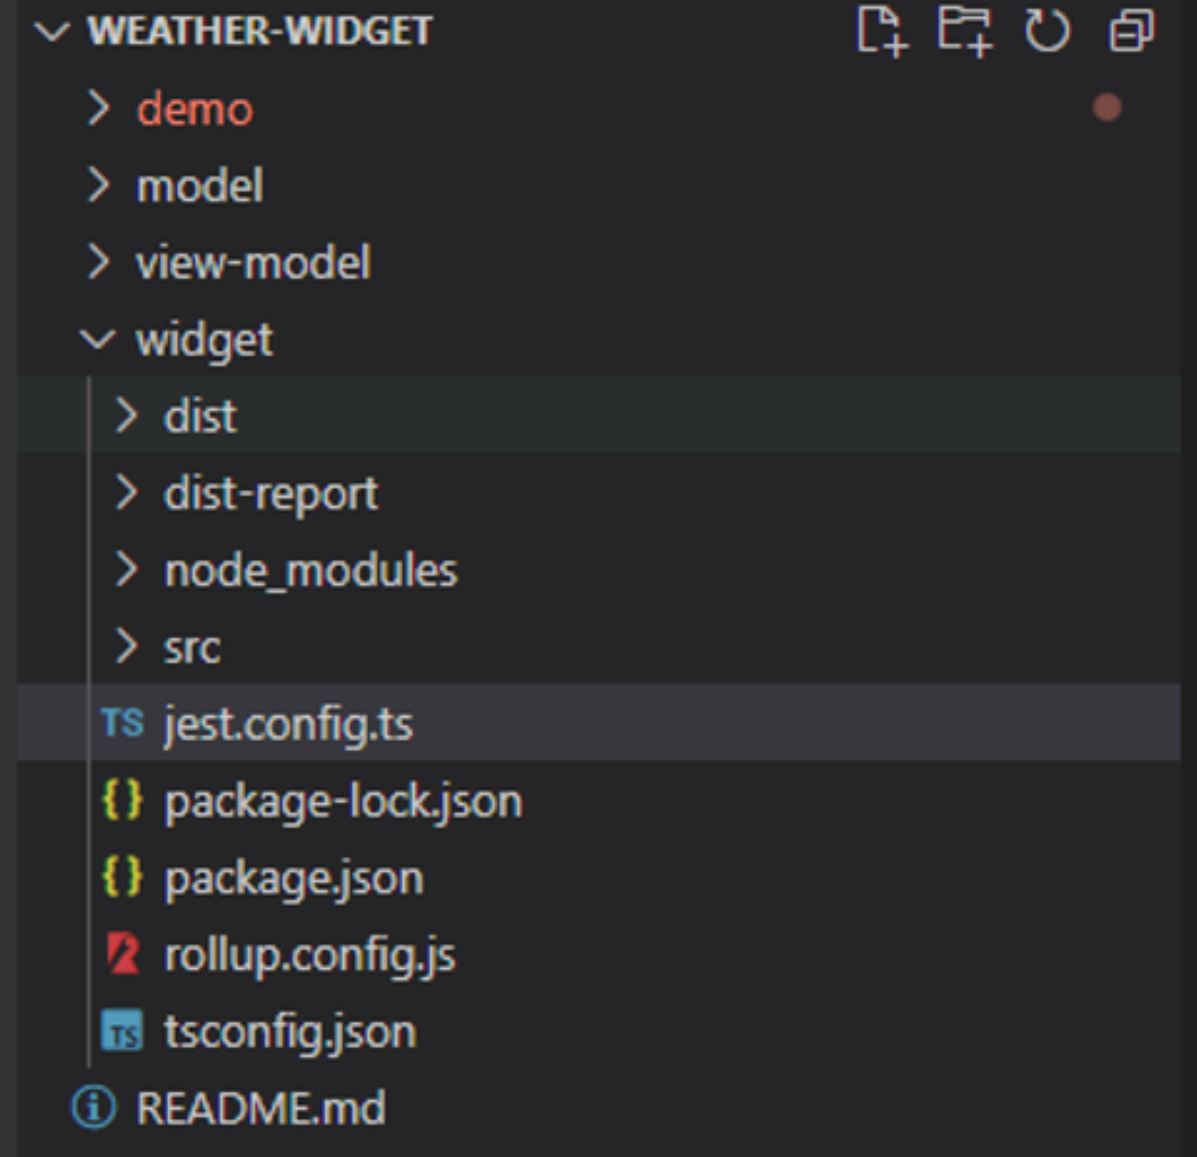
    Add a new file called jest.config.ts to the root of the widget folder and add in the following.


    /** @type {import(‘ts-jest/dist/types’).InitialOptionsTsJest} */

    export default {

        preset: ‘ts-jest’,

        moduleFileExtensions: [

            “ts”,

            “tsx”,

            “js”,

            “jsx”

            ],

        testEnvironment: ‘node’,

        testMatch: [‘<rootDir>/**/*.test.ts’],

        testPathIgnorePatterns: [‘/node_modules/’],

        collectCoverage: true,

        coverageDirectory: “<rootDir>/dist-report”,

        coverageReporters: [“json”, “html”, “cobertura”, “lcov”],

        reporters: [

            “default”,

            [

                “jest-junit”,

                {

                    outputDirectory: “dist-report”,

                    outputName: “ut-report.xml”

                }

            ]

        ],

        coveragePathIgnorePatterns: [‘node_modules’, ‘dist’],

        globals: { ‘ts-jest’: { diagnostics: false } },

        transform: {},

    };

    The above code tells jest that we are using TypeScript, to scan the folders for any files with .test.ts in the file name, and that we want to create a code coverage file and we want to report with JUnit.

    Open a command prompt and try running

    npm run test

    You should see something like the following.
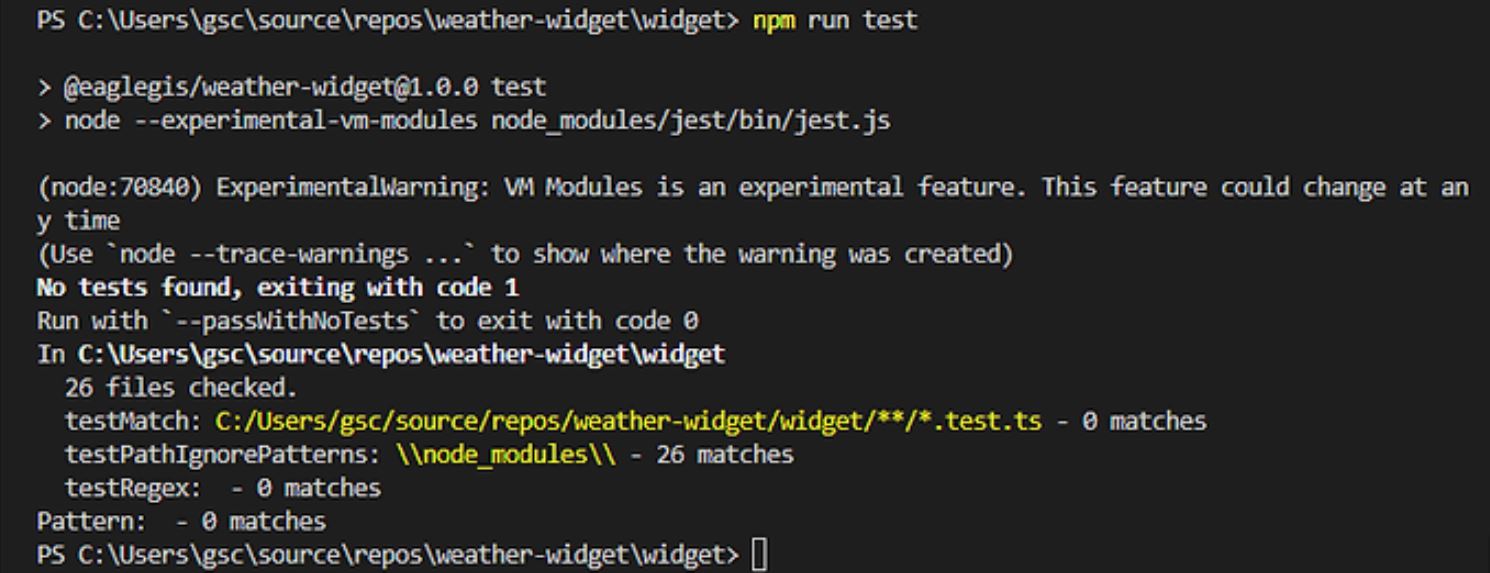
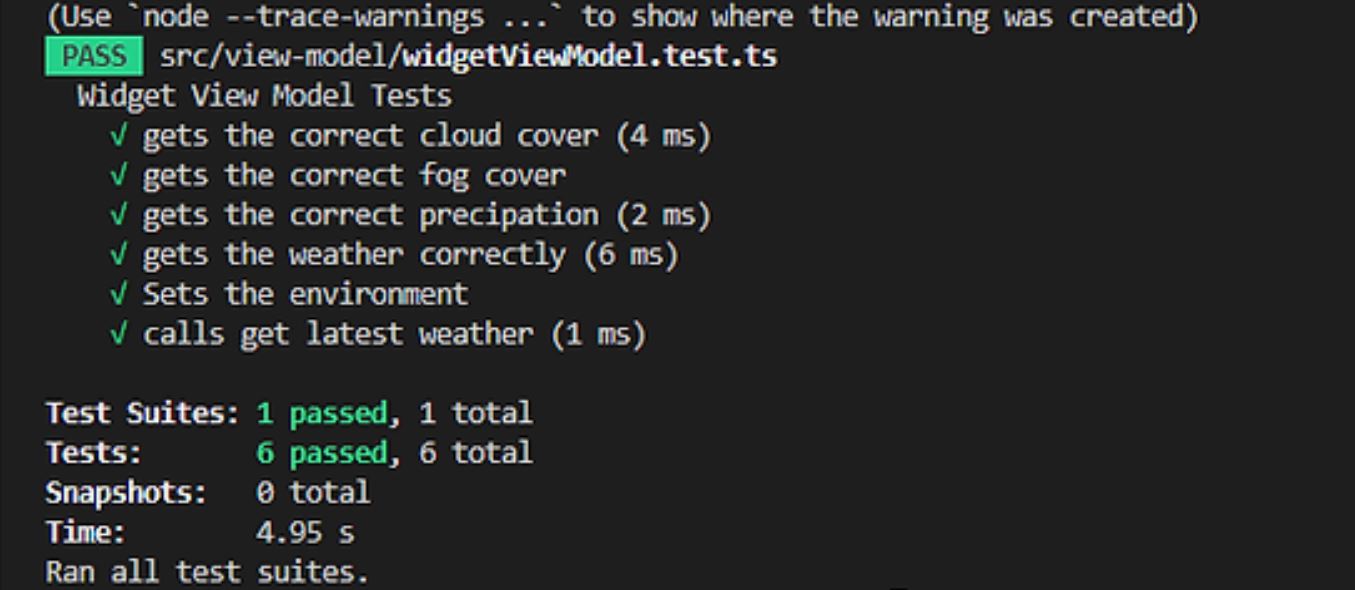
    Jest is running, but we have no tests, download the below zip, extract the file, and place it in the view-model folder widgetViewModel.test.zip

    Try running npm run test again, you will hopefully see something like the below.
    If you check the dist-report folder, you should now see it full of content from our test run.
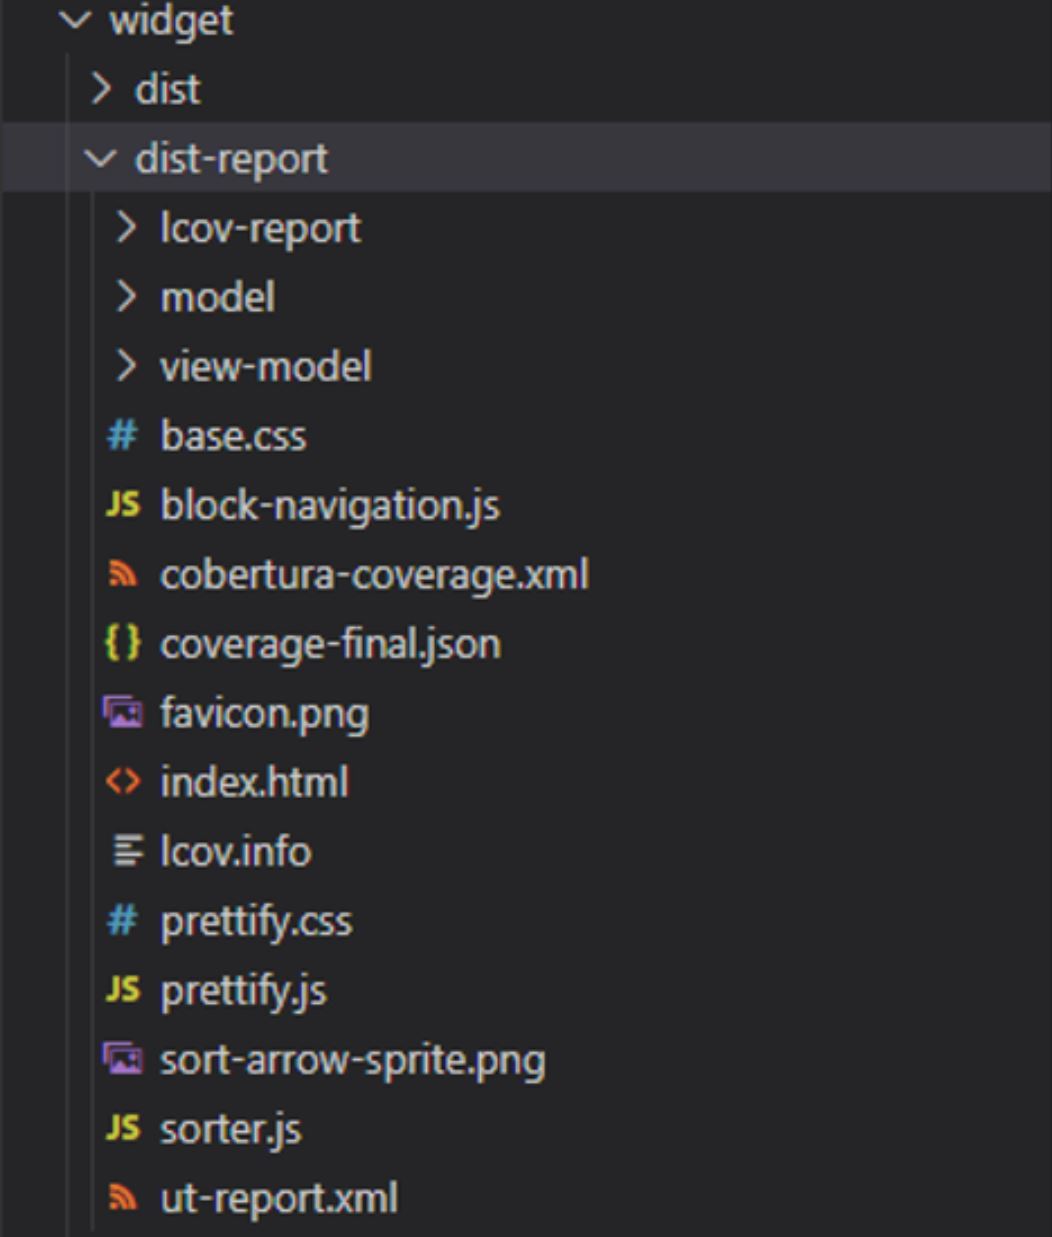
    If you right-click on the index.html file and click preview, you can see the code coverage. You can also drill down into this to see where you may be missing lines of code in your tests.

    8: Create the build pipeline

    Now that we have a project with our widget and with tests to ensure that we can keep our code quality up, we need to be able to share it with other people, this can be either with people in our organisation or publicly.

    The first step in achieving this, is creating a build pipeline. This is a pipeline that will be triggered anytime we push our code from our local machine back into our source control in Azure DevOps.

    We can do this all within DevOps which allows us to build up the pipeline using the editor.

    Within DevOps open the repository and click the button Setup Build in the top right of the page.
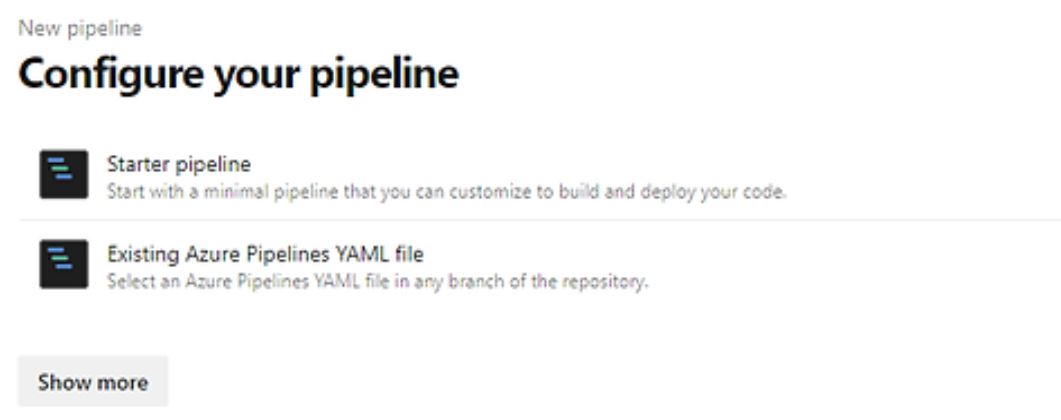
    This will open the pipeline editor, select Starter Pipeline from the options presented.
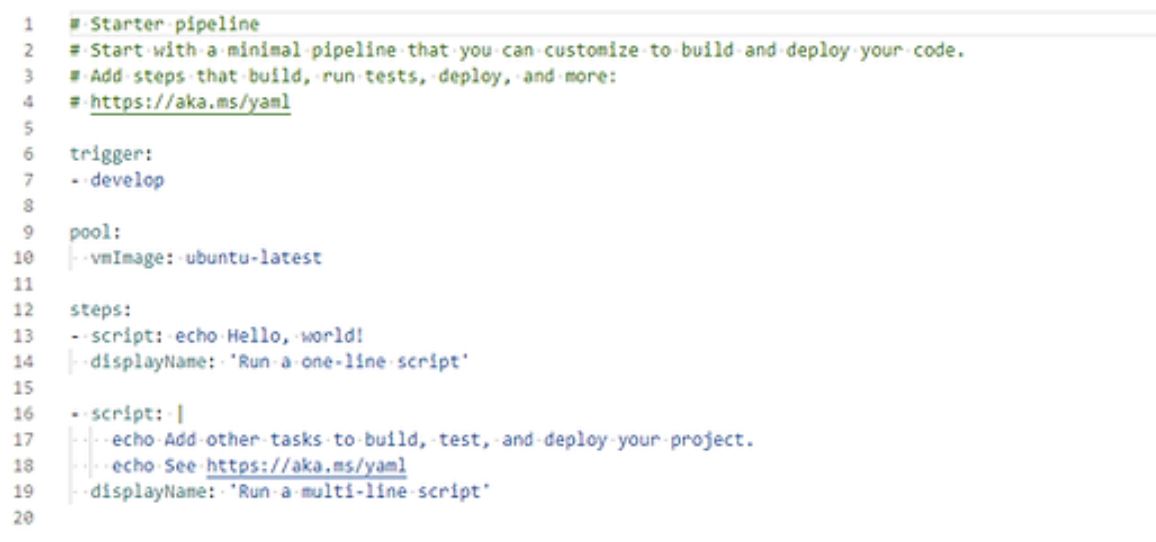
    You will now see a starter pipeline with some hello world code.
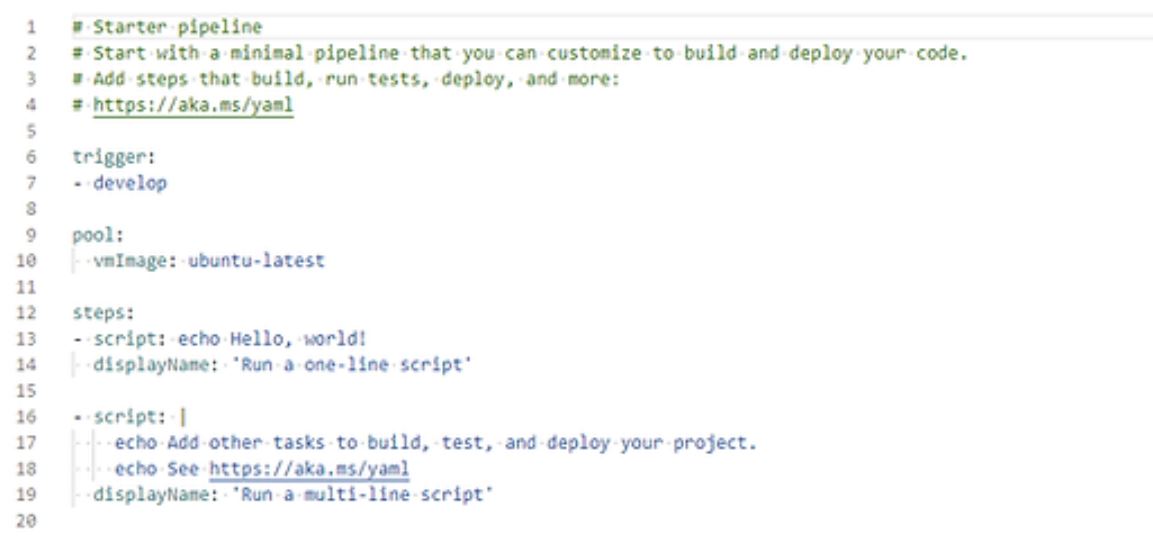
    Remove all code from line 13 down.
    On the right-hand side, you will see the Show Assistant button, click that as it will help us insert code snippets for us.
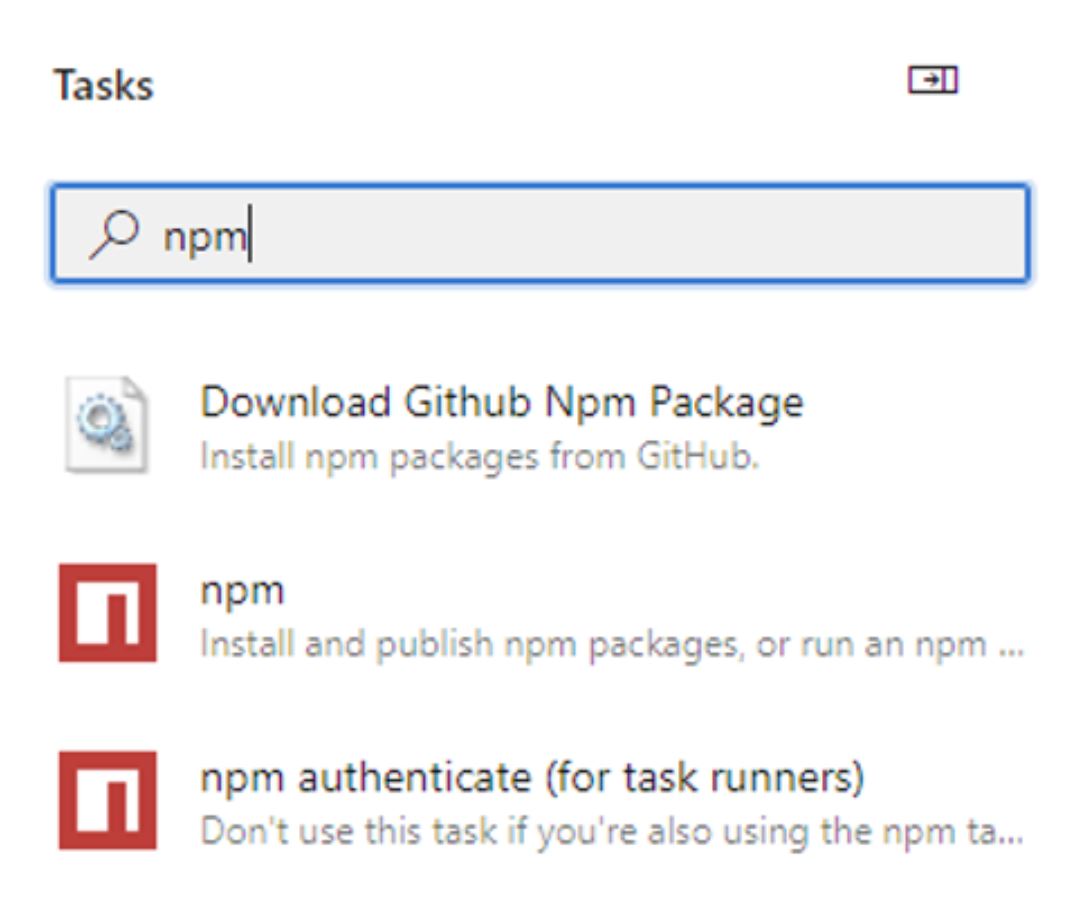
    Place the cursor on line 13 and then within the assistant window, search for the npm task and click on it.
    In the dialog that shows, keep install in the command window, update the below section to widget. This tells that command that folder in our source code that we want to run the command in is the widget folder.
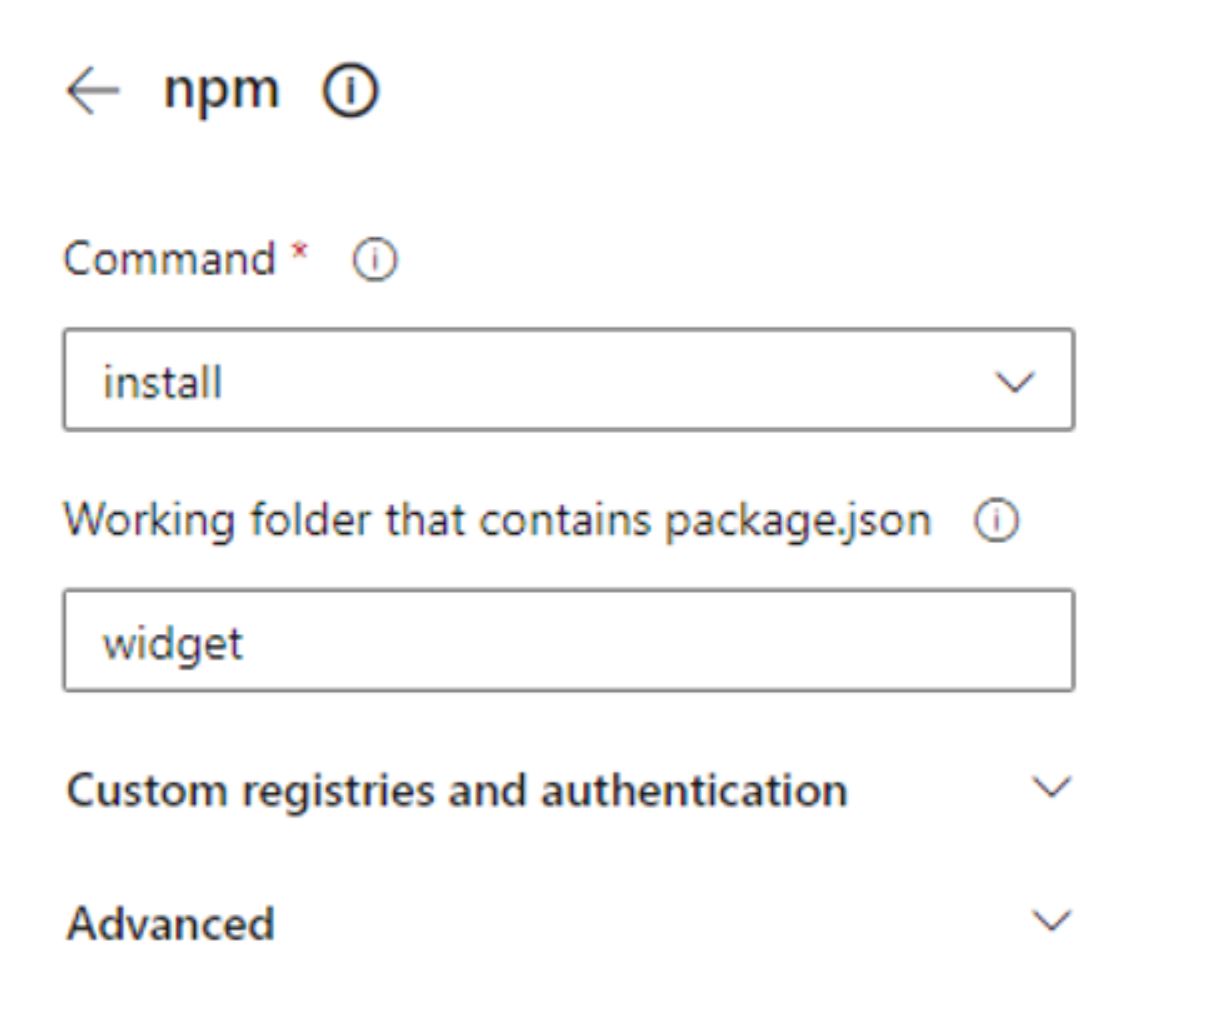
    Click Add at the bottom of the dialog to add this to our pipeline.
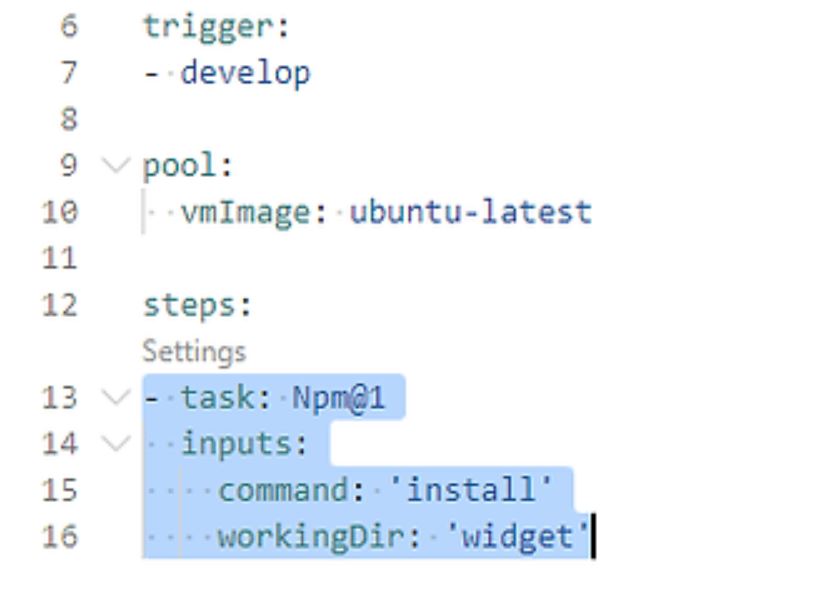
    The npm task will install the dependencies we need to build the widget within the DevOps pipeline.

    The next step we want to do is run our tests, so that each time we check in the code, we are running our tests to ensure that they are still passing.

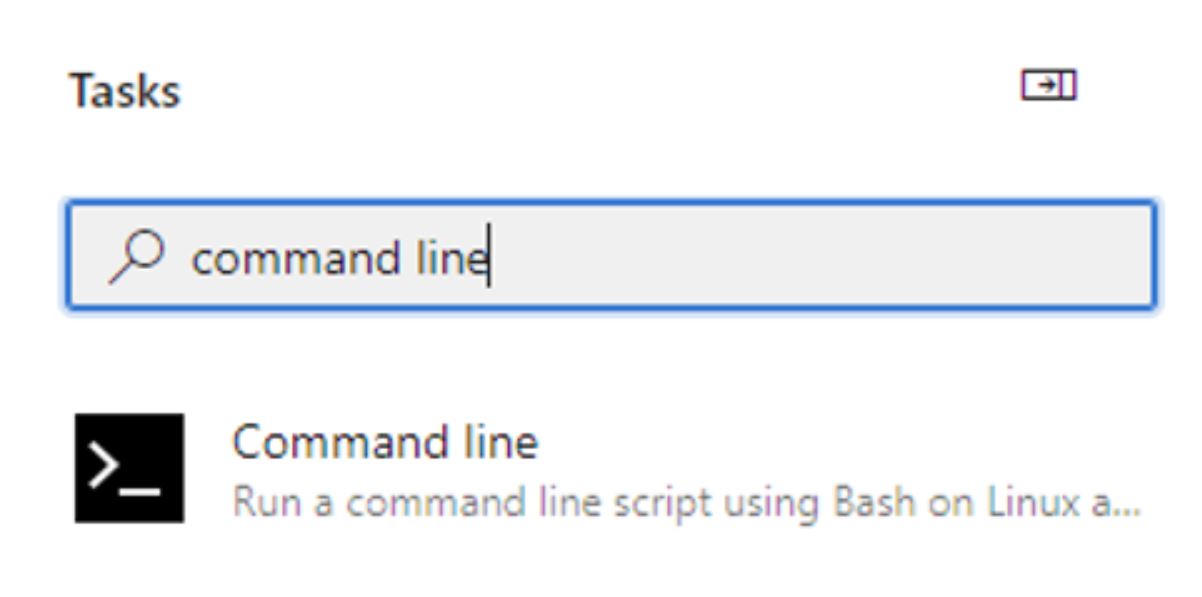
    Again, search in the assistant window for command line. and click on the Command line task to configure it.
     

    In the Script section, add in the following code npm run test, click the advanced section, and add in widget to the working directory.
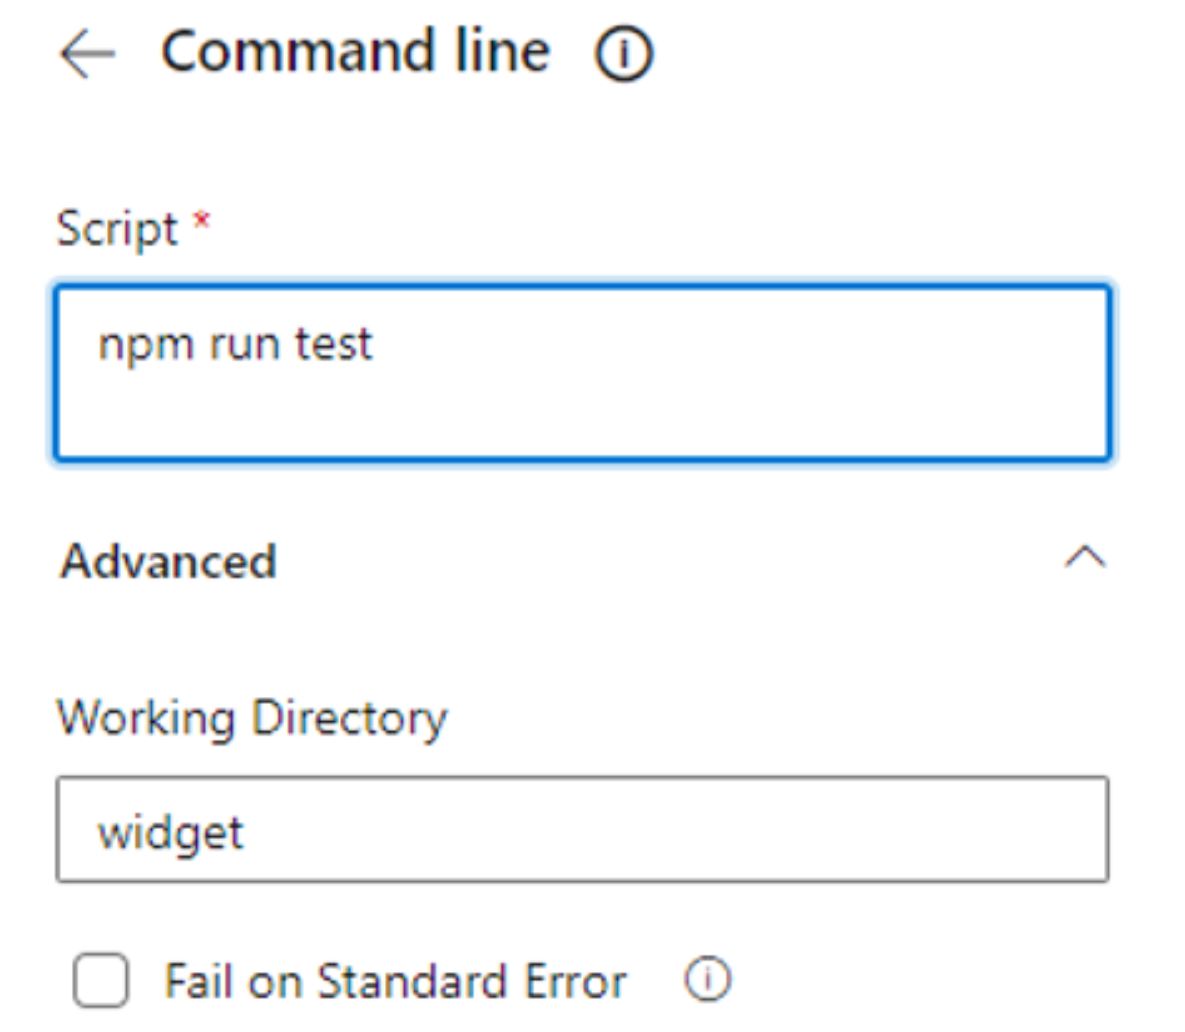


    The above will run our tests and produce the outputs. We now want to do something with those outputs, such as publishing them to our pipeline so we can keep track of our code quality.

    Again, in the assistant window, search for publish test.
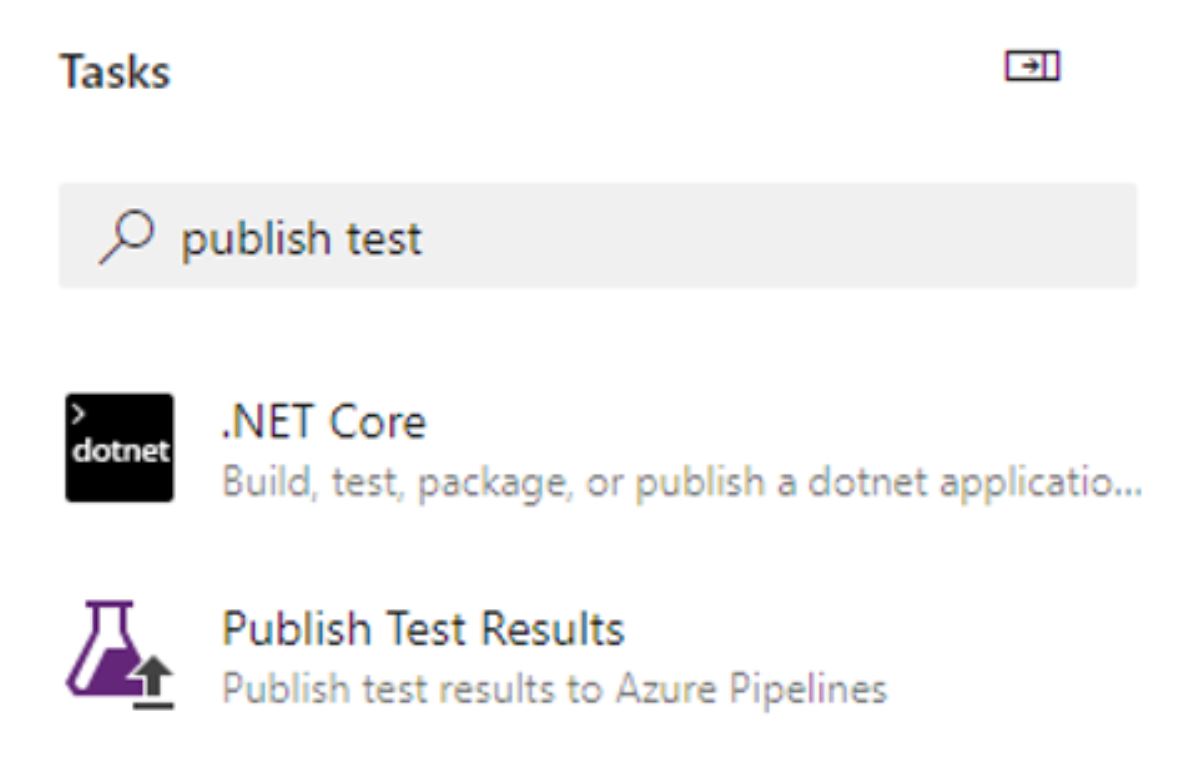

    Select the Publish Test Results

    Configure the task as follows.
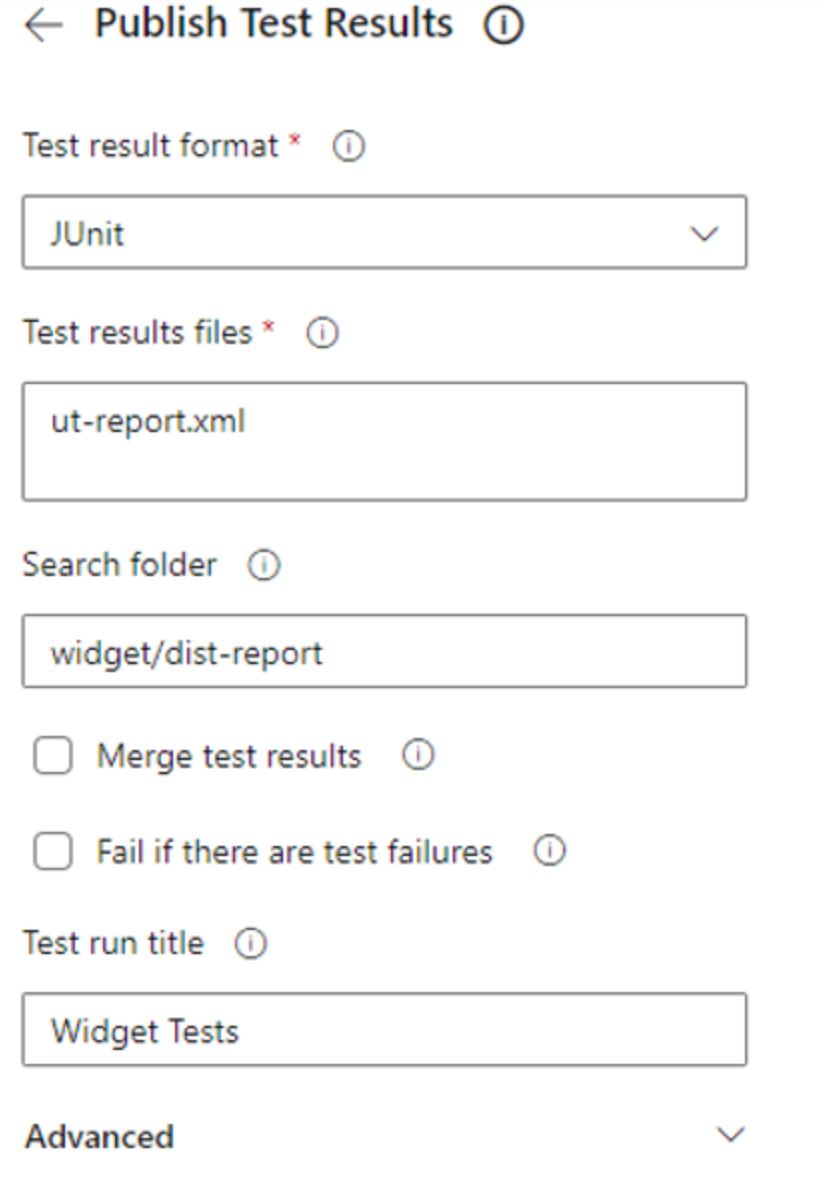
    This will publish the results of the test run to Azure DevOps.

    We also want to report our test line coverage as well. To do that we need another publish task. In the assistant search for coverage and select the Publish code coverage results task.
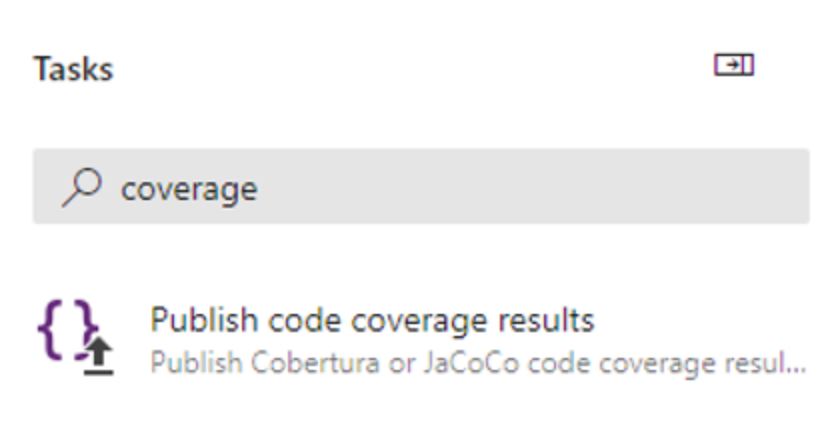
    Configure the task as follows. This will get the coverage file created by our test run and publish to Azure Devops.
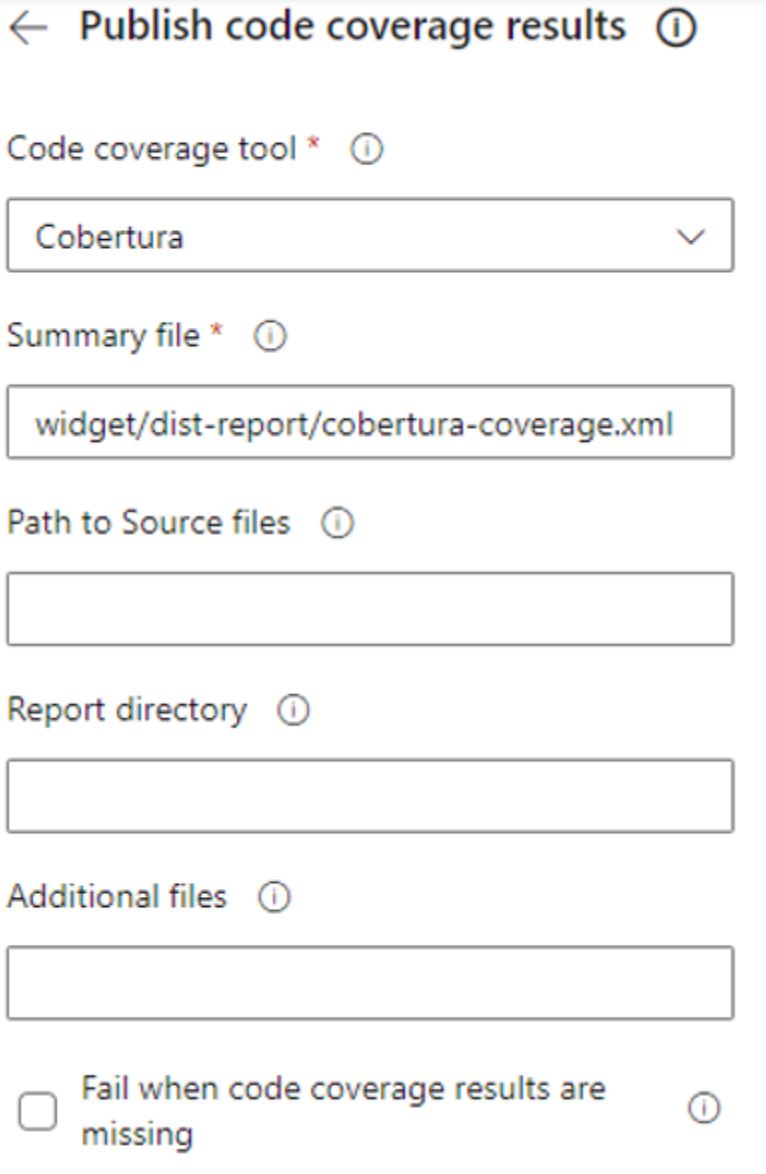
    We specify where that file is within our folder structure. The file and type were configured as part of our jest.config.ts file.

    Now we have completed all our tests, the next thing that we want to do is build and pack our widget in preparation for publishing it to npm.

    Add in two more command line tasks, the first one is to run our build script.

    npm run build.

    The second one should use:

    npm pack

    This is a special command from npm which will pack our build output so it can be published to npm. When creating the tasks, ensure the working directory is set to widget. Your resulting code should look like this.
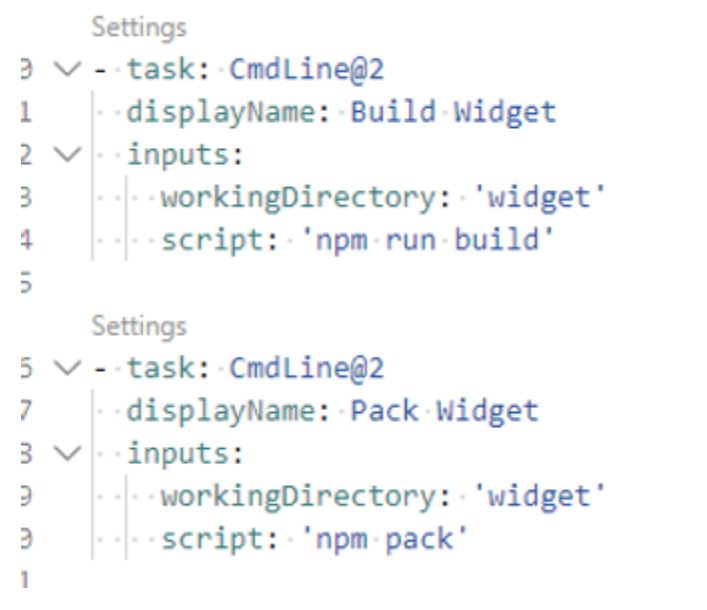

    The pack command creates an archive file of our build for us, we now want to make that available to the DevOps release pipelines, to do this we need to first copy the files to a staging directory, and then publish the artifcate.

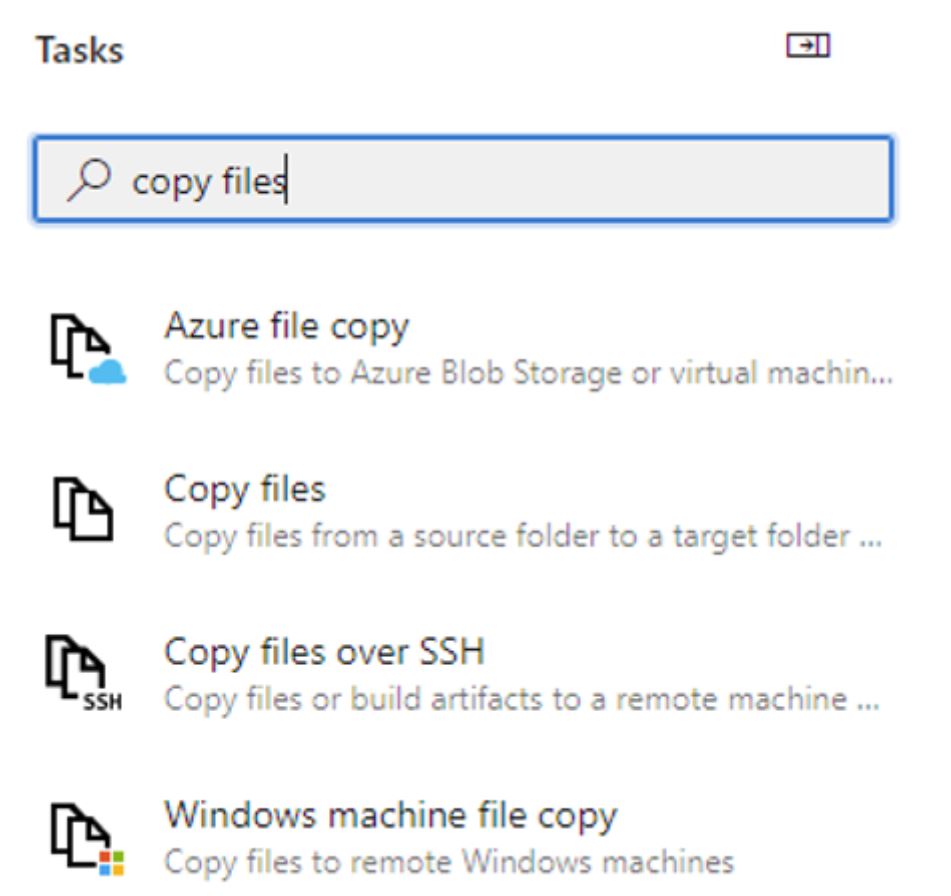
    In the task assistant, search for copy files and select the basic Copy files task (second in the list below).
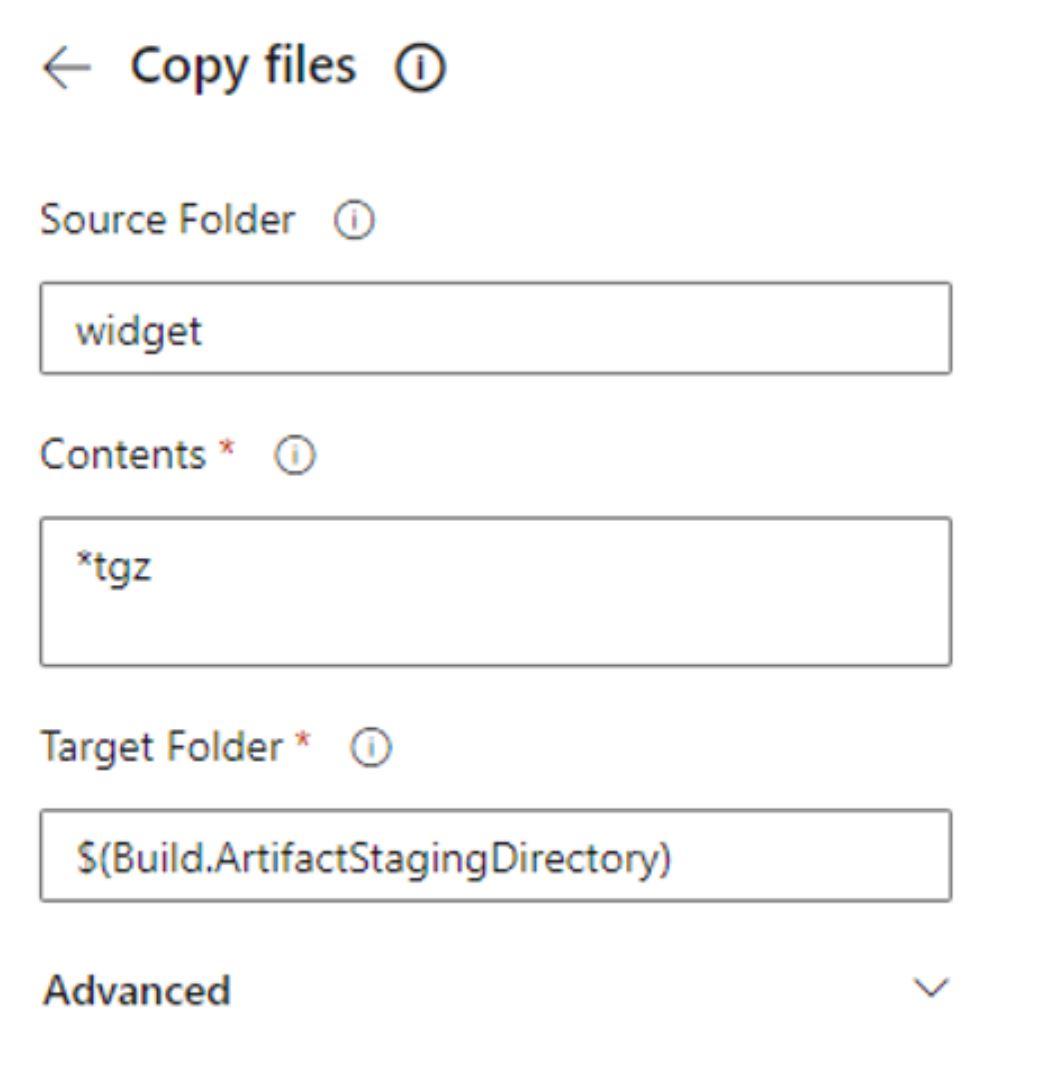
    Configure the task with the following settings. The contents, tells the task to look for any files with the .tgz extension, and the target folder we have specified is a special directory created as part of our build pipeline.
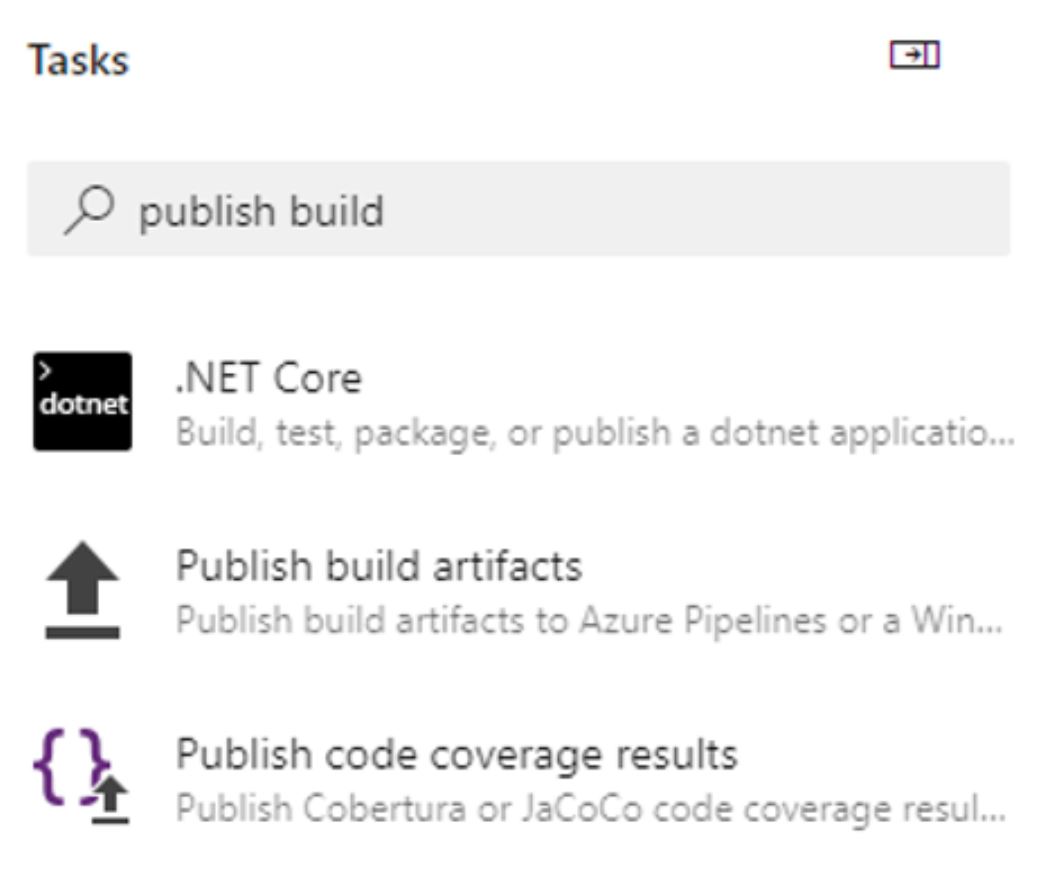
    The final task we need to do, is publish this archive from the artifact to Azure Pipelines where we can use it in release pipelines. Search for publish build and select the Publish build artifacts task.


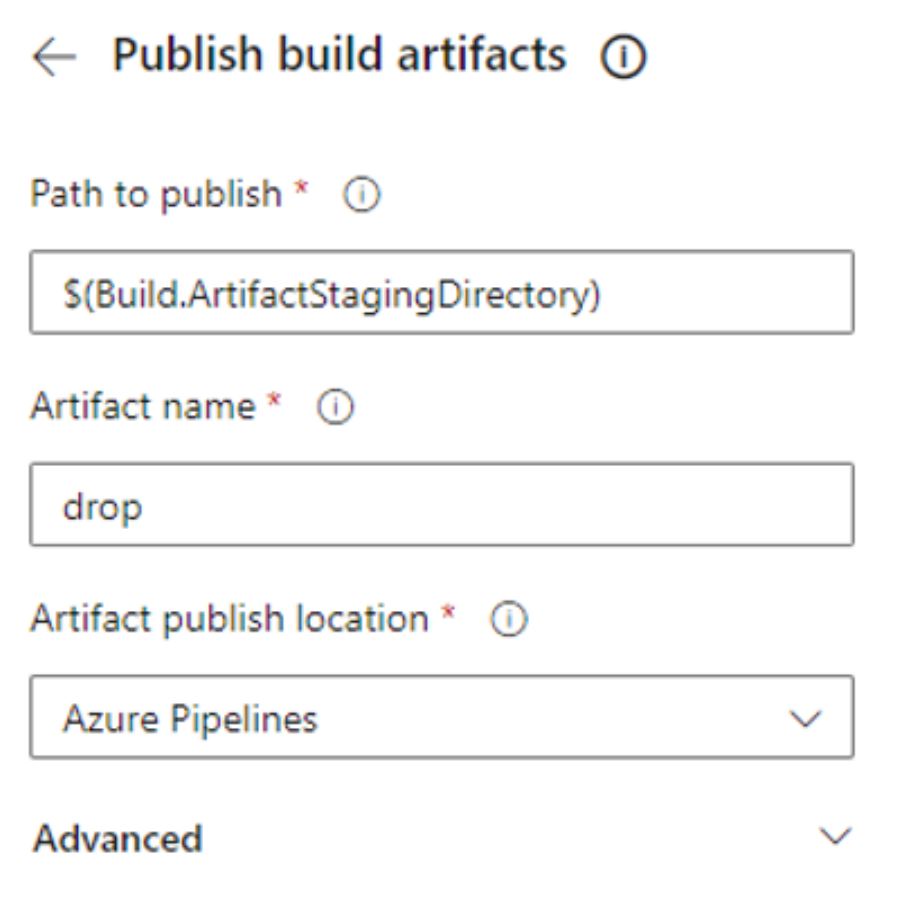
    You can accept the defaults and add the task.
     

    The completed yml should look like the below.
     

    # Starter pipeline

    # Start with a minimal pipeline that you can customize to build and deploy your code.

    # Add steps that build, run tests, deploy, and more:

    # https://aka.ms/yaml

    trigger:

    – master

    pool:

      vmImage: ubuntu-latest

    steps:

    – task: Npm@1

      displayName: Install NPM

      inputs:

        command: ‘install’

        workingDir: ‘widget’

        verbose: true

    – task: CmdLine@2

      displayName: Run tests

      inputs:

        workingDirectory: ‘widget’

        script: ‘npm run test’

    – task: PublishCodeCoverageResults@1

      inputs:

        codeCoverageTool: ‘Cobertura’

        summaryFileLocation: ‘widget/dist-report/cobertura-coverage.xml’

    – task: PublishTestResults@2

      inputs:

        testResultsFormat: ‘JUnit’

        testResultsFiles: ‘ut-report.xml’

        searchFolder: ‘widget/dist-report’

        testRunTitle: ‘Widget Tests’

    – task: CmdLine@2

      displayName: Build Widget

      inputs:

        workingDirectory: ‘widget’

        script: ‘npm run build’

    – task: CmdLine@2

      displayName: Pack Widget

      inputs:

        workingDirectory: ‘widget’

        script: ‘npm pack’

    – task: CopyFiles@2

      inputs:

        SourceFolder: ‘widget’

        Contents: ‘*.tgz’

        TargetFolder: ‘$(Build.ArtifactStagingDirectory)’

    – task: PublishBuildArtifacts@1

      inputs:

        PathtoPublish: ‘$(Build.ArtifactStagingDirectory)’

        ArtifactName: ‘drop’

        publishLocation: ‘Container’

    We are now done. Anytime we check the code into the repository, the above will run, complete our tests, and create a build for us. The next step is to take the artifact that we have created and publish it through a release pipeline to npm.
     

    9: Create the release pipeline

    The final step in our custom widget development is to publish the output to npm. To do this, you will need a npm account. In the example below, we are publishing to a public npm package, you can also publish to a private package with the same steps. You do not necessarily need to do this, however, one of the goals of this process is to demonstrate the workflow that is most useful for people in organisations creating code that they may not necessarily want to share with everyone.

    Note, before publishing to npm you will have to bump your version number in the package.json, you cannot simply overwrite an existing version.

    For more details on creating a npm account see here. For details on creating an organisation, see the details here.

    If you have the above, the next item you will need is an auth token to allow you to read and write. We need this token to authenticate when we publish the item to npm. Be careful with these tokens as they should not be shared publicly.

    Follow the details here to create a token. Once you have the token, we will place it in a variable library where we can keep it secret and make it available to any pipeline we create in DevOps. To do that, go to the Pipelines section and select Library.
    Once the page opens, create a new variable group, by clicking on the below button.

    Give the group a meaningful name, and then move down to the Variables section and add a new variable called npm_token. Paste your npm token you created previously, and then click the lock button to hide the details.
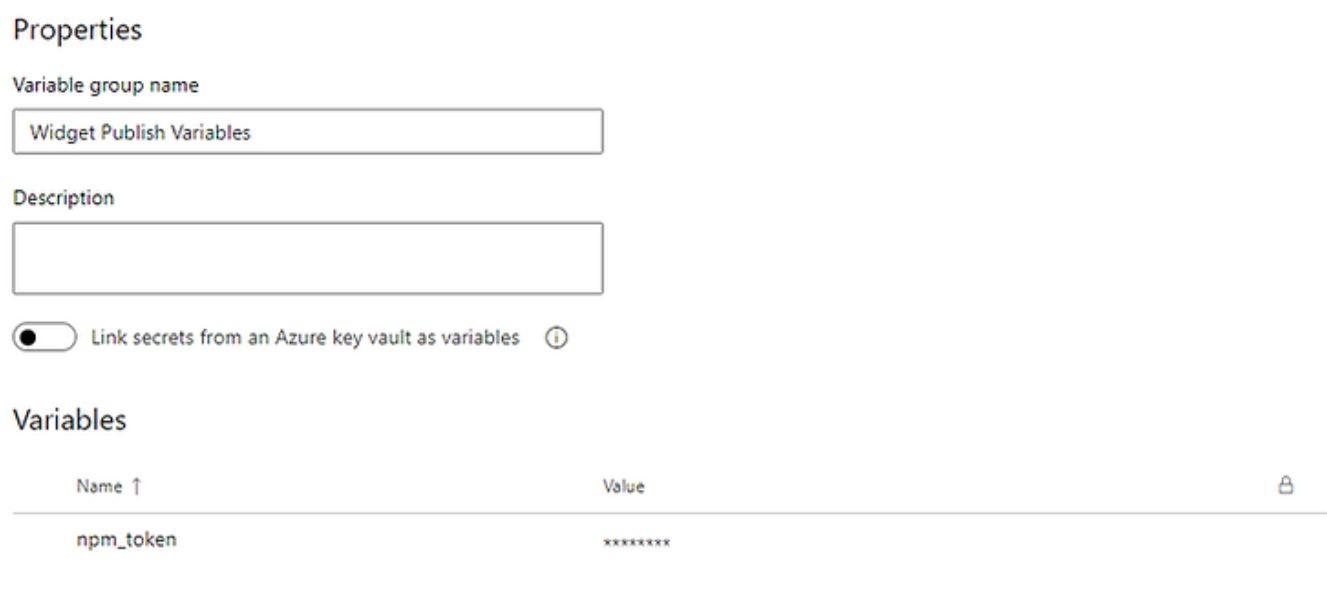
    The token is now stored securely within DevOps, no one can read it, but we can make it available to all our pipelines.

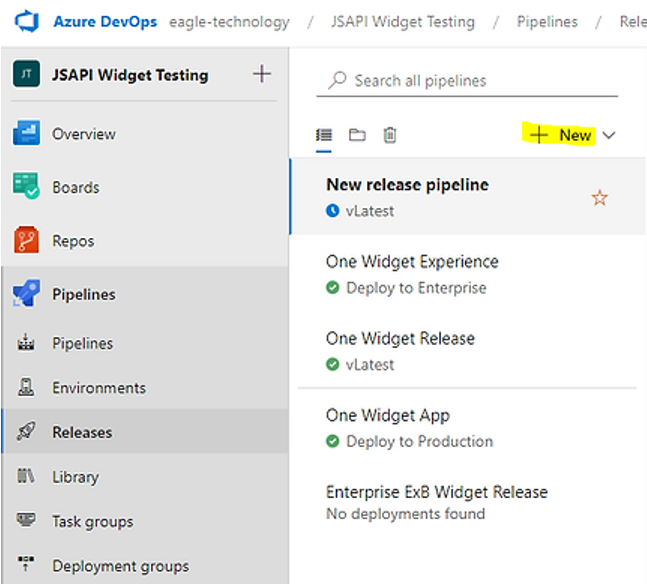
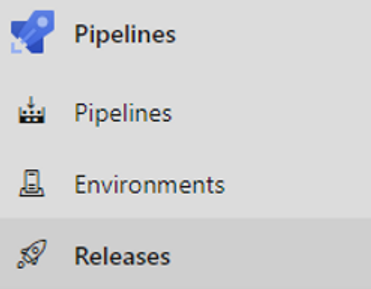
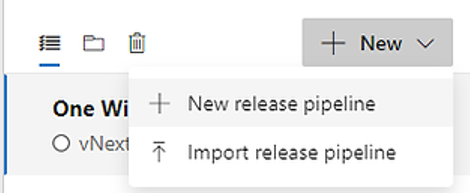
    Now we have our variable, let’s go and create our Release pipeline. Under the Pipelines section, select Releases, click New -> New release pipeline.
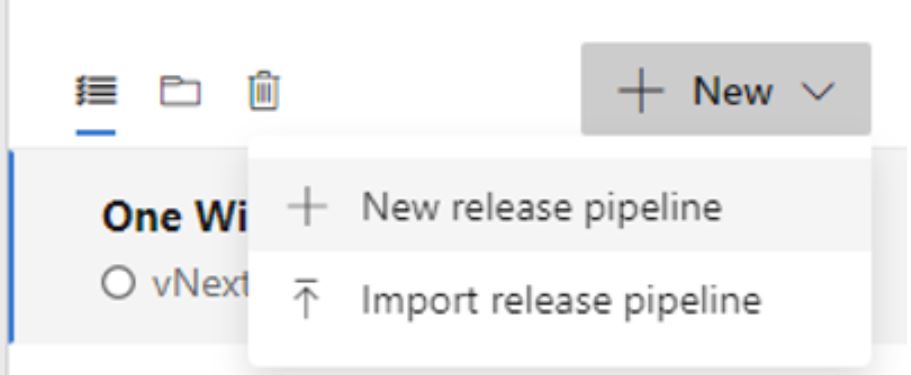
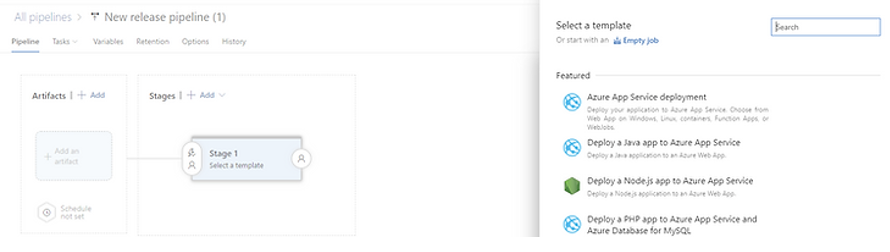
    Select the Empty job template.
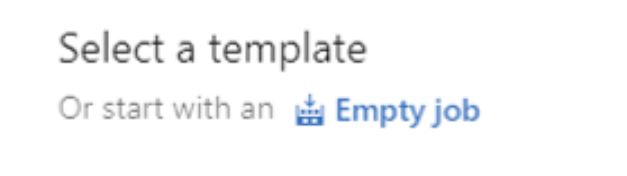
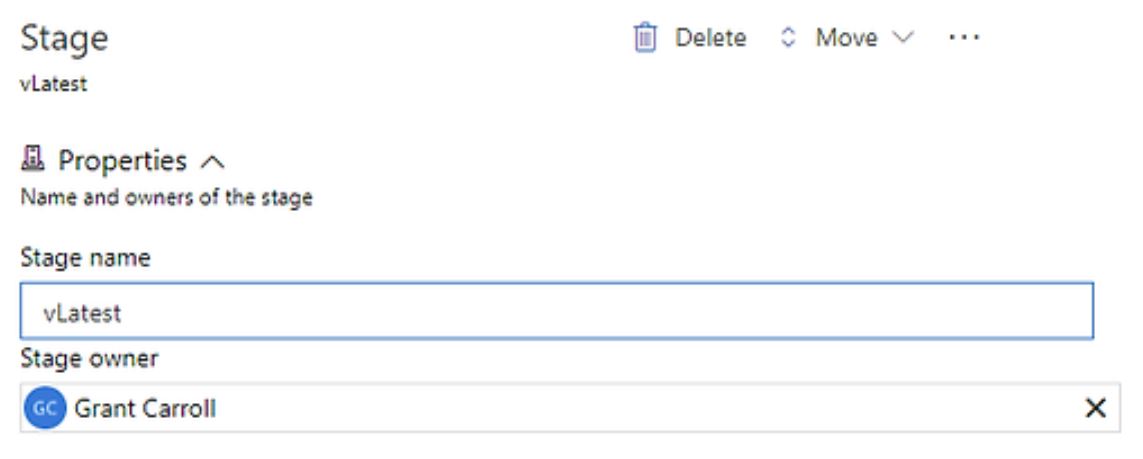
    Name the stage vLatest.
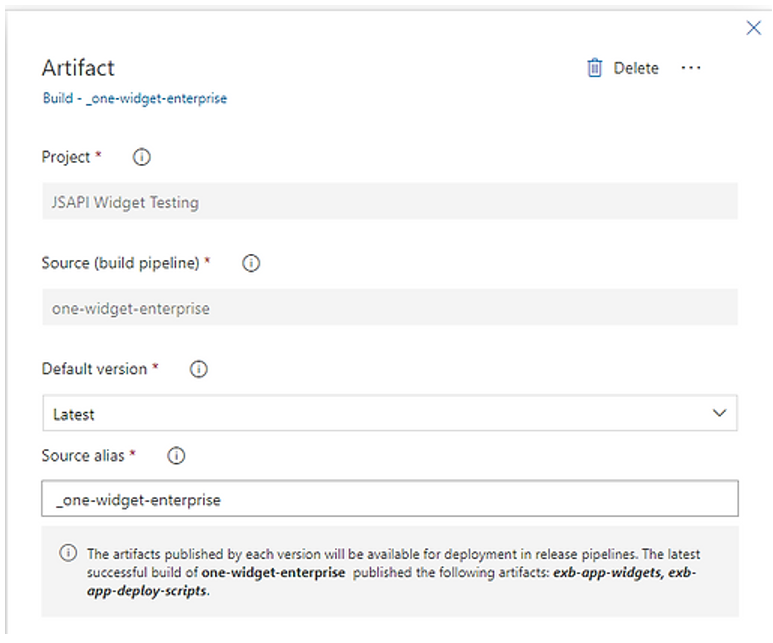
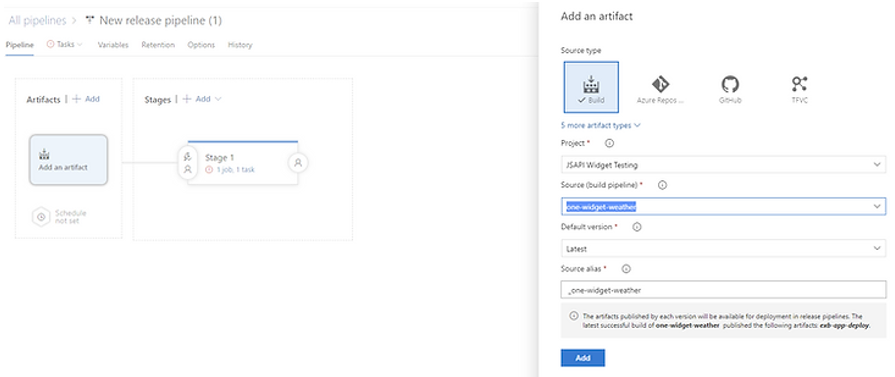
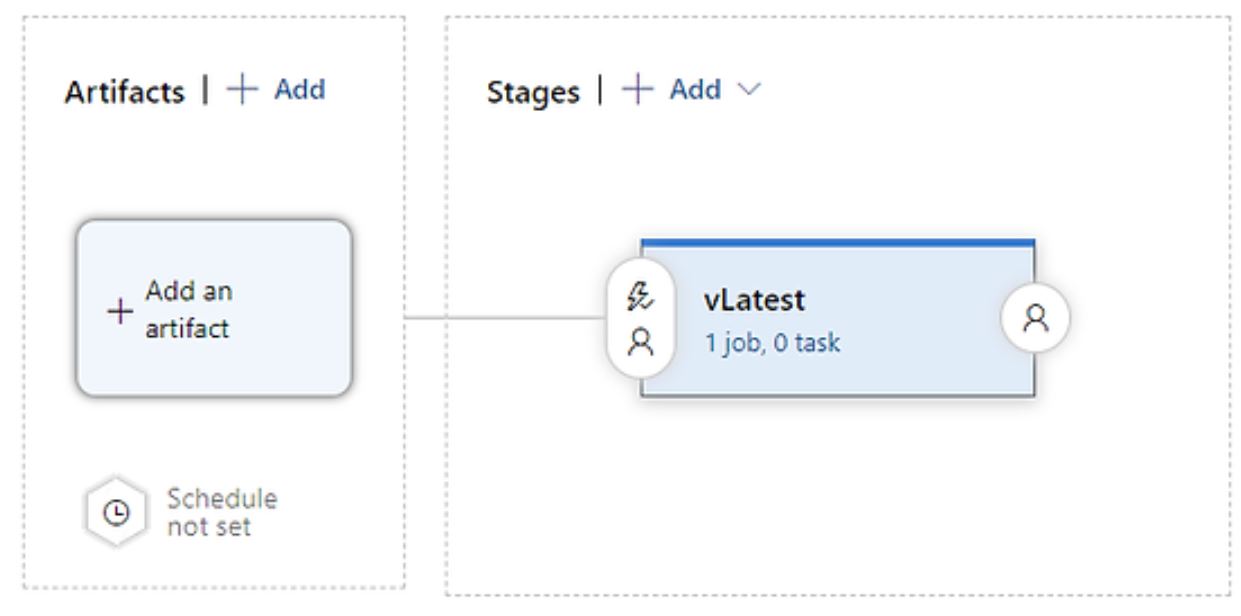
    We need to add in our outputs from our build pipeline to this, so select the Add artifact in the view.
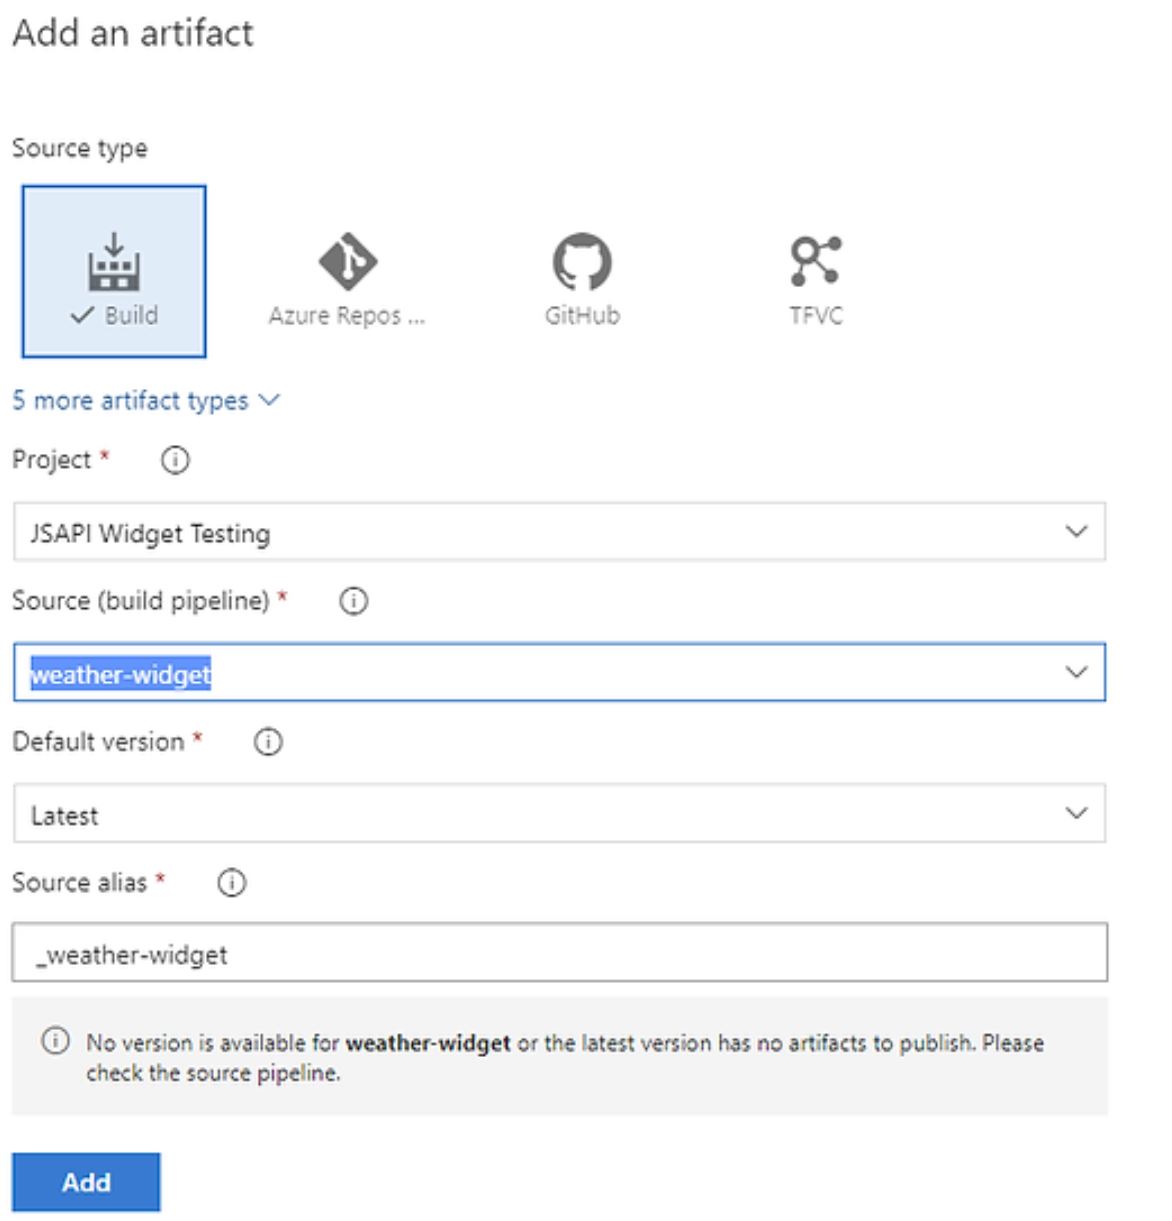
    Configure the settings as follows (using your details).
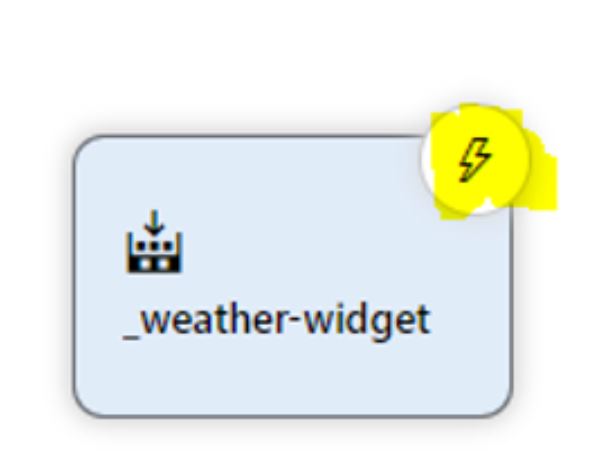
    We would like the release to be triggered as soon as a new artifact becomes available, so to do this, click on the lightning bolt next to our artifact.
    Enable the Continuous deployment trigger and configure as below. Now whenever we complete a build in our master branch, the release pipeline will be triggered.
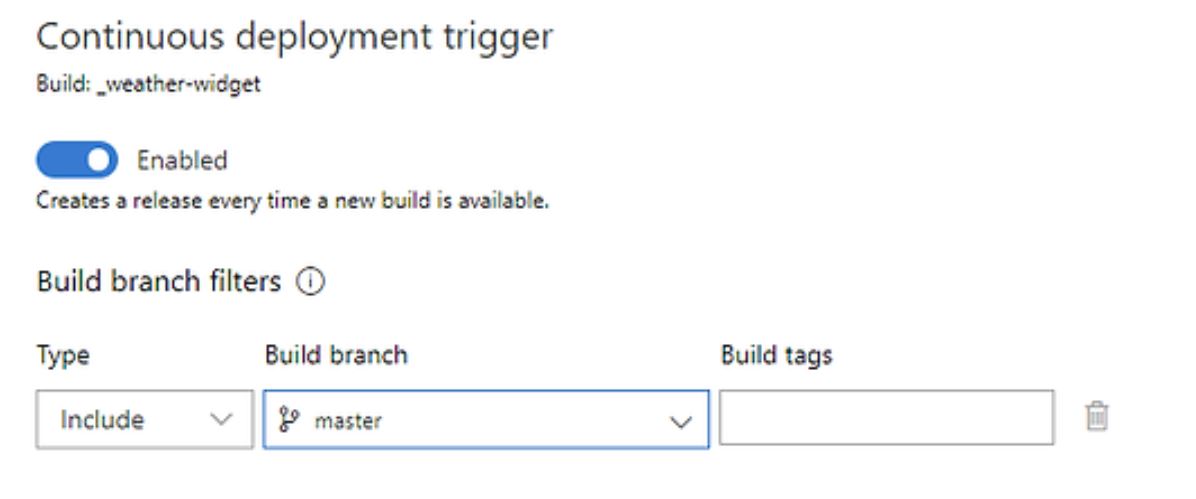
    At the moment, our Stage does nothing, so we will want to configure that next. First, we need to tell the release pipeline about our npm token we created. To do that, click on the Variables tab at the top of the screen.
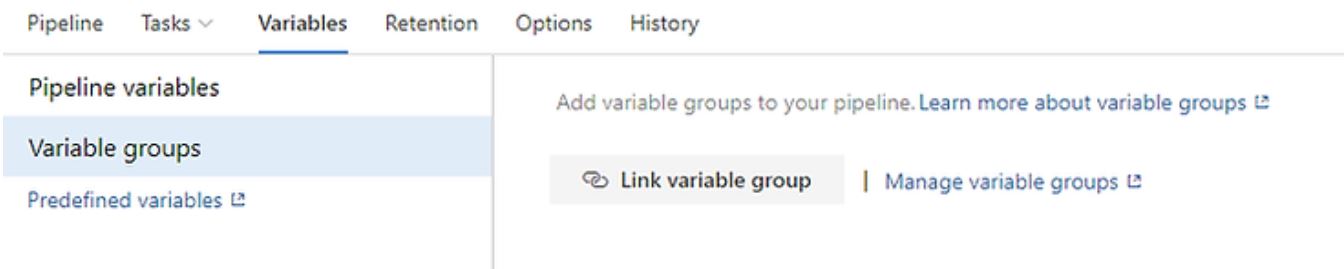
    Then select Variable groups in the lower section and select Link variable group..
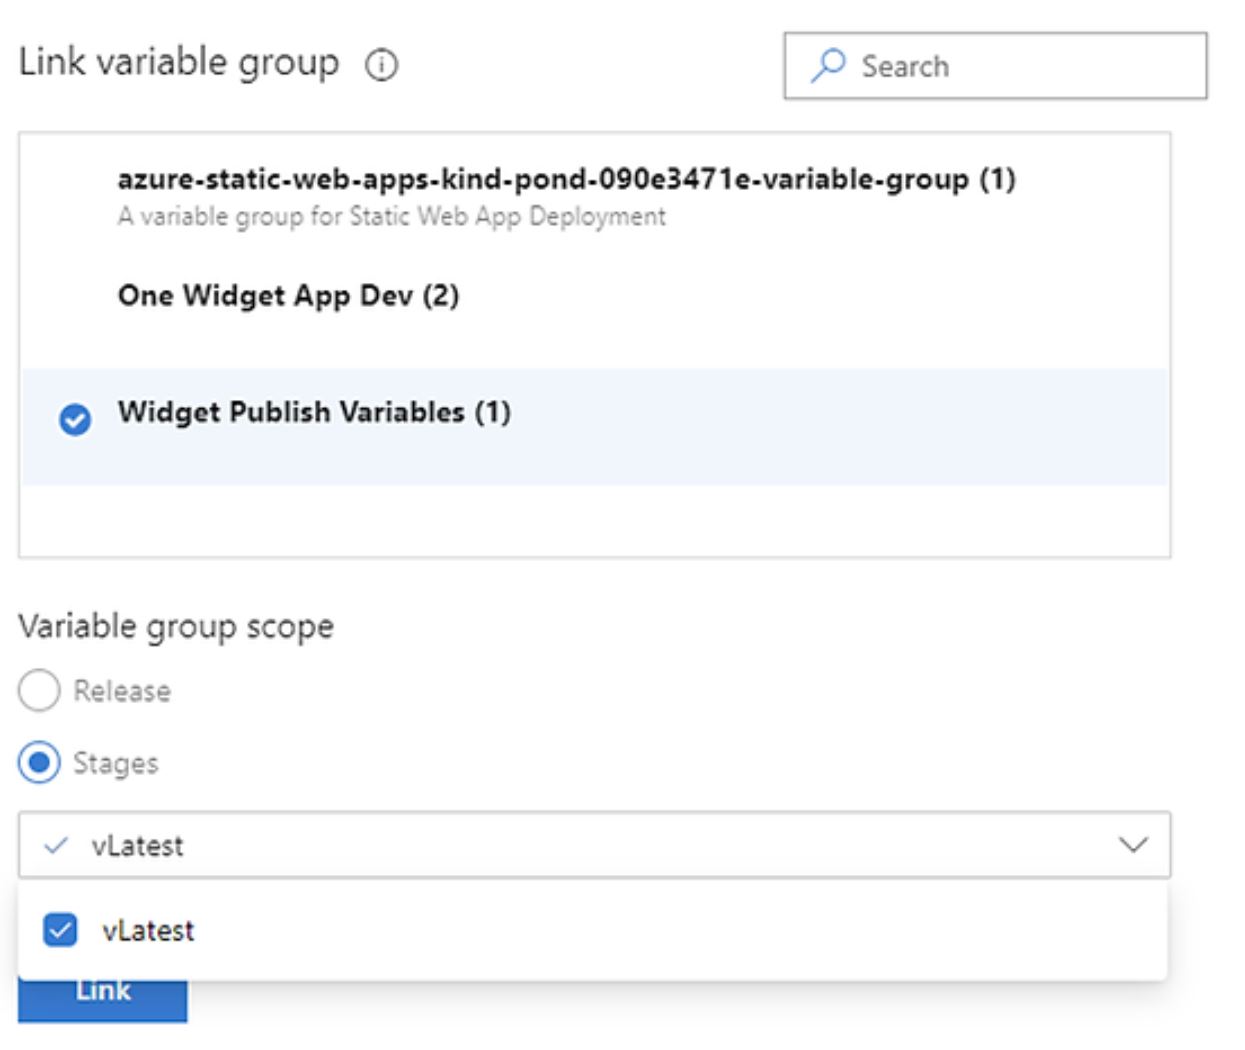
    Select the variable group you created earlier, you can scope the group to be across the whole release, or to a specific stage. Scoping to a stage is useful when you have multiple stages in your pipeline and you want to configure different settings for each, for example pushing to a test, pre-production, and production environment. With the variable group now linked, we can use the npm token in our pipeline. Go back to the pipeline and we will configure our publish stage. Click to edit the vLatest stage.
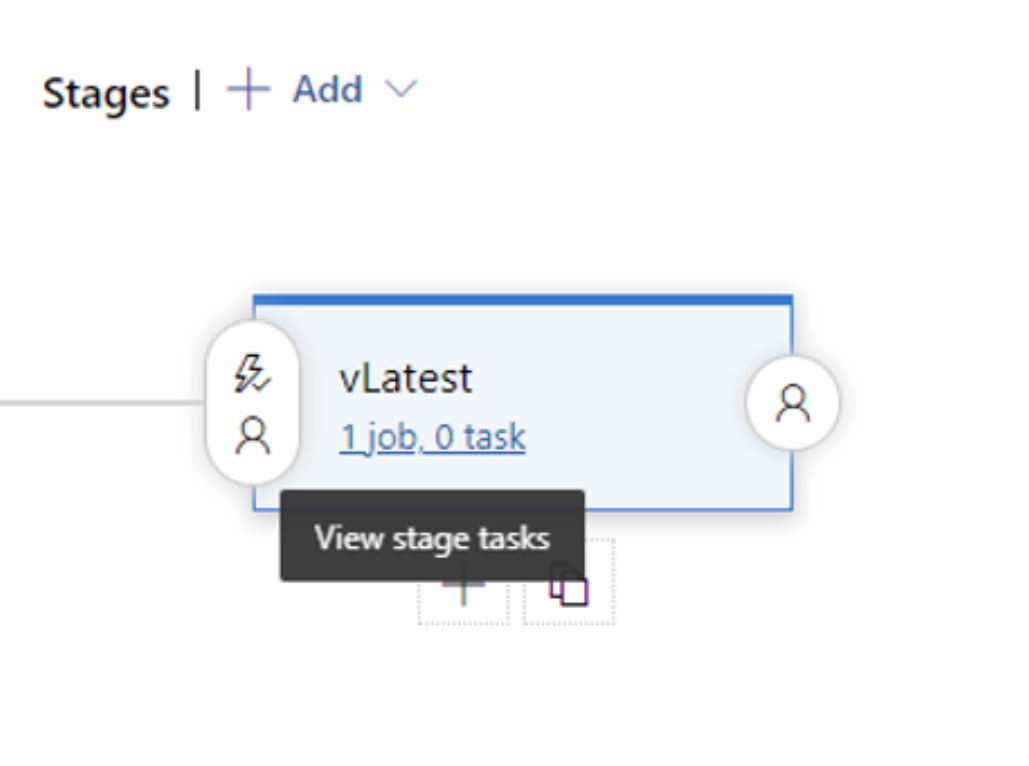
    Click the + button to add a new task to the Agent job. The first step we need to do is extract the files from our artifact. To do this we will add and configure an Extract files task.
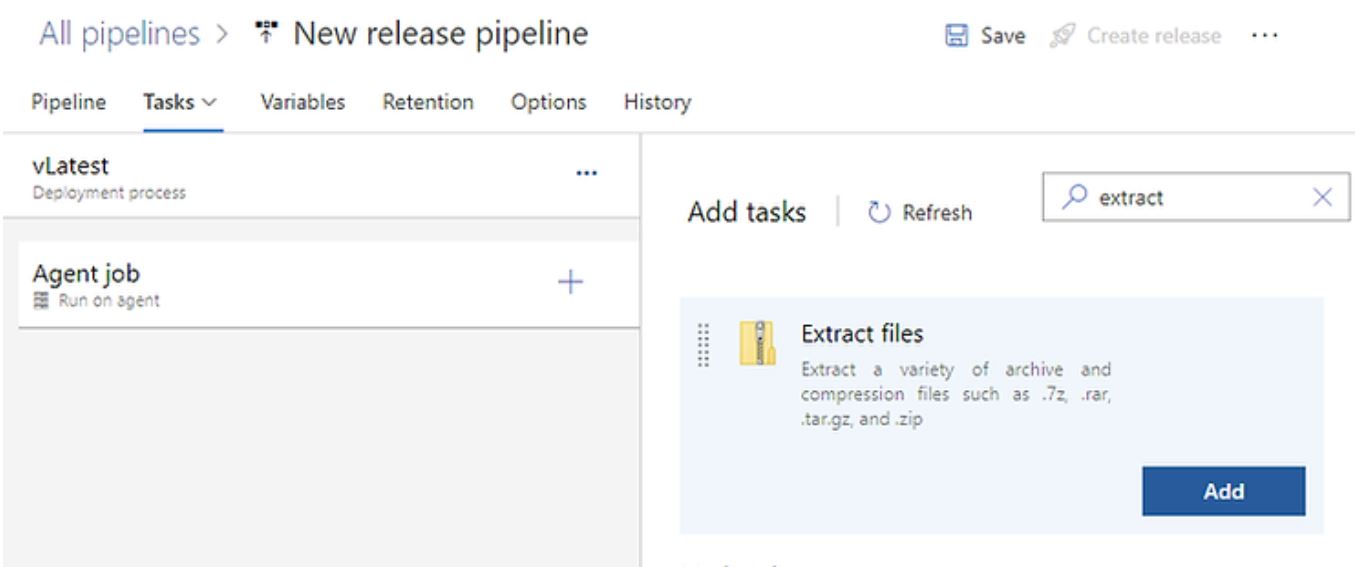
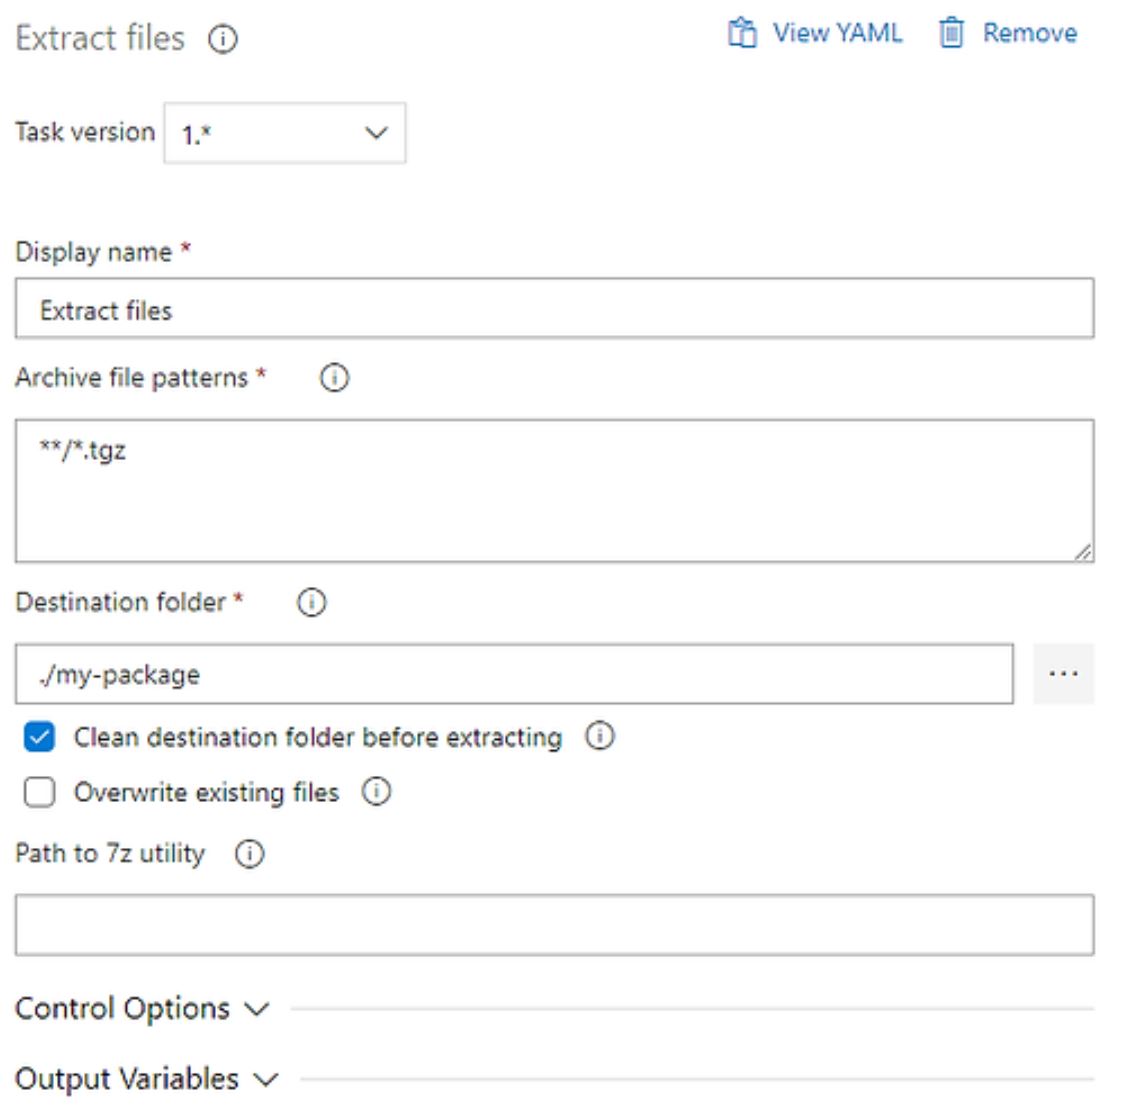
    Configure the task as follows, pay attention to update the Archive file pattern to tgz.
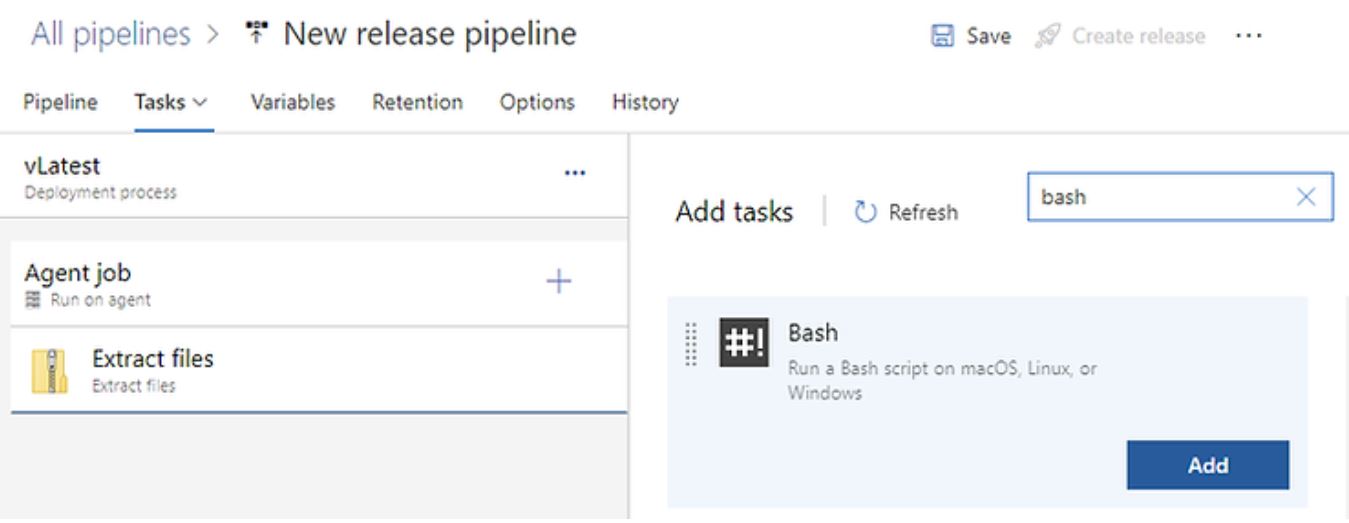
    Next add a new Bash task.
    Configure the task as follows.
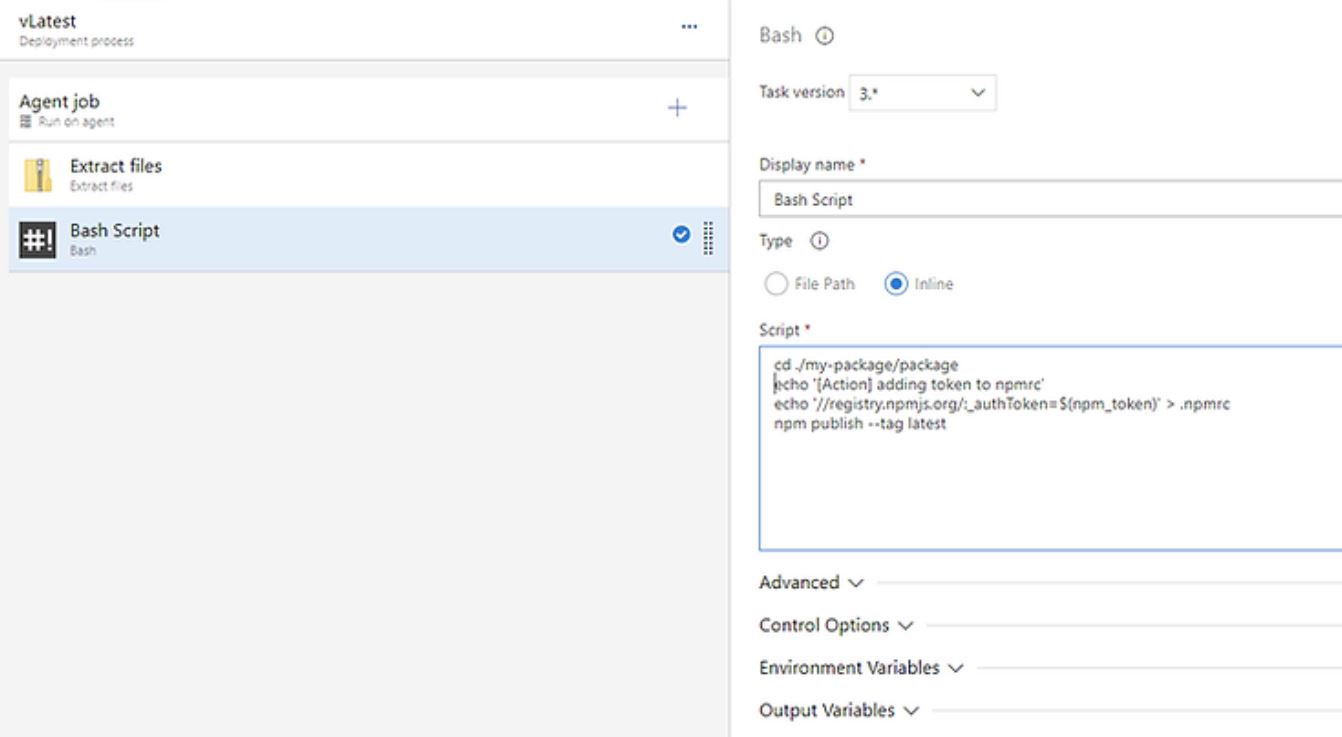
    The code does the following

    1.     Changes the working directory to where our package was extracted to.

    2.     Next, we tell npm that we need to authenticate, and for this package, use this token. Note the token is paramertised, pulling in our npm token from our variable library.

    3.     Finally, we publish the package with the latest tag, this is so that it will be the default version that gets installed by npm.

    We now have a release pipeline configured that will publish up to npm anytime we check the code into the master branch. However, we may want to seek approval before we do that. We can use a pre-deployment approval to send an email to approvers, who will then have the ability to approve the release, which will then trigger the release.

    Click the lightning bolt on the left side of the vLatest stage.
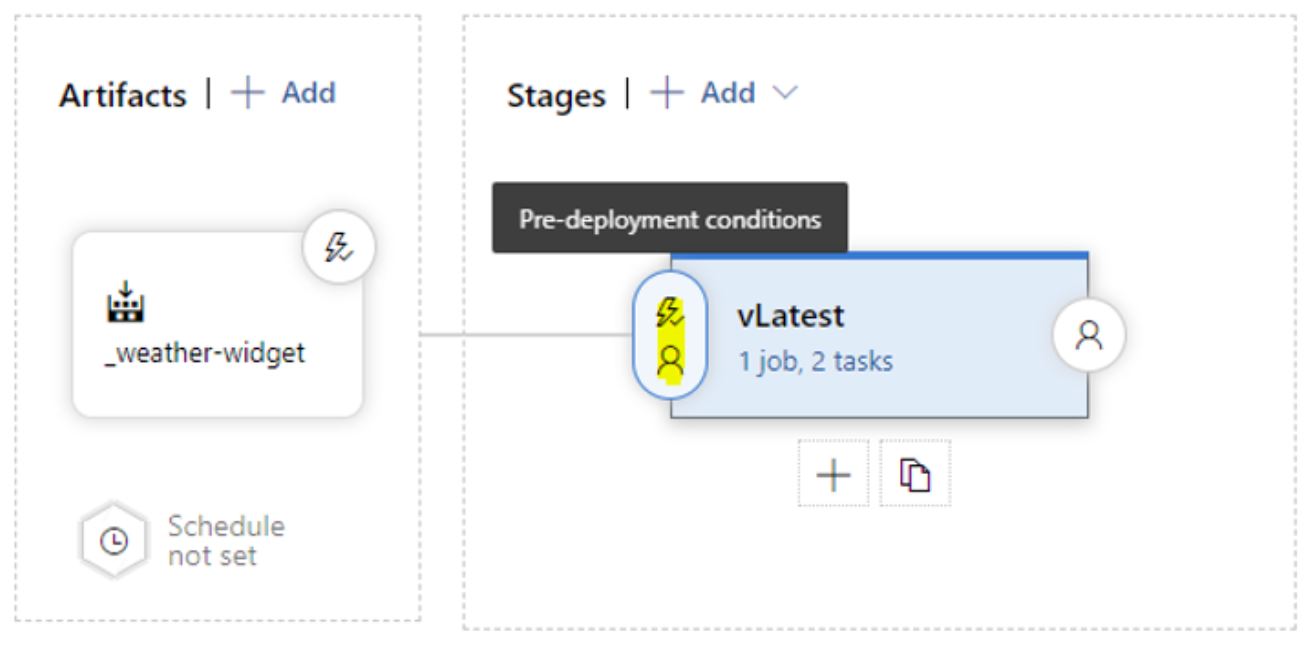
    Enable the Pre-deployment approvals Configure the approvals, by searching for users who can approve. You can set various rules as to how many approvals are required and who can approve.
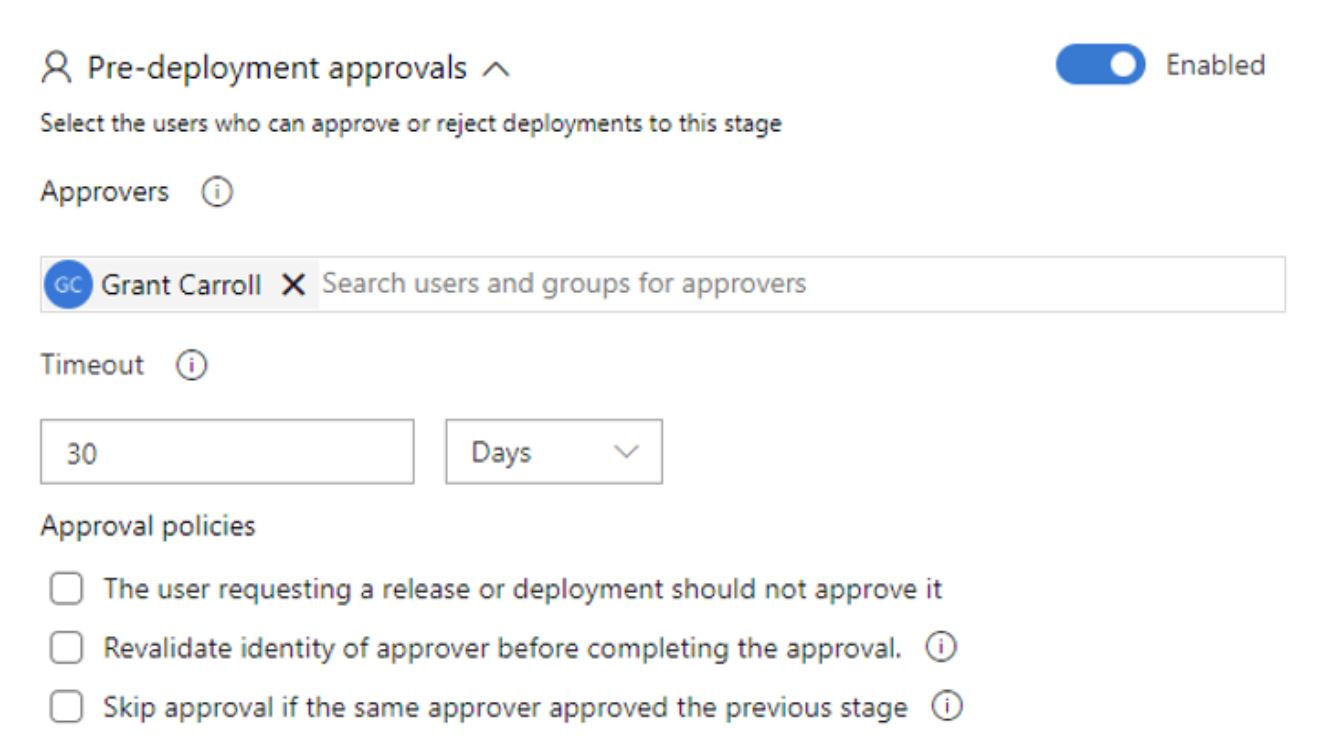
    Save the pipeline, and you are done. Now users who are on the list will receive an email asking them to approve the release.
    Clicking on the release details will take the user to pipeline results, where the results of tests and code coverage can be viewed.
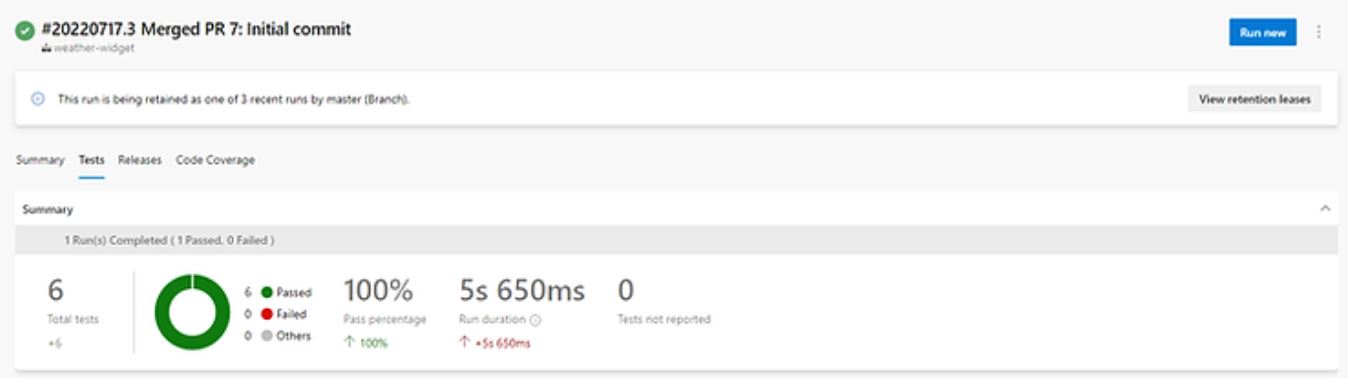
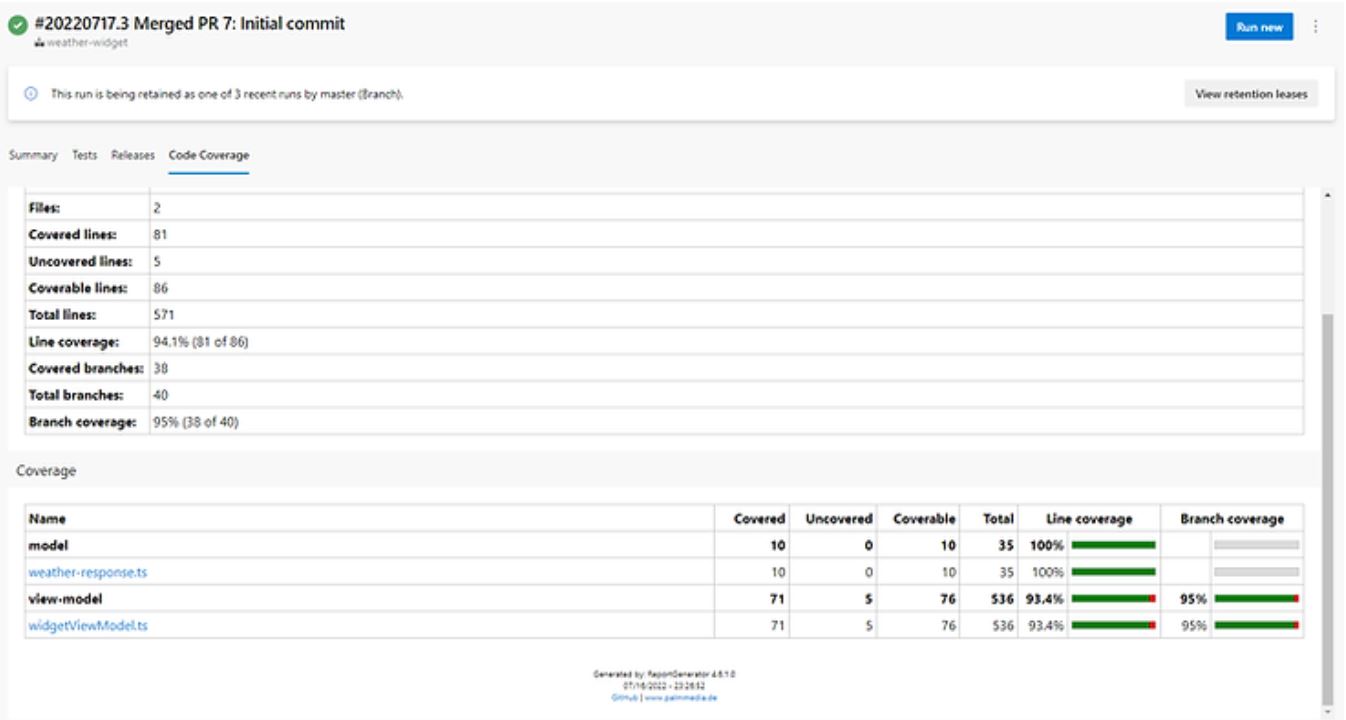
    Conclusion

    We now have widget and workflow that will allow us to develop, test, and publish our widget to npm.

    We can add to this by using the out-of-the-box tools in DevOps to track and manage enhancements, bugs, and new features.
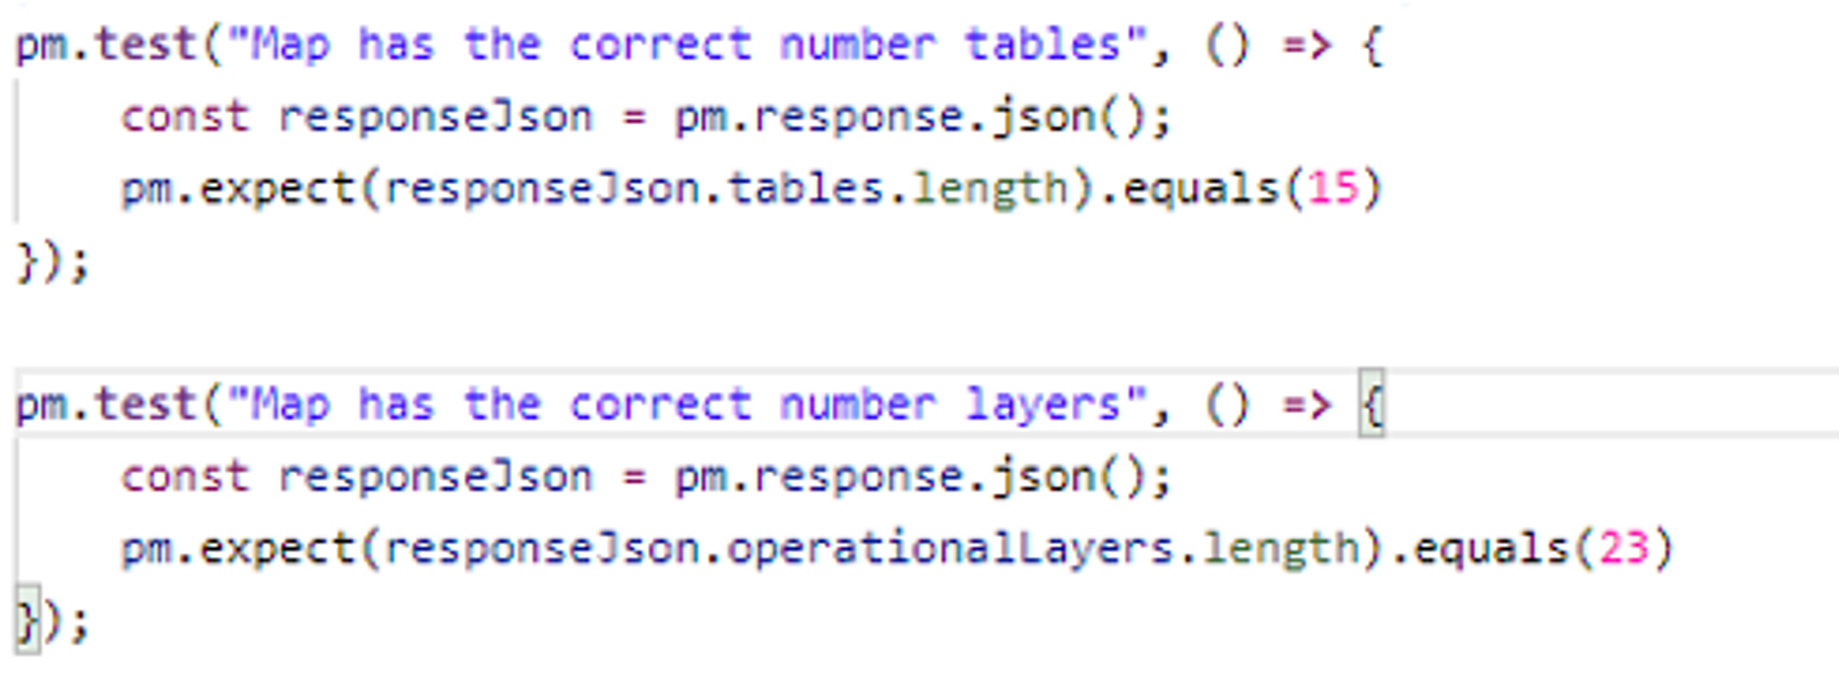
    In the next post, I will show how we can wrap the widget we have created into an Experience Builder application and build and distribute this via DevOps.